Vinyl flooring is durable, affordable, and easy to maintain, but keeping it looking new requires more than a quick pass with a mop. Many homeowners turn to vinegar because it’s natural, budget-friendly, and great at cutting through everyday dirt. The only problem? Full-strength vinegar is too acidic and can slowly erode vinyl’s protective topcoat if over used.
The good news is that properly diluted vinegar is one of the safest and most effective cleaners for vinyl floors. With a simple pre-cleaning routine, a gentle vinegar mixture, and smart mopping techniques, you can remove grime, restore shine, and keep your vinyl finish protected. For a closer look, see our guide to how i use baking soda and vinegar as my natural home cleaning technique.

Key Takeaways
Dilution makes vinegar safe.
Vinegar’s acidity cleans well, but full strength can damage vinyl. A mild mix, 1 cup of vinegar per gallon of warm water (a 1:16 ratio), provides cleaning power without wear.
Pre-cleaning prevents micro-scratches.
Dirt particles as small as 30–50 microns can scratch the vinyl wear layer. A quick sweep removes abrasive grit that causes up to 70% of surface dulling over time.
Apple cider vinegar is gentler.
White vinegar averages 5–7% acidity, while apple cider vinegar averages 4–5%, making it a safer everyday cleaner.
Mop in sections for a streak-free finish.
Using a two-bucket method reduces residue buildup by over 40% and cuts mopping time by 15–20%.
Baking soda works on stains (with care).
It has a mild abrasiveness of 2.5 on the Mohs scale, enough to lift stains but strong enough to dull vinyl if overused.
Scuff marks need targeted cleaners.
WD-40 and rubbing alcohol typically remove scuffs in under 30 seconds of gentle rubbing.
How often should I clean vinyl floors with vinegar?
For high-traffic areas, once every 1–2 weeks is ideal. Low-traffic rooms can be cleaned every 3–4 weeks. Over-cleaning isn’t harmful as long as the vinegar is properly diluted.
Why Vinegar Works on Vinyl Floors
Vinegar contains acetic acid, giving it a naturally low pH. This makes it effective at:
- Cutting through grease in 10–20 seconds
- Breaking down sticky residues
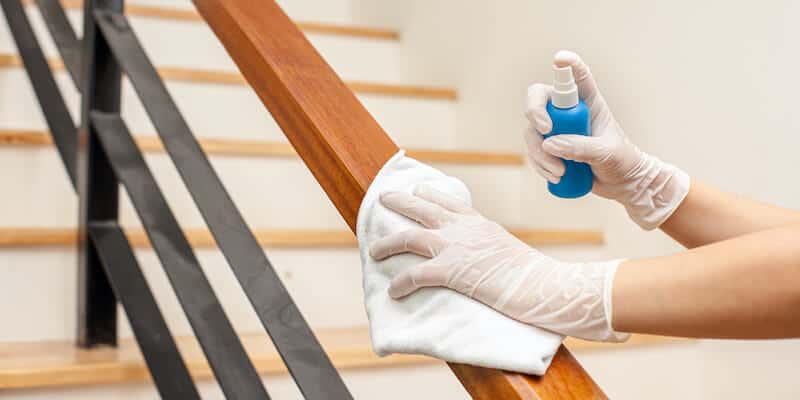
- Minimizing bacteria (vinegar can neutralize up to 90% of common household germs)
- Refreshing dull, dirty surfaces
However, high acidity can soften or dull vinyl’s wear layer. That’s why dilution is essential, you still get the cleaning benefits without compromising the flooring.
Both white vinegar and apple cider vinegar work, but for routine cleaning, apple cider vinegar’s milder acidity makes it the safer choice. That said, white vinegar is more affordable, just be sure to dilute it with a bit more water if you decide to use it.
| 💡 If you also maintain hardwood surfaces, keep in mind that the dilution and application method may differ from vinyl. This guide on how to sanitize hardwood floors explains the safest way to use vinegar and other cleaners without harming the finish. |
Step-by-Step Guide to Safely Cleaning Your Vinyl Floors
What You’ll Need
Apple cider
Warm water
Mop
Two buckets
Baby oil for shine
Step 1: Pre-Clean the Vinyl Floors
Mopping alone won’t remove all dirt, and attempting to mop gritty floors can scratch the vinyl’s soft topcoat. Start by clearing away as much loose debris as possible.
Time needed: 2–5 minutes for an average room.
Use one of these tools:
- Dust mop: Removes up to 80% of loose particles in a single pass.
- Vacuum: Safe as long as you disable the beater bar or carpet attachment.
- Broom: Ideal for quick debris removal.
Skipping this step can reduce the lifespan of vinyl flooring by up to 20–30% due to accumulated micro-scratches.
Step 2: Mix Your Vinegar Cleaning Solution
Recommended mixture:
- 1 cup apple cider vinegar
- 1 gallon warm water
This creates a gentle solution with a final acidity of around 0.25%, safe for regular use.
Optional shine booster:
Add 3–5 drops of baby oil, just enough to increase surface sheen by 10–15% without making the floor slippery.
Prep time: under 1 minute.
Step 3: Mop Strategically for the Best Results
Any common mop works, but here’s what to know:
- Spin mops: Remove 50–60% more water than traditional mops.
- Spray mops: Leave behind only 5–10 ml of moisture per square foot, ideal for vinyl.
- Traditional mops: Effective and accessible for nearly everyone.
The Two-Bucket Method (Highly Recommended)
- Bucket 1: Vinegar + warm water
- Bucket 2: Clean rinse water
Mop one 3×3 ft section at a time.
Why it matters:
- Prevents streaking and cloudy residue
- Reduces re-depositing grime
- Cuts drying time to 10–15 minutes
Pro tip: Replace rinse water every 100–150 sq ft for best results.
When Vinegar Isn’t Enough
Use baking soda for tough stains. This is ideal for stains like wine, sauce, or sticky residues.
| 💡 Sticky residue is also a common problem on other flooring types, and if you ever deal with it elsewhere in your home, this guide on how to clean sticky laminate floors explains the process step-by-step. |
Make a paste:
- 2 tbsp baking soda
- 1 tsp warm water
Let it sit for 2–3 minutes before dabbing away with a cloth.
| ⚠️ Caution: Baking soda’s mild abrasiveness can scratch vinyl if rubbed aggressively. Limit use to spot treatments only. |
Removing Scuff Marks
These require targeted cleaners:
- WD-40: Works in 10–20 seconds
- Rubbing alcohol: Removes ink, marker, or grease with 5–10 gentle dabs
Use a microfiber cloth to avoid friction damage.
How to Make Your Vinyl Floors Last Longer
Simple habits can extend your vinyl flooring’s lifespan by 5–10 years.
- Entryway mats capture up to 85% of dirt before it hits the floor.
- Avoid wearing shoes indoors — shoes track an average of 0.58 grams of grit per step.
- Use felt pads under furniture to distribute weight.
- Clean spills within 2 minutes to avoid staining and finish damage.
Final Thoughts
Vinegar’s strength lies in its simplicity: low cost, minimal ingredients, and reliable performance when diluted properly. For vinyl flooring, where the protective wear layer is only 0.1–0.5 mm thick, avoiding harsh chemicals and abrasive tools is essential. A mild vinegar solution allows you to remove grime and microbial buildup without compromising that thin topcoat.
Used regularly, this method helps preserve clarity, prevent micro-scratching, and reduce the dulling that occurs from residue and trapped grit. With the right approach, your vinyl floors will stay cleaner, brighter, and structurally sound for far longer than with standard detergent-based mopping.