You’ve probably seen it before: a laminate floor that looks “off,” where all the seams line up and the planks start shifting months later. That usually comes down to one thing, the staggering wasn’t done correctly. The truth is, staggering laminate flooring isn’t just about looks; it’s what keeps your floor solid, quiet, and long-lasting.
What is the correct way to stagger laminate flooring?
To properly stagger laminate flooring, each row should start with a plank cut to a different length so that end joints never line up. Aim for at least a 6–12 inch offset between row seams, avoid repeating patterns, and follow the manufacturer’s spacing and installation guidelines to keep the floor stable and visually balanced.
Now that you understand the basics, this article will walk you through exactly how to stagger laminate flooring the right way.
We’ll cover the essential tools you need, the planning process, the step-by-step installation method, common mistakes to avoid (like H-joints), and pro tips to ensure your floor looks flawless and stays structurally sound for years to come.
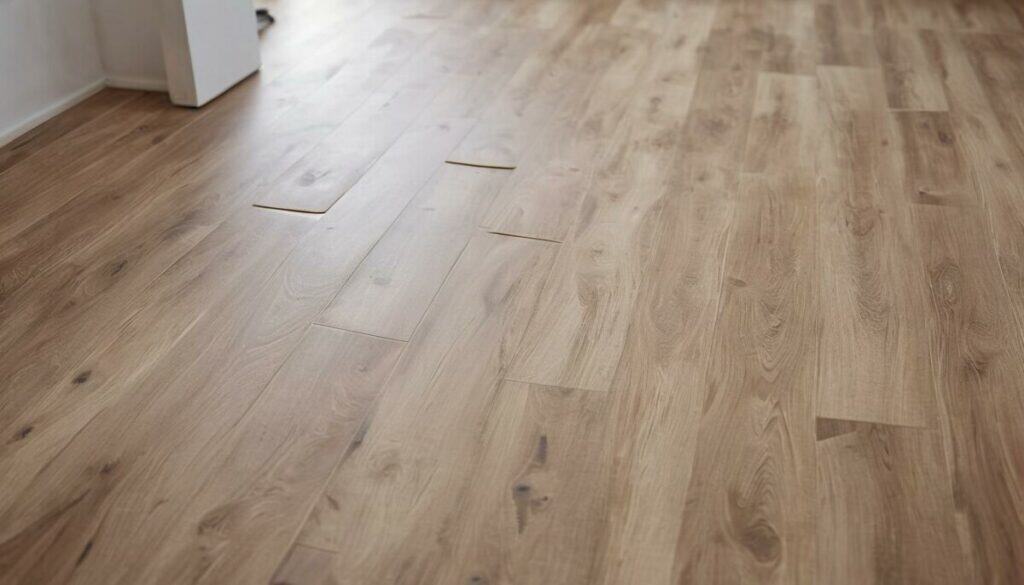
Choosing the Design of Your Laminate Flooring
Before installing your laminate flooring, take time to choose a design that matches your home’s style. Laminate comes in a wide range of finishes, from wood-grain patterns to stone, concrete, and brick effects — making it suitable for any room, including kitchens, living areas, and bathrooms.

Consider plank width, color, and texture. Light or whitewashed tones suit contemporary spaces and make rooms feel larger, while warm neutrals, hazelnut shades, and industrial-style finishes work well in cozy or minimalist interiors.
Laminate planks typically cost around $10 per square foot, with premium options offering textures that mimic real hardwood or ceramic tile. Use a flooring calculator to estimate how many planks you’ll need.
With so many styles available, choose the look that best reflects your home and personal taste.
To stagger laminate flooring you have to follow the specific instructions provided by the manufacturer. Then, clean the room, prepare the subfloor, add an underlayment sheet, climatize and lay down the planks to complete the installation process.
The Plan for Perfectly Staggered Laminate Planks (8 Steps)
Staggering your laminate planks is essential. Without proper staggering, a floating floor can look repetitive and uneven, and it may lack the strength and stability needed to stay locked in place. Over time, this can lead to loose boards, gaps, lifting planks that need fixing, and sections that shift away from the walls.
To avoid these issues, follow these 8 steps to stagger your laminate planks correctly and achieve a stable, professional-looking installation:
Why Proper Staggering Matters
Besides looking a little odd, not staggering laminate flooring can create many crucial issues.
For example, firmness and endurance; if the laminate planks are not firmly secured to one another they can disengage. To make sure that structural stability is satisfactory and the flooring is safe, we need to follow all of the steps for proper staggering. If you are still not sure about doing it yourself, just get an estimate from a local company, just make rouse they have good reviews.
As for the aesthetics aspect of the staggering, if the flooring is not staggered (or properly staggered for that matter) it will flat out look weird!

Installing a laminate floor is like putting together a puzzle, but in this case, you can make the pieces fit to your own style. You can simply add an area rug, this will change the style completely.
Correct staggering provides a safe flooring, that will stay in place for a long time which is why we hope these tips will drive you to follow the manufacturer’s instructions!
Good luck with your installation! Once your new floor is down, be sure to follow a routine for deep cleaning laminate floors so they stay in great condition for years.
References
https://www.bobvila.com/articles/laminate-vs-hardwood/
https://www.thespruce.com/laminate-flooring-pros-and-cons-1821644


