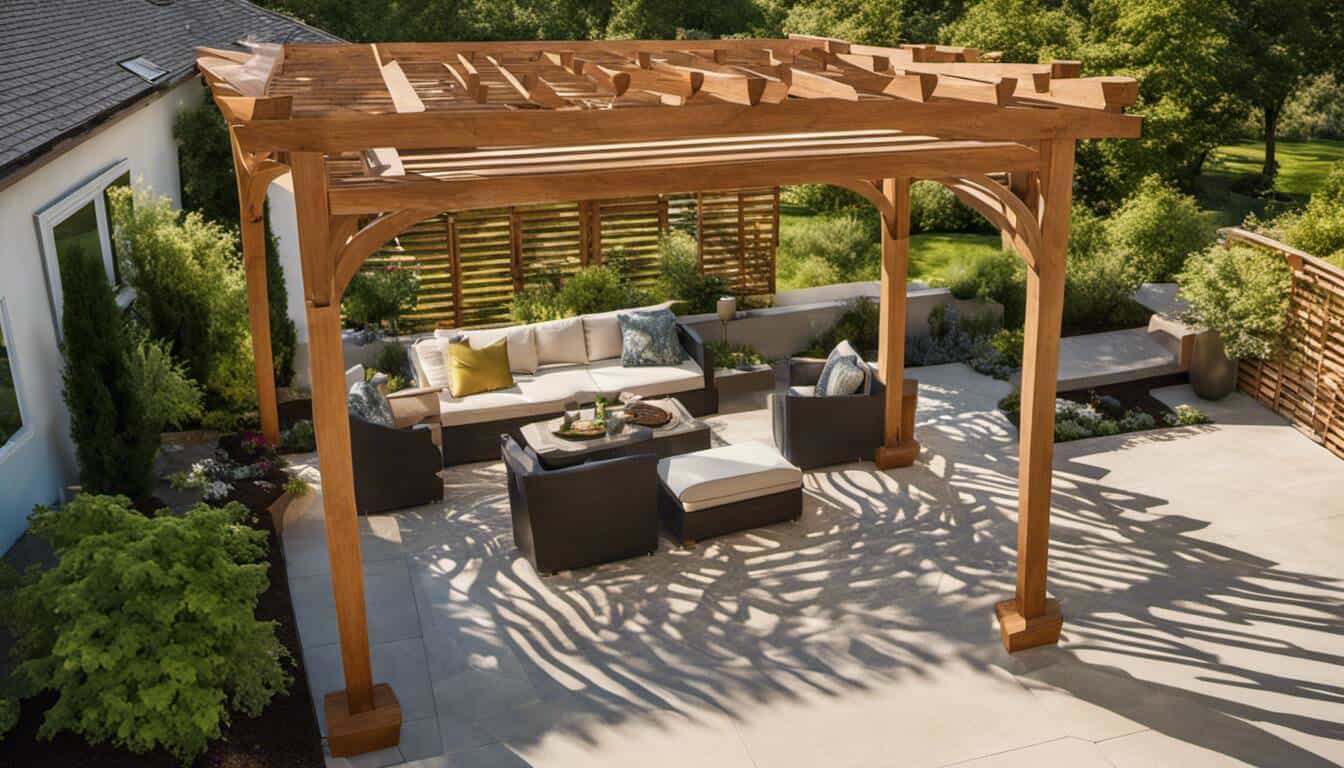
Every homeowner knows the satisfaction of a successful DIY project. When it comes to enhancing your outdoor space, building a pergola is a rewarding endeavor that can add value to your home. If you’ve ever hesitated, thinking it’s too complicated, let me share how I tackled it. I describe my journey of construction filled with effort, success, and a touch of challenge!
“The Epic Tale of My DIY Pergola” is a personal account of one individual’s experience building a pergola on their own. They share insights, tips, and challenges they encountered during the process to offer inspiration and guidance to other individuals looking to build their own pergolas. It provides an interesting read full of valuable information for those considering taking on their own home improvement projects.
“In my experience,” Gransby begins, “I found Cedar to be the best wood for building pergolas due to its resistance to decay and insects, plus its wonderful appealing grain. However, I must stress that proper care and maintenance is key to the pergola’s longevity and beauty, no matter the wood you choose.”
Meryl Gransby, Registered Architect
Designing and Planning Your Pergola
When embarking on your DIY pergola project, the first step is to design and plan your pergola. This stage is crucial as it allows you to envision how your pergola will look in your garden or backyard and ensures that you have a clear roadmap for construction.
Consider the following factors when designing your pergola:
- Size and Location: Determine the size of your pergola based on the available space in your garden. Consider any existing structures or trees that may impact the location and ensure it suits your needs.
- Style and Aesthetics: Decide on the style of your pergola – whether you prefer a traditional or modern design. Consider factors such as material choices, color schemes, and any additional features like lattice panels or climbing plants that repel mosquitoes.
- Functionality: Determine the purpose of your pergola. Do you want it to provide shade for outdoor seating, serve as a focal point, or act as a support structure for climbing plants? Understanding its functionality will guide your design decisions.
Remember, there are numerous design options available, so take some time to explore ideas, browse online resources, or seek inspiration from home improvement lookbooks. The more thought you put into the design phase, the happier you’ll be with the final result.
Now that we have covered the initial steps of designing and planning your pergola, let’s move on to discussing measurement techniques and design choices.
- When embarking on a DIY pergola project, it’s essential to carefully design and plan the structure before starting construction. This involves considering factors such as size and location, style and aesthetics, and functionality. Taking the time to explore design options and seek inspiration will ensure that you are satisfied with the final result.
Measurement Techniques and Design Choices
Precise measurements play a vital role in ensuring a successful DIY pergola construction project. Accuracy is key to achieving sturdy and visually pleasing results. Here are some essential measurement techniques and design choices to consider:
1. Post Placement: Measure and mark where each post will be placed before digging holes. Ensure they are evenly spaced and aligned correctly. Use strings or stakes to outline their positions for accuracy.
2. Height and Length: Measure the desired height and length of your pergola. Keep in mind that you can adjust the height later if needed, but having accurate measurements from the start will provide a solid foundation for construction.
3. Crossbeam Spacing: Determine the spacing between your crossbeams. It’s important to strike a balance between aesthetics and structural integrity. Consider the dimensions of any outdoor furniture or features that will be placed under the pergola when deciding on the spacing.
4. Lumber Cuts: Measure and mark where lumber needs to be cut. Accurate cuts are crucial for a precise fit and clean look.
Remember, these are just a few examples of measurement techniques and design choices involved in building your own pergola. The host of the video mentioned earlier emphasized checking and double-checking measurements, as well as making adjustments as necessary. Attention to detail will ensure a professional and satisfying outcome.
Gathering Materials and Preparing the Site
Before embarking on the exciting journey of building a DIY pergola, it’s essential to gather all the necessary materials and adequately prepare the site. This preliminary step sets the foundation for a successful construction process.
Start by taking accurate measurements of the area where you plan to build your pergola. Consider factors such as height, width, and depth requirements. Once you have these dimensions in hand, create a detailed layout plan that will serve as your guide during the construction process.
Next, it’s time to gather all the materials needed for the project. Make a list and ensure you source high-quality lumber from reputable suppliers like 84 Lumber. Remember that different types of lumber have specific purposes, so choose wisely based on your design preferences and budget.
Consider if you need any additional accessories or components, such as braces, fasteners, or decorative elements. Don’t forget about safety equipment like goggles and gloves to protect yourself during construction.
Now that you have your materials ready, it’s important to prepare the site accordingly. Clear any obstacles or debris from the area where you will be working. If necessary, level the ground using a shovel or other suitable tools to ensure a solid foundation for your pergola.
Prepare any necessary utilities, such as electrical wiring or plumbing lines, before starting the construction process. This will save you time and effort later on and ensure that everything is properly integrated into your pergola design.
By diligently preparing both your materials and site, you’ll set yourself up for success during the pergola construction process. Take your time in this preparation phase to avoid any potential hiccups down the line.
With all our materials gathered and the site prepared, let’s now dive into another essential aspect of this DIY pergola project: selecting suitable lumber and tools.
Selecting Lumber and Tools Necessary for the Project
The success of your DIY pergola largely depends on selecting the right lumber and tools for the job. This section will help you navigate through the options and make informed choices to ensure a sturdy and aesthetically pleasing structure.
When it comes to lumber, consider using pressure-treated wood for the main support beams and posts. These are crucial components that need to withstand outdoor conditions and resist rotting or insect damage over time. Opting for higher quality lumber might be a bit pricier upfront but will pay off in durability and longevity.
For secondary components like cross beams, rafters, and decorative elements, you can select from a variety of wood options based on your design preferences and budget. Common choices include cedar, redwood, or even engineered wood products. Ensure these pieces are straight, free from defects, and properly sized according to your design plans.
As for tools, a few essential items will greatly streamline the construction process. Consider having an impact screwdriver, drill, circular saw, rubber mallet, speed square, level, large wood clamps, and a tape measure in your arsenal. A miter saw and hand drill can also be handy additions if you have access to them.
Keep in mind that reusing materials from previous projects can help reduce costs. For example, deck screws leftover from another endeavor can serve as excellent alternatives to nails. Utilizing spare lumber as bracers is another way to save money without compromising on structural integrity.
Remember that each project may have specific requirements, so feel free to adapt this list based on your unique needs. Moreover, if you’re building the pergola in your yard instead of on a pre-existing deck, additional considerations like concrete footings and digging deeper post holes might be necessary.
Pergola Frame Construction
The foundation of your DIY pergola project lies in the construction of its frame. This is where you bring your vision to life, creating a sturdy and visually appealing structure that will serve as the backbone of your garden oasis. To start, gather your materials and tools, including the lumber for the beams and posts, screws or nails, a circular saw, a drill, a tape measure, and a level.
Begin by measuring and marking the location for each post, ensuring they are symmetrical and evenly spaced. Dig holes deep enough to secure the posts firmly into the ground. Place the posts into the holes, making sure they are plumb and level using a spirit level before backfilling with soil or concrete for added stability.
For added strength and rigidity, it’s essential to install cross beams perpendicular to the support posts. Measure and cut these beams to size using a circular saw. Attach them securely to each post using screws or nails, checking their alignment along the way.
Aligning Structures and Adding Supportive Beams
Once you have constructed the main frame of your pergola, it’s time to focus on aligning structures and adding supportive beams. Proper alignment ensures that your pergola is aesthetically pleasing while providing stability.
One method to achieve alignment is by using a 2×4 as a reference point. This involves placing a straight 2×4 board across the top of the posts, ensuring it is level and flush with all sides. Adjust the height of each post if necessary until it aligns perfectly with the reference board.
Another technique commonly used is the 3-4-5 method. By measuring three feet from one post along one beam and four feet along another beam from a different post, the diagonal between those two points should measure five feet if everything is square. Adjust as needed until the measurements result in a perfect square.
To add additional support to the frame, install further beams diagonally between the main beams. These supportive beams will reinforce the structure, making it more durable. Make sure to measure and cut these beams accurately before attaching them securely to the main beams using screws or nails.
With your structures aligned and supportive beams in place, you are one step closer to completing your DIY pergola project. Take a moment to admire your progress and envision the transformation it will bring to your garden.
Finalizing and Admiring Your DIY Pergola
Congratulations! After putting in hours of hard work and dedication, you’ve reached the final stage of your DIY pergola project. Now it’s time to step back and admire the beautiful structure you’ve created in your garden. Take a moment to appreciate the satisfaction and sense of accomplishment that comes with completing such a significant undertaking.
Imagine sitting beneath your new pergola, surrounded by lush greenery and a gentle breeze rustling through the vines and flowers, creating your own garden sanctuary. You can already envision the countless gatherings, barbecues, and relaxing evenings spent in this comfortable space, adding joy and memories to your outdoor living area.
As you finalize your pergola, there are a few key steps to consider. First, take the time to thoroughly inspect all aspects of your construction. Ensure that all connections are secure, posts are level, and the structure is stable. Make any necessary adjustments or fixes to ensure the longevity and safety of your pergola.
Next, consider adding any finishing touches that will enhance both the aesthetics and functionality of your pergola. This could include staining or painting the wood to protect it from weathering while also complementing your outdoor decor. You might also want to add decorative elements such as planters, shade cloths, or string lights to create an inviting atmosphere.
Once everything is in place, step back and admire your handiwork. Revel in the feeling of success that comes from taking on a challenging project and seeing it through to completion. Share your accomplishment with friends and family who supported you throughout this journey – they’ll be equally impressed by your DIY skills.
Remember that creating a DIY pergola goes beyond just constructing a physical structure; it’s about transforming your outdoor space into a haven where memories are made. While this marks the end of our discussion on DIY pergolas, let it serve as an inspiration for future projects and a reminder that with determination, creativity, and a little guidance, you can bring your dreams to life.


Paying attention to the material selection is crucial when building your own pergola. Opting for weather-resistant wood like cedar or redwood provides not only aesthetic beauty but also longevity, making it worth every penny spent.
As a retired carpenter, I’ve always likened building your own pergola to crafting your very own piece of art. It’s about taking raw materials and transforming them into something both functional and beautiful. Working with redwood especially brings pleasure, thanks to its characterful grain patterns and resilience to weather extremes – just remember to seal it properly for maximum longevity.
Good point Valentine, working with redwood indeed comes with its unique perks. The grain patterns and resilience to weather extremes create a product that not only looks good but lasts. However, correct me if I’m wrong, cedar could be another option due to its insect-repelling properties and affordability, especially for those venturing into pergola building for the first time.
That’s an interesting thought there Ulysses. You’re spot on about cedar being a great choice for beginners due to its qualities. However, keep in mind that redwood while more expensive, can provide a sense of grandeur that some homeowners might prefer even as first-timers.
I have to step in here, Demetrius. There’s no denying the grandeur that redwood can bring to a pergola design – I’ve seen it firsthand. However, it’s crucial to remember that for beginners, managing the budget is as important as achieving aesthetic appeal. In my experience, cedar does more than just serve as an affordable starting point. It adds character to the design without breaking your wallet, which I believe is what first-time DIY enthusiasts need.