The first time I removed paint from floors… oh boy! What a disaster. I scratched everything and there was still paint remaining. However, removing paint from your wood floors isn’t as difficult as you might think. The secret lies in acquiring the right tools and being patient, meticulous, and careful during the process. One of the most essential equipment you’ll need is a heat gun – an invaluable tool known for its ability to soften hard paint, making it easier to scrape off. But mind you, remember to use a heat gun with adjustable temperature settings to avoid damaging the wood by overheating. Now, let’s dive into what else you’ll need.
The most effective method for removing paint from wood floors is to use a combination of hot soapy water (such as Murphys or Dawn), followed by gentle scraping with a putty knife wrapped in a wet rag. This method works well for most cases and helps avoid damaging the wood surface. Remember, it’s always recommended to consult a professional and consider refinishing the floors if the paint removal process becomes challenging.

Tools and Materials Needed for Paint Removal
When it comes to removing paint from wood floors, specific tools and materials are essential for a successful outcome. Let’s explore the key items you’ll need to effectively strip away unwanted paint without causing damage to the wooden surface.
Heat Gun
A heat gun is invaluable for softening paint, making it easier to scrape off. Select a heat gun with adjustable temperature settings to prevent scorching or damaging the wood during the paint removal process. By carefully applying heat, the paint will start to soften and bubble up, allowing for delicate scraping without harm to the wood.
Sandpaper or Sanding Machine
For larger areas or stubborn paint, consider utilizing coarse, medium, and fine-grit sandpaper, or a sanding machine. Sandpaper is suitable for small, detailed areas, while a sanding machine can efficiently tackle larger sections. Use caution to avoid inadvertently gouging or scratching the wood floor during the paint removal process.
Scraper and Putty Knife
A scraper and putty knife are indispensable for carefully removing paint from narrow or intricately detailed areas on the wood floor. These tools facilitate gentle lifting and scraping without causing damage to the underlying wood surface.
Solvents/Chemicals
In cases where heat and physical scraping are insufficient, solvents such as mineral spirits or paint strippers may be necessary for tougher paint removal tasks. These methods are similar to removing wax from wood floors, requiring careful application and patience. Ensure proper ventilation when using these chemical products and strictly adhere to safety guidelines to minimize health risks.
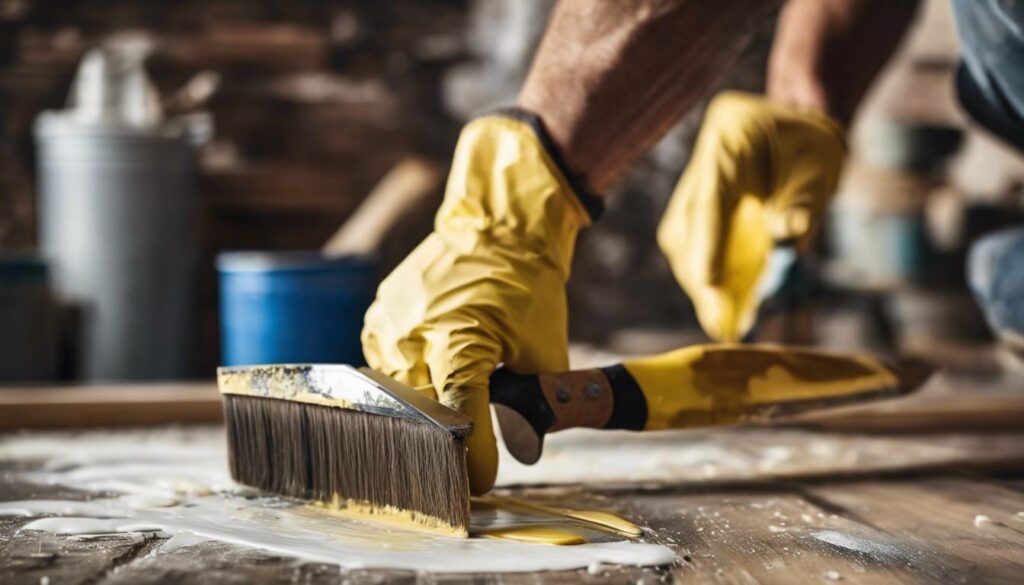
Protective Gear
Equip yourself with safety goggles, gloves, and a respirator mask when undertaking paint removal tasks to protect your eyes, skin, and respiratory system from fumes and fine particles.
Drop Cloths and Plastic Sheeting
Use drop cloths and plastic sheeting to safeguard the surrounding area and furniture from dust and paint chips generated during the removal process. These protective measures help contain debris and prevent it from settling on nearby surfaces.
Armed with these essential tools and materials, you’ll be well-prepared to tackle the task of removing paint from your wood floors with precision and care.
Protecting Your Workspace Before Paint Removal
Before removing paint from your wood floors, it’s crucial to prepare and protect the space where you’ll be working. This not only prevents any damage to your furniture and belongings but also ensures a smooth and hassle-free paint removal process.
The first step in protecting your workspace is to clear the area. You’ll want to remove any furniture, rugs, or other items from the room. Not only does this prevent them from getting covered in dust or debris during the paint removal process, but it also gives you ample space to work without any obstructions. Additionally, clearing the area reduces the risk of accidental damage to your belongings.
Once the area is clear, the next step is to cover the floors and surrounding objects. To protect the floor and any objects in the room from paint chips and dust generated during the removal process, use drop cloths or plastic sheeting. These protective coverings act as a barrier, ensuring that any debris or paint particles are contained and do not spread to other areas of your home.
When covering the floor and surrounding objects, it’s important to consider the type of protective covering you use. Drop cloths are versatile and serve as an effective shield against debris and paint chips. Measure the area you need to cover and choose an appropriate size of drop cloth to ensure complete protection. Plastic sheeting can also be used, especially for larger areas or when dealing with potentially messy paint removal projects.
For instance, if you’re removing paint in a small section of your floor, a drop cloth may suffice. However, for larger areas or more extensive projects, plastic sheeting provides comprehensive coverage while minimizing dust and debris migration.
In addition to floor protection, consider covering any surrounding objects or furniture in the room. This preventative measure shields them from accidental splatters or dust accumulation during the paint removal process. Use additional drop cloths or plastic sheeting to safeguard these items, ensuring that they remain free from any unwanted residues.
By preparing and protecting your workspace before beginning the paint removal process, you create a conducive environment for efficient and safe completion of the task.
Now that we’ve laid down a solid foundation for safeguarding our workspace during paint removal, let’s delve into the nitty-gritty of employing sanding techniques for effective paint removal.
Sanding Technique for Paint Removal

When using sandpaper or a sanding machine to remove paint from wood floors, it’s essential to follow a few key steps to ensure the best results.
Start with Coarse Grit
Coarse-grit sandpaper should be your initial choice when beginning the paint removal process. This heavy-duty sandpaper is perfect for handling the bulk of the paint on the wood surface. The rough texture of the coarse grit allows it to effectively strip off multiple layers of paint without damaging the wood underneath. It’s crucial to apply even pressure while using the sandpaper to ensure consistent paint removal across the floor.
This is a critical step as it lays the groundwork for the rest of the process, primarily focusing on eliminating the thicker layers of paint that may have accumulated over time.
Progress to Finer Grits
After stripping away most of the paint with coarse-grit sandpaper, it’s time to switch to medium and fine-grit sandpaper. These finer grits are designed to smoothen the wood surface and eradicate any remaining paint residue. The medium-grit sandpaper works on refining the wood surface, while the fine-grit ensures all traces of paint are removed, leaving behind a smooth finish ready for refinishing.
For initial paint removal, start with a recommended grit size of 60-80. As you progress to refine and smoothen the wood surface, use a finer grit size in the range of 100-120 for superior results.
Clean the Area
Once you’ve completed sanding with various grits of sandpaper, it’s crucial to clean the area before proceeding with the next steps in the paint removal process. Use a vacuum cleaner or a tack cloth to remove all the dust generated during sanding. For stubborn residue, you might consider using a mixture of baking soda and vinegar, which can be effective for cleaning various surfaces with various grits of sandpaper, it’s crucial to clean the area before proceeding with the next steps in the paint removal process. Use a vacuum cleaner or a tack cloth to remove all the dust generated during sanding. This step ensures that any leftover particles from the sanding process are completely eliminated, leaving behind a clean and smooth surface ready for further treatment or refinishing.
It’s worth noting that cleaning the area thoroughly after sanding also prevents any debris from settling back onto the freshly sanded wood, ensuring that your efforts in removing paint do not go to waste and that the surface remains free of any contaminants that can affect subsequent treatments.
By following these steps meticulously, you ensure that your wood floors are properly prepared after undergoing thorough paint removal via sanding. This paves the way for refinishing or further treatment, leaving you with beautifully restored wood floors ready to grace your living space once again.
Now that we’ve explored effective paint removal through sanding, let’s shift our focus to another potent method—using a heat gun to strip away layers of paint from wood floors.
Using a Heat Gun to Remove Paint
Using a heat gun is another method for removing paint from wood floors, and it can be quite effective if used carefully.
Preparing the Surface
Before you start using the heat gun, it’s important to clear the floor of any debris and protect the surrounding area. This entails removing any rugs, curtains, or furniture nearby and covering them with protective materials like drop cloths. Additionally, ensure there’s good ventilation in the room to prevent fumes from building up.
Heat Application
When using the heat gun, hold it several inches away from the painted area and move it slowly over the surface until the paint starts to soften and bubble. To prevent scorching the wood, maintaining a safe distance is crucial. The recommended temperature range for effective paint removal with a heat gun is typically between 400°F to 600°F. The softened paint should start to bubble, indicating that it’s ready for removal.
It’s important to note that a heat gun can be a fire hazard if not used properly. The user needs to follow safety guidelines regarding proximity to flammable materials and electrical outlets. Additionally, maintaining a safety distance between the heat gun and the wood floor will help prevent any accidents.
Scraping Off the Paint
Once the paint has softened and started bubbling, use a putty knife or scraper to gently remove the softened paint. Work in small sections and avoid holding the heat gun in one place for too long, as it can cause scorching or discoloration of the wood. It’s essential to be patient during this step, ensuring thorough removal without damaging the underlying wood.
Imagine using a heat gun like working with a delicate tool in an artisan’s workshop—precision and caution are key. If done correctly, it can strip away layers of old paint, revealing the natural beauty of the wood underneath.
When used mindfully and cautiously, a heat gun can be a powerful tool for paint removal on wood floors, uncovering their original charm without causing harm to the underlying surface.
Effective Scraping Methods for Paint Removal
Scraping off paint can be laborious, but with the right tools and techniques, it can be done efficiently without damaging the wood underneath. Here are some essential tips to consider when using scraping as a method for paint removal:
Utilize Proper Tools
Having the right tools at hand is crucial when scraping off paint from wood floors. A 3-inch wide metal putty knife is recommended for effective paint removal. The width of the blade provides good coverage and allows you to work efficiently without creating scratches on the surface.
The scraping angle is also important; a 30-45 degree angle is ideal for effective paint removal while minimizing the risk of damaging the wood. Additionally, optimal pressure for scraping off the paint is around 10-15 pounds. This gentle pressure ensures that you remove the paint without gouging or scratching the wood surface.
Work in Sections
Dividing the floor into manageable sections helps in focusing on one area at a time. This approach not only makes the task less overwhelming but also allows you to give attention to each section thoroughly. When working in sections, maintaining a systematic approach by starting from one end and working your way across the floor ensures consistent results without missing any spots.
Gentle Pressure
Applying consistent but gentle pressure while scraping off the paint is crucial to avoid causing damage to the wood. Remember that excessive force can lead to scratches or indentation on the floor, while insufficient pressure may result in inefficient removal of paint. Effective scraping techniques involve using a circular motion and following the wood grain. This method ensures that you tackle all areas of the painted surface and prevent any streaks or uneven patches. Moreover, wearing appropriate protective gear such as safety goggles, gloves, and a dust mask ensures your safety during this process.
By adhering to these methods and tips, you can achieve efficient and safe removal of paint from wood floors through scraping, maintaining the integrity of your flooring while restoring its natural beauty.
With an understanding of effective scraping techniques under our belt, let’s now turn our attention to exploring the use of solvents and chemicals as alternative methods for removing paint from wood floors.
Using Solvents and Chemicals for Paint Stripping
When it comes to removing paint from wood floors, solvents or chemicals can be powerful allies. They help break down and dissolve old, stubborn paint, making the removal process easier. However, it’s important to approach this method with caution to ensure the safety of both the users and the wood surface being treated.
The first critical consideration when using solvents or chemicals for paint stripping is ventilation. These products often emit strong fumes that can be harmful if inhaled. It’s crucial to work in a well-ventilated area or use a fan to disperse the fumes. Additionally, wearing protective gear such as gloves, goggles, and a mask will help safeguard against any accidental exposure.
Before diving into full-scale application, it’s wise to conduct a test in a small area. This step helps to determine whether the solvent or chemical may negatively affect the wood finish or cause other unwanted reactions. Choose an inconspicuous spot on the floor to apply a small amount of the product according to its instructions. If after a short period there are no adverse effects, it should be safe to proceed with the full application.
Here’s an example of what you might observe
If you see that the solvent causes discoloration or dullness on your wood floor finish upon initial testing, this is a red flag indicating that it’s not suitable for use on your flooring.
Lastly but most importantly, always adhere to the manufacturer’s instructions for the proper application and disposal of chemical products. Each product comes with specific guidelines related to safety precautions, application methods, and disposal procedures. Following these instructions ensures effective paint removal while protecting your health and preserving the condition of your wood floors.
By observing these precautions diligently, you can effectively leverage solvents and chemicals in removing paint from wood floors while ensuring both safety and efficacy throughout the process.
Now armed with the knowledge of paint stripping techniques, let’s shift our focus to mastering post-removal cleaning and finishing tips.
Post-Removal Cleaning and Finishing Tips
Once the paint is gone, it’s essential to ensure that your wood floor looks fresh and clean. Here are some critical steps to take after the paint removal:
1. Clean the Surface
After scraping off the paint, your floor might still have tiny paint particles or dust lingering on its surface. To ensure a smooth finish, use a vacuum cleaner with a soft brush attachment to gently remove any remaining debris. Alternatively, a damp cloth can also be used to wipe down the floor and eliminate any stubborn dirt or grime. This step is crucial for preparing the wood for any further treatments, creating a clean canvas for the next step.
2. Evaluate the Wood
Inspecting the wood is vital after removing the paint. The process of scraping or applying solvents may have created scratches, dents, or other flaws that need attention. Look for any damaged areas and make the necessary repairs before proceeding with refinishing or applying a wood finish. By addressing these issues promptly, you can prevent potential complications and ensure that your wood floor remains in top condition.
It’s crucial to address any damages or imperfections revealed during the paint removal process. Checking for signs of damage such as discoloration, rough patches, or weakened areas in the wood is essential. If there are deep scratches in the wood, consider using fine sandpaper to smooth them out. For more serious issues like cracks or severe gouges, matching wood filler can be applied to repair these imperfections before moving on to the next step.
3. Apply a Wood Finish
Once the surface is clean and any damages have been fixed, it’s time to restore the natural beauty of your wood floor and provide protection against future wear and tear by applying a wood finish. This process is similar to cleaning a bathtub in that it requires thorough preparation and careful application to achieve the best results. Consider using a wood stain to enhance the natural color of the wood or apply a sealant for added protection against moisture and stains.
The application of a quality wood finish not only gives your floor a polished appearance but also acts as a shield, preserving the integrity of the wood and preventing unnecessary damage in the future.
Following these post-removal cleaning and finishing tips will ensure that your wood floor retains its charm, remains resilient against daily wear, and continues to exude an elegant appeal in your home environment.
Effectively removing paint from wood floors requires not only precision but also careful attention to post-removal cleaning and finishing techniques. By following these steps diligently, you can restore your wood floor’s allure and safeguard it against future damage.