You don’t want to spend several thousands in flooring only to have it ruined a few years later. However, I want to reassure you that ash and oak are both solid choices when it comes to hardwood flooring due to their hardiness and suitability for high-traffic areas. Oak is offered in two main types: red oak and white oak, each boasting unique colors and grain patterns; while ash tends to have lighter shades with one-of-a-kind sinuous grain designs. However, not every room’s decor may harmonize well with specific wood strains or hues. Take time to reflect on the overall style of your home before making a final decision — the subtle colors found in ash might be exactly what a particular room needs. Soon we’ll delve into more details about these two materials.
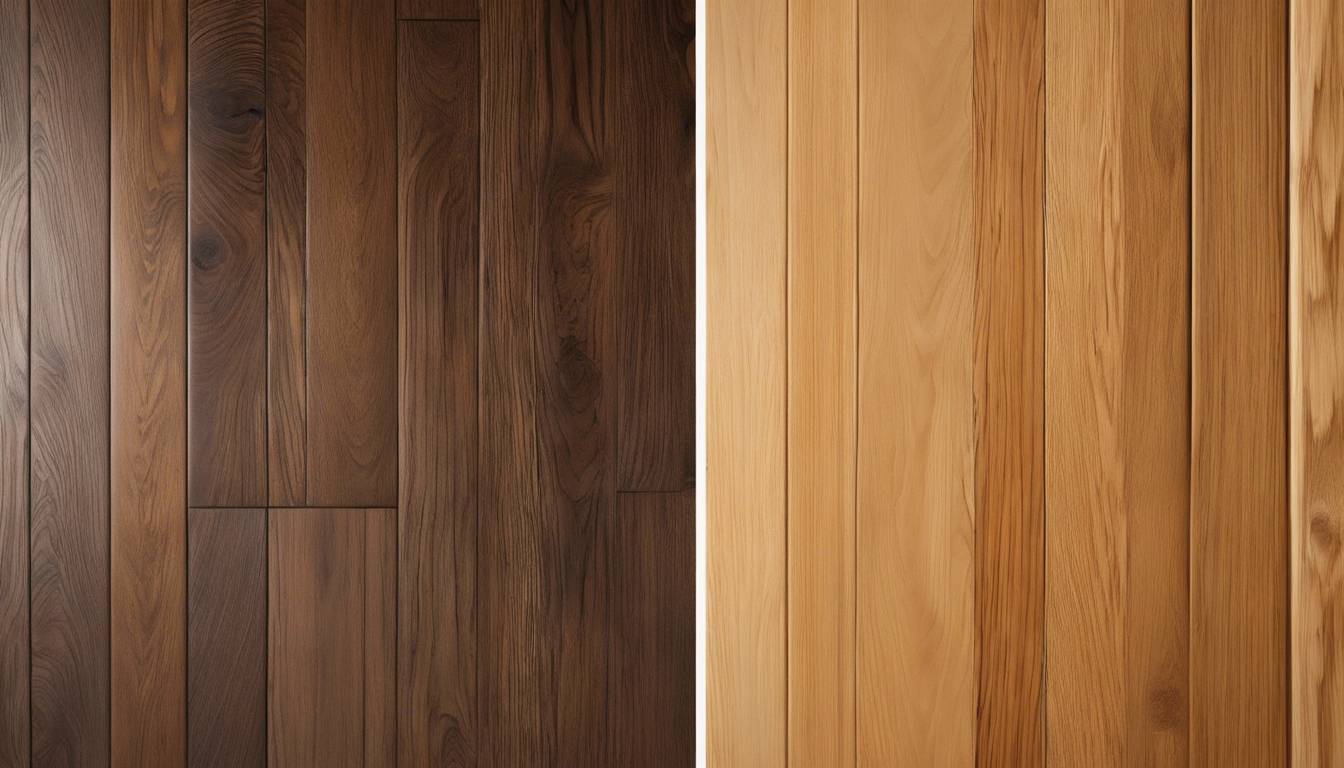
The main differences between ash and oak flooring lie in their appearance and durability. Ash offers lighter, more neutral tones with meandering grain patterns, making it suitable for modern interiors, while oak provides a range of hues from pinkish to nutty browns with prominent, consistent grain patterns, making it an excellent choice for classic or contemporary designs. In terms of hardness, white oak is the densest and slightly more durable than ash, making it ideal for high-traffic areas, but both options are suitable for engineered floors as well. Understanding the wood hardness scale can help you make an informed decision about which option is best for your specific needs.
Overview of Ash and Oak as Flooring Material
When it comes to choosing the right material for your hardwood flooring, both ash and oak stand out as durable and versatile options. Oak is especially known for its strength and is available in two main varieties: red oak and white oak.
Red oak features a pinkish hue and salmon tones, imparting warmth to any room. In contrast, white oak offers tan and nutty brown hues that tend to darken over time. The grain patterns in both varieties range from simple to intricate swirls, giving them a unique and visually appealing appearance. While oak is a popular choice, some homeowners also consider alternatives like hickory or maple flooring for their distinct characteristics. This versatility makes them well-suited for classic, formal, or contemporary interior designs, catering to a wide range of personal preferences.
On the other hand, ash presents a lighter, more neutral hue compared to oak. It ranges from light blonde to cream-colored, all the way to rich nutty browns. This variation makes it an excellent choice for modern, contemporary interior designs where creating a sense of space and openness is desired. The grain patterns in ash possess more flair and personality, with meandering patterns that add an element of visual interest to the flooring.
In terms of durability, both ash and oak are excellent choices for high-traffic areas in a home. Red oak, with its distinct color nuances and prominent grain patterns, offers a Janka rating of 1290, indicating its resilience against wear and tear. Similarly, ash boasts a Janka rating of 1320, signifying its ability to withstand heavy use in busy households. White oak sits at the top with a Janka rating of 1360, making it the densest among these hardwood options.
Furthermore, both ash and oak are popular choices for engineered floors, which offer added advantages in terms of moisture resistance and stability. For those interested in exotic options, acacia wood is another material worth considering for its unique properties and appearance. The strong core of engineered floors enhances their ability to withstand fluctuations in temperature and humidity, making them suitable for installation in areas prone to moisture exposure.
With their suitability for engineered floors, ash and oak offer homeowners greater flexibility in choosing flooring materials that can adapt to different environmental conditions. This adaptability adds value for homeowners seeking durable yet stylish flooring solutions that can be installed across various spaces within their homes.
As we further explore this comprehensive comparison between ash and oak flooring, we’ll continue unraveling the qualities that make each option unique while exploring how they stack up against each other in terms of cost-effectiveness and environmental impact.
Durable Qualities and Differences Between Ash and Oak
When it comes to choosing the right hardwood flooring for your home, durability is a critical factor. Both ash and oak are highly durable options, but they have slight variations in hardness that can impact their performance over time.
Hardness and Durability
Oak, especially white oak, is notably denser and slightly harder than ash. This difference in hardness makes oak flooring more resistant to the wear and tear caused by heavy foot traffic and frequent use. In contrast, ash is also durable, making it an excellent choice for most residential applications, but it may not withstand high-traffic areas as well as white oak.
It’s important to consider the Janka hardness rating when comparing these two wood types. White oak typically has a Janka rating of 1360, while ash has a rating of 1320. This means that white oak is marginally denser and better equipped to handle prolonged use without showing significant signs of wear. However, it’s essential to remember that both ash and oak are suitable for high-traffic areas in a home but might exhibit varying degrees of wear over time.
Grain Patterns
In addition to durability, the visual appeal of the flooring plays a significant role in interior design. The grain patterns of ash and oak contribute to the overall aesthetics, creating distinct appearances that can enhance various design schemes.
Ash showcases more expressive and variable grain patterns, giving it a unique flair and adding character to interior spaces. The meandering patterns range from straight lines to beautiful swirls, creating a visually captivating effect on the flooring. This distinct feature often makes ash a preferred choice for modern and contemporary interior designs where the grain patterns add depth and visual interest.
On the other hand, oak—especially red oak—is known for its prominent, consistent grain patterns that provide a classic and timeless appearance to the flooring. The strong and defined grain complements traditional or formal design schemes, adding warmth and richness to the overall aesthetic.
These differences in grain appearance open up a world of possibilities when it comes to selecting the perfect flooring that aligns with your design preferences. Whether you’re drawn to the expressive charm of ash or the classic allure of oak, each option offers unique characteristics that can elevate your living space.
Now that we’ve explored their durability and grain patterns, let’s delve into the cost comparison between ash and oak flooring materials to help you make an informed decision for your home.
Aesthetic Variations in Ash and Oak

The color and tone of your flooring can greatly impact the ambience of a room. Ash flooring is distinct for its lighter tones, ranging from creamy white to pale yellow hues, lending a brightness that can make small spaces feel more expansive and open. Conversely, oak flooring exhibits varied colors, from light tan to rich, warm brown hues, creating a sense of depth and richness.
When you think about how different rooms have their own personalities, the color variations in these woods can really help you set the mood! Walking into a room with cozy oak flooring might evoke a classic and inviting feel, while a room with bright ash flooring could impart a fresh and modern vibe.
A Closer Look at Grain Appearance
In addition to their color differences, ash and oak diverge in their grain appearance. This further distinguishes them in terms of aesthetic appeal. While ash displays more flair and personality with its meandering grain patterns, oak boasts its unique charm as well. White oak presents simple to intricate swirls in its grain patterns, adding an elegant and refined touch to its appearance. Meanwhile, red oak features prominent grains with tighter and more consistent patterns.
Imagine looking down at your floor and seeing all these tiny lines moving around almost like little rivers in the wood. Each type of wood shows these lines differently! It’s amazing how something so small can have such a big impact on how your home looks and feels.
This is like how every person has their own unique fingerprints – each type of wood has its signature markings that set it apart from others. The grains are what give the wood floors their distinct visual appeal.
Understanding these distinctive traits between ash and oak will not only guide you in making an informed choice but also allow you to tailor your flooring to complement the overall design theme of your living space. So, when considering the aesthetics of your home, it’s worth taking the time to contemplate the subtle yet significant differences between ash and oak flooring.
In crafting the perfect ambiance for your living space, selecting between ash and oak flooring is truly just the beginning – let’s take a closer look at the broader impact of this decision on our environment.
Environmental Impact of Ash vs Oak Flooring
Choosing between ash and oak flooring involves considering the environmental impact of your decision, beyond visual appeal and durability. Both ash and oak can be sustainable choices, as they are sourced from responsibly managed forests, contributing to their eco-friendly nature. However, there are distinct factors that set them apart in terms of sustainability and their carbon footprint.
Ash trees have faced a significant threat from an invasive beetle, resulting in the destruction of old-growth ash trees in certain locations. This has made sourcing ash hardwood more challenging and costly compared to oak. Oak, on the other hand, does not face the same level of threat from pests, making it more readily available for flooring materials.
The devastation caused by the invasive beetle brings attention to the vulnerability of certain wood species and emphasizes the importance of sustainable forest management practices.
In terms of transportation and manufacturing processes, both ash and oak flooring may contribute differently to their carbon footprint. Consumers who are concerned about environmental impact can opt for certified sustainable wood products to reduce their contribution to deforestation and promote responsible forest management.
It is important for consumers to be aware of the sourcing and production methods behind their flooring choices in order to make environmentally conscious decisions. By selecting sustainably harvested and manufactured wood products, individuals can significantly reduce the environmental impact associated with their flooring.
By carefully considering the sustainability and carbon footprint of ash and oak flooring, consumers can play a key role in promoting responsible forestry practices and minimizing environmental harm. Making informed choices regarding wood products not only benefits the environment but also supports sustainable resource management for future generations.
As we continue our exploration into the world of hardwood flooring, we’ll now shift our focus towards understanding the cost, care, and longevity of ash and oak in real-life scenarios.
Cost, Care, and Longevity of Ash and Oak
When considering the cost of ash vs. oak flooring, several factors come into play. While the initial cost is generally comparable, there are nuances that can affect the overall expenses.
Availability and Sourcing: Oak, being more widely available than ash, may be slightly less expensive. However, the recent infestation of the emerald ash borer beetle has significantly impacted the availability and sourcing of ash hardwood, potentially increasing its cost due to the challenges in finding and harvesting unaffected ash trees.
These challenges in sourcing ash hardwood may lead to higher transportation costs and increased overall prices, making oak a more financially viable option in some cases.
Maintenance and Longevity
When it comes to maintaining your flooring, both ash and oak have similar requirements. Regular care through proper cleaning and occasional refinishing are essential for extending the life and aesthetic appeal of your hardwood floors.
Both types of hardwood flooring readily accept various stains, providing you with an array of finishing options to match your interior design preferences.
It’s like caring for a beautiful antique piece of furniture; routine dusting and occasional polishing keep it looking splendid for generations to come.
However, one notable difference lies in their natural hues. Ash floors are often favored for their naturally lighter and more neutral tones, whereas oak flooring tends to have a deeper, richer color profile. This distinction is crucial if you have a specific color scheme in mind for your space.
By understanding the differences in cost considerations as well as maintenance requirements and aesthetic qualities between ash and oak flooring, you’ll be better equipped to make an informed decision that aligns with your budget and design preferences.
As you weigh these insights into the cost, maintenance, and aesthetic attributes of both ash and oak flooring, it’s time now to move towards drawing a comprehensive comparison to inform your final decision-making process.
Final Verdict on Ash vs Oak Flooring
After examining the costs, care requirements, longevity, and environmental impact associated with both ash and oak flooring, it’s clear that each has its own distinct advantages. Both materials offer remarkable durability, making them suitable for high-traffic areas in a home. However, the choice between these classic hardwood options often comes down to individual preferences in color, grain patterns, sustainability, and interior design aesthetics.
Color and Grain Pattern
Ash presents a diverse range of natural and neutral hues, from light blonde to rich nutty brown tones, making it an ideal choice for modern and contemporary interior designs seeking a more expansive feel. On the other hand, oak floors made with White Oak offer tan and nutty brown hues, while Red Oak features pinkish, salmon tones, providing homeowners with the flexibility to select a hue that aligns with their vision for their space.
Style Preferences Individual taste and the design scheme of the space play a significant role in determining whether one favors the subtle elegance of ash or the classic appeal of oak. In terms of grain appearance, ash offers more flair with meandering patterns that range from straight to beautiful swirls. Meanwhile, White Oak exhibits simple to intricate swirls in its grain patterns, while Red Oak has prominent grain with tighter and more consistent patterns.
Cost and Availability
While there’s typically not a significant difference in cost between ash and oak flooring, oak is generally slightly less expensive due to its availability. However, it’s important to note that sourcing ash hardwood may be more challenging and costly due to an invasive beetle destroying old-growth Ash trees in certain areas. Hence, availability may influence the decision-making process for some homeowners.
In conclusion, whether you opt for ash or oak flooring depends on various factors including personal style preferences, budget constraints, environmental impact considerations, and the specific needs of each unique space in the home. Remember that personalized guidance is available for choosing between these hardwood floors through design consultants offered on our website Amazinghomedecorco.com. With expert assistance at your fingertips, you can confidently make an informed decision that aligns with your vision for a stunning home interior.