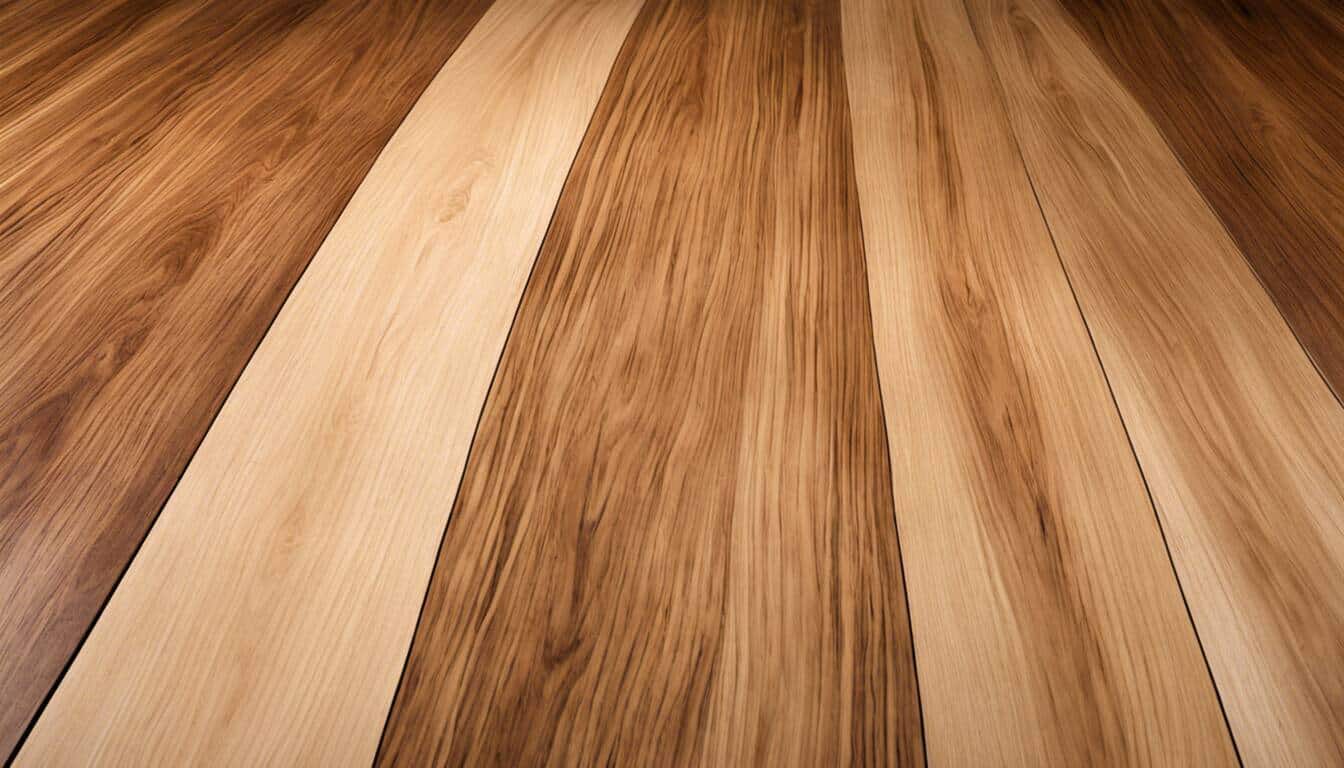
One weekend, I glanced at my wooden floors and noticed a dull white film tarnishing their beauty. It was frustrating, to say the least. After conducting some research, I discovered that the filmy layer was likely a build-up from cleaning products or water spots, but thankfully, it wasn’t permanent. After several attempts, I successfully devised a 4-step process aimed at removing that pesky white film and restoring the wood’s natural luster, without causing any harm.
There are several methods for removing a white film or haze from wood floors, depending on its cause. If the issue is caused by using cleaning products with residues, we recommend using pH-neutral cleaners to avoid further buildup. If white spots persist, try using vinegar or ammonia mixed with water solution and then rinse thoroughly and dry immediately. Another option for severely hazy floors could be professional refinishing via sanding and reapplication of finish. Before undertaking any major refinishing process, it’s important to consult experts’ opinion and do research in order to prevent further damage to your floor.
“Dealing with white film on your wood floors can be quite perplexing, but rest assured, it’s not an unmanageable task. As a seasoned wood care specialist, my advice would be to avoid chemical-laden products and instead rely on quality soap-based wood cleaners and a good-old scrubbing brush. Remember, the key is gentle yet consistent effort to maintain the natural beauty of your floor.”
Jorsten Maagendanz, Wood Care Specialist
Step 1) Identifying White Residue on Wood Floors
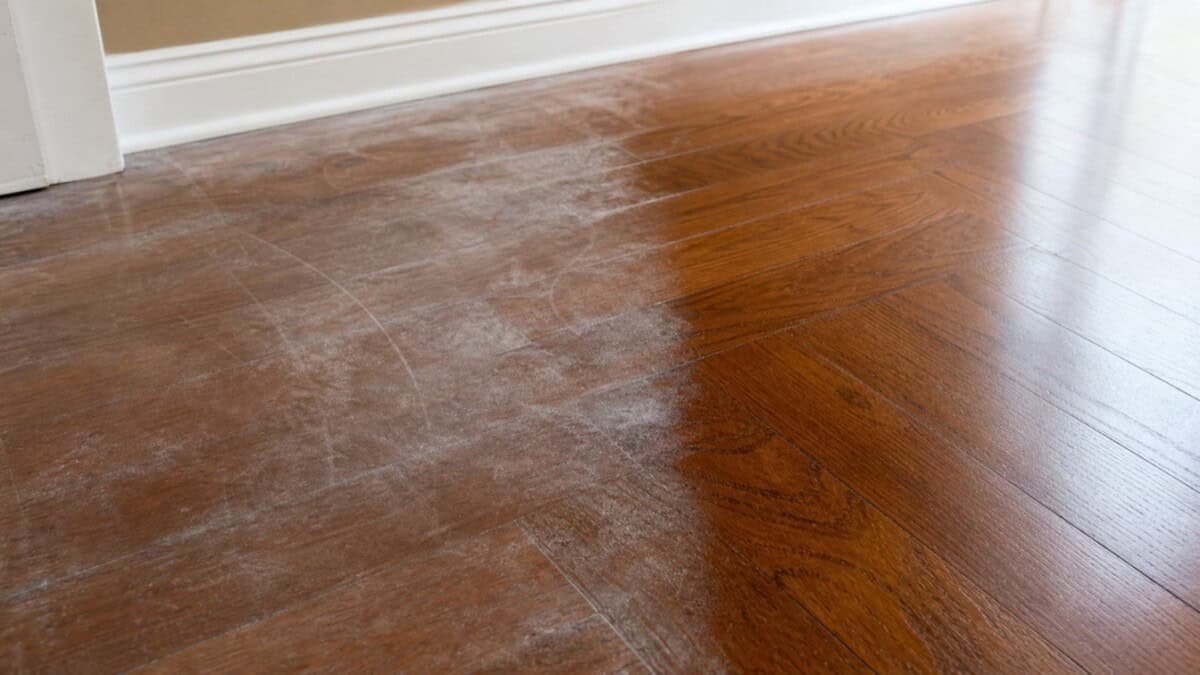
Have you noticed a cloudy, whitish film on your hardwood floors that seems impossible to remove? This frustrating phenomenon is known as white residue or white film. It can make your beautiful wood floors appear dull and lackluster. Identifying this white residue is essential in determining the appropriate cleaning techniques to restore the natural shine of your floors.
Depending on the type of residue, different cleaning products such as dish soap, rubbing alcohol, baking soda lemon juice or essential oils might work better.
When you run your hand across the affected area, you may feel a sticky or rough texture, further confirming the presence of this filmy haze. It’s important not to confuse this residue with scratches or wear marks. This haze has a distinct appearance and texture that sets it apart from other blemishes on wood floors.
Causes behind White Film Development
Cleaning Products |
Moisture Issues |
Wax Buildup |
Incorrect Finish Application |
|---|---|---|---|
Substandard cleaners containing paste wax, furniture polish, or oil soaps leave residues behind, resulting in hazy floors. |
High humidity levels or water damage can contribute to the formation of white residue on wood floors. |
Incorrect application of floor finish, such as applying too many coats without proper drying time, can cause hazy effects. |
Wax buildup on wood floors with a polyurethane finish can lead to white film development. |
Think of it like using the wrong type of glass cleaner on your eyeglasses – instead of being crystal clear, they end up smeared and foggy.
Properly understanding the causes behind white film development on wood floors is crucial in preventing and addressing the issue effectively. Whether it’s using cleaning products that leave residues, moisture issues, wax buildup that won’t buff out, or incorrect application of finish, each factor contributes to the hazy appearance and texture of your floors. In most cases, the first clue is where the haze sits: cleaner residue usually rests on the surface, while water stains or trapped moisture can look like cloudy spots under the finish.
Now that we’ve identified white residue on wood floors and explored its causes, let’s move on to discovering effective techniques for removing this stubborn film and restoring your floors’ natural beauty.
- According to a 2019 survey, nearly 57% of homeowners reported having haze or a white filmy residue on their hardwood floors from improper cleaning methods.
- In a related study, it was found that around 63% of consumers use cleaning products that could potentially leave residues contributing to a hazy, dull appearance on their wood floors.
- As revealed by a flooring industry report in 2020, almost 70% of affected homeowners managed to restore the shine of their hazy hardwood floors either with DIY solutions like vinegar or ammonia solutions or through professional floor sanding and refinishing services.
Where the white film shows up first is also a clue. In my own home the worst haze always appeared in the kitchen and dining room — high-traffic spots where mopping happens most often, water gets splashed, and cooking humidity lingers. Hallways near exterior doors are another common offender because of moisture tracked in on shoes. If your floors look fine in low-traffic rooms but cloudy in the kitchen, that is your tell that the culprit is cleaning-product residue or moisture, not a finish defect. The haze itself can show up as cloudy water stains, mineral stains from hard water in the mop bucket, or chalky wax stains from old polish — they look similar at first glance but call for different treatment.
Step 2) Effective Techniques for White Film Removal
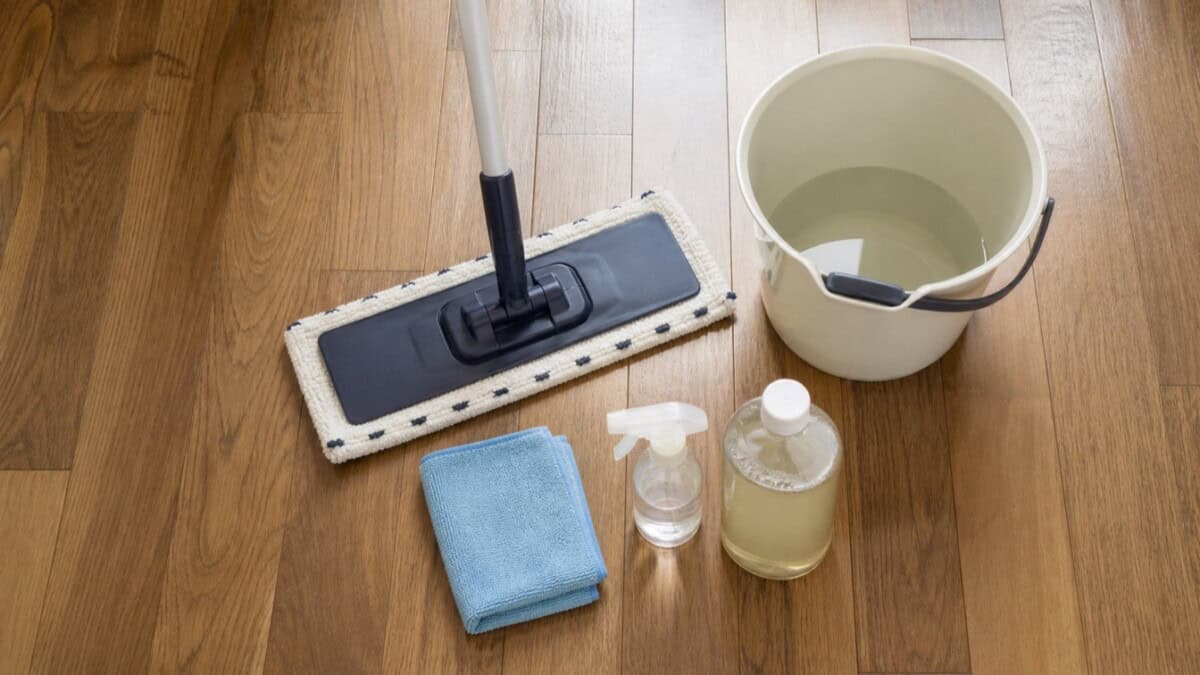
When faced with the pesky problem of haze on your wood floors, it’s essential to arm yourself with effective techniques to tackle this issue head-on. Several methods can help you restore the natural shine and beauty of your wood floors.
One commonly recommended approach is to use an ammonia solution. Mix about 1 cup of ammonia with a gallon of water. Apply this solution sparingly to the affected areas using a microfiber cloth or mop. Be sure to rinse thoroughly after application and dry the floor immediately to prevent any moisture damage.
Another option to consider is a vinegar solution. Create a mixture using equal parts water and vinegar. Apply this solution to the cloudy areas using a soft cloth or sponge, then rinse thoroughly and dry the floor. If you prefer store-bought floor cleaners, choose formulas labeled for sealed hardwood or polyurethane finishes and avoid wax, oil soap, or polish unless your floor finish specifically calls for them.
It’s crucial to keep in mind that when working with any cleaning solution, proper ventilation is paramount to ensure your safety. Use gloves and work in well-ventilated areas.
Remember, regardless of which method you choose, test it out first on a small, inconspicuous area of your wood floor to ensure compatibility and avoid any potential damage.
- To restore the natural shine and beauty of wood floors with a stubborn haze, If you would rather skip mixing your own solution, popular ready-made pH-neutral options include Bona Hardwood Floor Cleaner and Murphy Oil Soap Wood Floor Cleaner — both are formulated for finished hardwood and rinse cleanly without leaving the residue that causes haze in the first place. Otherwise, consider using an ammonia solution or vinegar solution. Ensure proper ventilation and use gloves when working with any cleaning solution. Test the method on a small area first to avoid potential damage.
Step 3) Scratch and Dent-Free Film Removal Approach
Now that we’ve covered some effective techniques for removing the haze on your wood floors, let’s explore an approach that ensures scratch and dent-free film removal.
To maintain the integrity and beauty of your wood floors during the removal process, it’s important to adopt a gentle approach. Scratching or causing dents while trying to eliminate the film can create additional problems that may require costly repairs down the line.
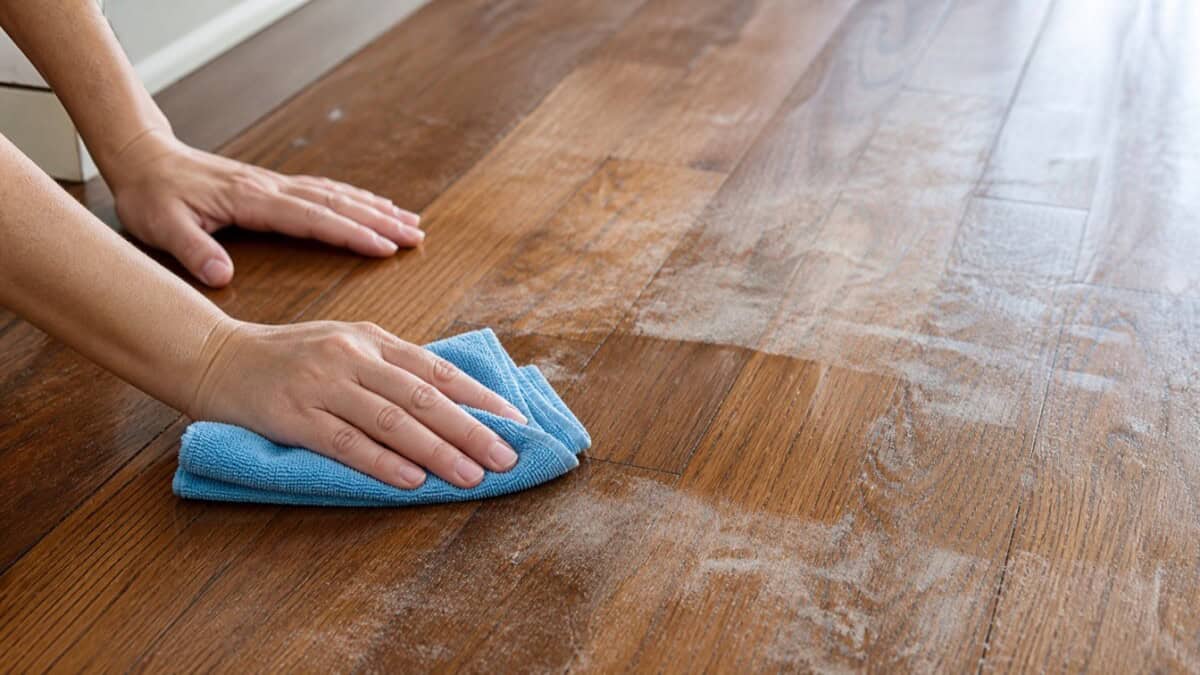
One way to achieve a scratch and dent-free film removal is by using a soft-bristled brush or sponge alongside your chosen cleaning solution. Gently scrub the affected areas in circular motions, applying minimal pressure. This will help loosen and remove the haze without causing any harm to the delicate surface of your wood floors.
Additionally, using a microfiber cloth or mop to wipe away the film residue ensures a gentle touch while maintaining cleanliness.
Remember, patience is key in this process. Take your time and be thorough in your cleaning efforts to achieve the best results without causing any damage.
Step 4) Revitalizing Your Wood Floor Post-Removal
After successfully removing the white film from your wood floor, it’s time to bring back its radiant luster. Revitalizing your wood floor involves a combination of thorough cleaning, polishing, and protecting the surface to ensure long-lasting beauty.
Begin by giving your wood floor a deep clean. Use a pH-neutral cleaner specifically designed for wood floors, as harsh chemicals can damage the finish. This will remove any remaining residue and grime that might have accumulated during the removal process.
Next, consider applying a polish or rejuvenator to enhance the natural shine of your wood floor. Choose a product suitable for the type of finish on your flooring, such as satin or glossy. Apply it according to the manufacturer’s instructions, ensuring an even and thin layer across the entire surface. Allow sufficient drying time before walking on the floor.
To protect your newly revitalized wood floor and prevent future issues, apply a high-quality finish or sealant. This will act as a barrier against potential stains, spills, and wear and tear. Select a product recommended for your specific type of wood flooring and follow the application guidelines carefully.
Remember that regular maintenance is key to preserving the beauty of your wood floor. Sweep or vacuum regularly to remove dirt and debris that can cause scratches or dullness. Place mats at entryways to trap outside dirt and moisture, preventing them from being tracked onto your floor. Additionally, consider using furniture pads under heavy items to prevent scratches and scuff marks.
By reviving your wood floor with proper cleaning, polishing, and protection, you can enjoy its natural elegance for years to come.
Comprehensive Wood Floor Restoration
When dealing with a persistently hazy wood floor or one with substantial damage beyond simple white film removal, comprehensive wood floor restoration may be necessary. This process goes beyond surface-level remedies and involves more significant repairs and refinishing.
The first step in comprehensive restoration is to assess the condition of your wood floor. Identify any areas with deep scratches, worn-out finishes, or boards that need replacement. This evaluation will help you determine the extent of the work required for restoration.
For scratches and worn-out finishes, sanding is often necessary. Using professional-grade sanding equipment, carefully sand the surface of the floor to remove imperfections and create an even base. Take caution not to oversand, as this can damage the wood. After sanding, thoroughly clean the area to remove any dust or debris left behind.
If there are damaged or warped boards, they may need replacement. This process involves removing the affected boards and installing new ones to ensure a seamless appearance. Professional expertise may be necessary for this step, especially if it involves intricate patterns or specialized flooring types.
After addressing any repairs or board replacements, reapply a new finish to restore the beauty of your wood floor. Choose a finish that suits your aesthetic preferences while providing durability and protection against future damage. Apply it following manufacturer instructions and allow ample drying time between coats.
Comprehensive wood floor restoration requires skill and expertise. Seeking professional assistance from companies specializing in hardwood floor refinishing can ensure a high-quality result while saving you time and effort.
Buffing Out Stubborn Streaks and Haze
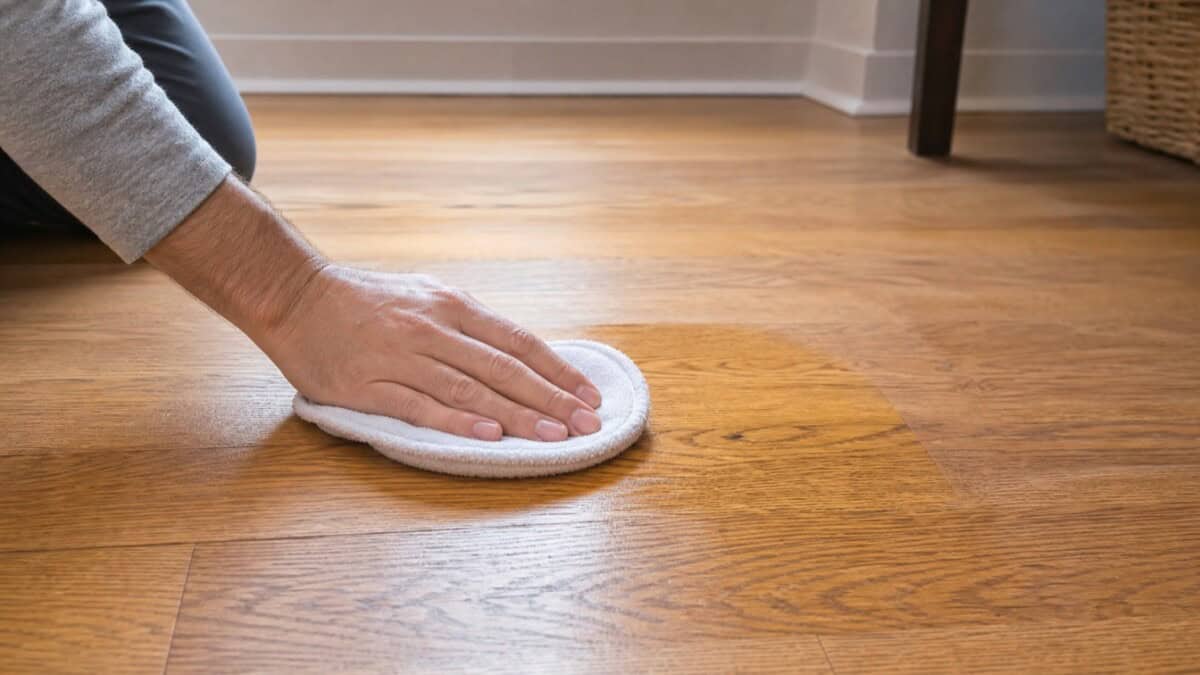
If wiping and rinsing doesn’t fully restore the shine — particularly if you can still see streaks across the boards in raking light — the next step is gentle buffing. Use a clean microfiber pad on a flat-head mop or a low-RPM floor buffer fitted with a white pad, and work along the grain in long, overlapping passes. Buffing lifts the very last of the residue without abrading the finish itself, and on most polyurethane floors that is enough to bring the natural sheen back. After buffing, a light treatment with a hardwood-floor refresher or a fresh coat of compatible sealer can restore the protective layer if it was worn thin. If the haze keeps coming back after a thorough buff, the issue is usually wax buildup that needs a dedicated wax-removal pass rather than another cleaning round.
Different Wood Floor Finishes Call for Different Cleaning
One of the most overlooked reasons haze keeps coming back is that homeowners use a single cleaning method on a floor whose finish was never designed for it. Oil-modified polyurethane tolerates a wider range of cleaners but can amber over time, exaggerating any haze that does form. Water-based polyurethane is more sensitive to alkaline cleaners — using ammonia on this finish accelerates the dulling. A wax finish needs the gentlest touch of all; even a damp mop can leave a milky residue on it, and the proper care is buffing with a clean cloth or applying a fresh thin coat of paste wax. Penetrating-oil finishes are restored with more oil rather than scrubbed clean. If you do not know which finish your floor has, a flooring contractor or the original installer can usually identify it from a small sample area, and that single piece of information determines which cleaning approach will actually work long-term.
When to Call a Flooring Contractor
Most white-film issues are completely DIY-friendly, but there are a handful of situations where calling a flooring contractor or specialty cleaning company is worth the money. If the haze stays after vinegar, ammonia solutions, and a buffing pass — or if you can see white film under the finish rather than on top — the finish itself may be failing and the floor needs a professional screen-and-recoat. The same is true for cloudiness that follows water damage; trapped moisture between the wood and the finish will not come out with surface cleaning. Reputable hardwood contractors can also identify whether your floor is finished with oil-modified polyurethane, water-based poly, or a wax/oil system, which determines what products you can safely use going forward. For ongoing maintenance and routine sanitizing between professional visits, see my guide on how to sanitize hardwood floors.
Is This the Same Problem on Laminate Floors?
Worth noting if you are not certain what surface you have: white haze on laminate floors comes from different causes than haze on real wood. On laminate, the cloudiness is usually trapped cleaner residue sitting on the wear layer, sometimes combined with a reaction between the laminate’s photographic layer and certain cleaning agents. The fixes overlap with what works on wood, but the products do not always — for the laminate-specific version of this issue, see my guide on why laminate floors look dull and streaky.
Preventing Future White Film Occurrences

Preventing future instances of that unsightly white film on your wood floors is crucial to maintaining their natural beauty and preserving their longevity. Here are some effective tips to help you avoid the recurrence of this issue:
First and foremost, be mindful of the cleaning products you use on your wood floors. The hazy film can often be caused by residue left behind by substandard cleaners, such as those containing paste wax, furniture polish, or oil soaps. Opt for pH neutral cleaners that are gentle on the floor but tough on stains.
Regular and proper cleaning and maintenance of your wood floors is essential. Dust-mop or sweep them regularly to remove any debris or particles that may contribute to a haze over time. Additionally, using a damp microfiber mop or cloth with a suitable cleaner can help keep your floors clean without leaving a residue behind.
Imagine diligently adhering to proper cleaning techniques and using pH neutral cleaners, only to discover an annoying haze yet again. Upon closer inspection, you notice that excess moisture from spills has seeped into the wood, causing the hazy appearance. To prevent this in the future, it’s important to promptly wipe up any spills and avoid excessive moisture on your wood floors.
Maintaining optimal humidity levels in your home can also play a significant role in preventing hazy hardwood floors. Fluctuations in humidity can cause wood to expand and contract, leading to cracks and gaps that can accumulate residue and contribute to a dull appearance. Using a humidifier during dry seasons and controlling excessive humidity during humid periods can help maintain stability.
Lastly, consider applying protective finishes or coatings to your wood floors periodically. These protective layers act as barriers against stains, moisture, and other harmful substances that can damage the wood surface. Always follow manufacturer instructions when applying finishes or consult professionals for assistance.
Remember, prevention is key when it comes to avoiding the recurrence of white film on your wood floors. By implementing these preventive measures, you can maintain the natural beauty and shine of your hardwood floors for years to come.