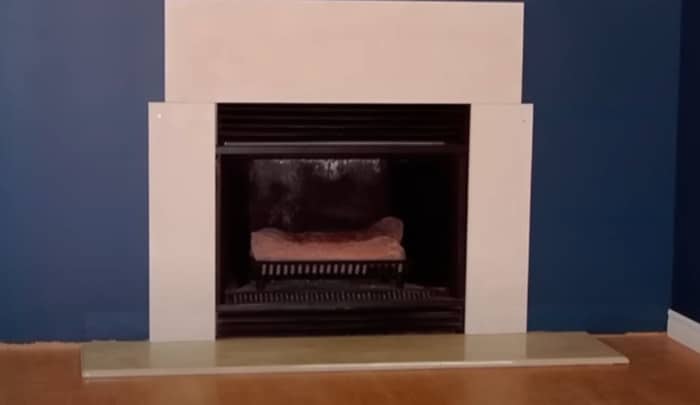
When it comes to being a homeowner, there’s nothing quite like the feeling of cozying up to a crackling fire on a cold winter’s night. With winter months just around the corner, there’s no better time to get to grips with how to fit a fireplace.
But before you start hammering and sawing away, pause for a minute and consider the impact it could have. Fireplaces are more than just beauty and nostalgia—they offer a unique way to reduce your bills and regulate the temperature of your home.
So before you dive straight in and break out the toolbox, take a few moments to read through our step-by-step guide on how to fit a fireplace in the most efficient way possible. In no time at all, you’ll be set to settle into your nest in front of a warm roaring fire.
If you are skilled in DIY projects, then installing a fireplace can be a relatively straightforward task. However, you should always consult with an experienced professional to make sure it is done safely and correctly.
“The most common mistake I’ve seen is improperly measuring the flue. This could lead to smoke spillage and pose a significant safety risk. As a certified technician, I’ve devoted my career to ensure fireplaces are not only aesthetically pleasing but safe to use.”
Jasper Flynn, Certified Fireplace Technician
Preparing to Fit a Fireplace
Before beginning the process of fitting a fireplace, it is important to prepare. It is essential to take into account the various regulations, safety practices, and materials required before undertaking a fireplace installation.
For traditional wood-burning fireplaces, you should ensure that you are using an appropriately certified and registered appliance – particularly if you are located in an urban area where emissions regulations are more stringent. Checking local laws and ordinances should also be conducted to ensure that approved building standards are met. Additionally, an inspection must be completed to check the flue system and the lining of the chimney stack.
Beyond this, the type of fuel used in the new fireplace will also require consideration. For example, wood-burning models require a larger opening than gas fireplaces – plus additional clearances for remains or waste ash associated with burning open fires. Additionally, log burners without chimneys are becoming increasingly popular for those without traditional chimney setups. Furthermore, flue liners need to be replaced if they have been damaged or corroded due to past chimney fires or general wear-and-tear over time.
When completing any work on a home’s existing heating system or installing any new products/services related to heating, it is important to adhere to best practice safety guidelines such as those set out by the minimum requirements of The Building Regulations Part J in England and Wales, which state: Ventilation shall be provided in every room using combustible fuel appliances and an adequate air supply must meet all heaters provided with combustion air from outside; or provide for mechanical replenishment systems – extract fans do not satisfy this requirement unless designed specifically for this purpose.
To sum up, preparing for a fireplace installation requires quite a bit of prework – from research into local building codes and regulations to checking flues and ensuring ventilation problems do not occur during fuselage changes. After preparing appropriately for installation, we can look at how to choose the right place for your new fireplace with our next section….

Choosing the Right Space
When deciding where to install a new fireplace, it’s important to focus on both functionality and aesthetics. It’s essential to select the right space that best fits the needs of your home while still ensuring the room looks beautiful.
If possible, try to incorporate the fireplace into the centre of pre-existing living spaces. By placing the fireplace in the focal point of the area, you can ensure that it becomes the natural anchor that attracts attention and ties the entire aesthetic together. Not only will this add value to your home, but it can also increase energy efficiency by allowing heated air to move more naturally around the room.
A fireplace may not be necessary for every single room in a home, but can be a great feature for basic places like bedrooms or kitchens. For example, an electric fireplace can be a great way to set a cozy atmosphere in a bedroom – just make sure there are no flammable materials around!
On the other hand, adding a unit too close to vulnerable spaces such as attics or crawlspaces is not recommended, as heat from the fire can damage these areas easily. If you must place a unit near these rooms, consider investing in extra insulation and sealing off any gaps or cracks that could let heat seep through.
Ultimately, when choosing where to fit your fireplace, think about practicality as well as style – safety and efficiency should always come first! Now that you have selected the right space for your new fireplace, it is time to measure up and prepare for installation. The next section of this article will guide you through measuring the area and getting ready for installation.
Measuring the Area
Measuring the area where you will install your fireplace is a crucial first step. Before you purchase a particular insert or design, you’ll want to take precise measurements of the inside of the space, as well as any potential exterior venting.
A standard chimney flue measures six inches for both width and height, but it can range from four to ten inches. These measurements are important as they determine how much clearance is needed between the firebox opening and the flue. Also, measuring this area will help determine whether there are any existing obstructions in the way that may make installation more difficult or even impossible.
Exterior vents should measure at least eight to twelve inches in width and one foot high, but again that can range based on your design and the space available. This measurement helps give an idea of whether a prefabricated unit or a custom model will be able to fit properly into the space.
Once you have these measurements completed and noted down, you are ready to move on to installing your fireplace insert. After procuring all necessary materials and supplies, it is time to begin the installation process.

Installing the Fireplace Insert
Installing a fireplace insert is an easy process, but requires steady and careful work. First, inspect the insert for any damages before installation. Check to ensure the firebox gasket is fitted correctly and the door latch is working properly. Position the insert into the existing firebox and secure it with screws while making sure that the position of each screw is as level as possible in order to maintain a secure fit. The next step is to provide electrical power to your insert. This can be done using metal flex conduit or metal-sheathed cable, depending on your local building codes.
After connecting the electrical cables, you should test the operation of your fireplace insert by turning it on and running through its complete cycle of operation. This includes checking for proper communication between the fireplace insert and its connected wall thermostat or remote control receiver. Once this has been completed, it’s time to move onto checking building codes which govern the use of chimney systems in relation to your newly-installed fireplace insert.
Checking building codes is essential in order to ensure that your new fireplace insert system complies with all local standards and regulations relating to flue systems, venting materials, appliance operation and safety measures. In the next section we will discuss how to check building codes related to your existing chimney system when installing a new fireplace insert.
Checking Building Codes
Before beginning any installation, it is important to make sure the project complies with local building code regulations. Depending on the location of your fireplace, you may need to obtain a building permit before starting your installation. Assemble all necessary documentation ahead of time to save yourself time and hassle down the line.
If you are unsure whether or not your installation requires a permit and inspection, contact your local building department for guidance. Although the exact building codes for fireplaces will vary by jurisdiction and jurisdiction, in general, all fireplaces must meet certain safety requirements. For instance, fireplaces should be installed with adequate clearance from combustible materials such as wood and paper. Furthermore, there should be a chimney cap in place to prevent debris from entering the flue and causing a blockage.
When you are confident your plans meet the required building codes, you can move forward with confidence that your fireplace is safe and up to code. Once your compliance with building codes is confirmed, it’s time to take the next step – installing the electrical vent and flue.
Installing the Electrical Vent and Flue
Once all the components that make up a fireplace, such as the firebox, opening, and chimney hood, are ready to install, it is then time to take on the installation of the electrical vent and flue. The electrical vent will house the exhaust fan which will be responsible for venting out smoke and providing fresh air in return to the firebox.
Before beginning the installation process, it’s important to review safety precautions like ensuring proper wiring and applicable local codes. When it comes to installing the electrical vent and flue, there are two primary methods available: hard-wired installations or plug-in installations.
For hard-wired installations, connect the electrical supply leads to a power source such as a junction box or wall switch and clean the aluminum cap about where your wiring will run through before threading it through. Once all wiring is secured, use plumber’s putty around the outer edge of the aluminum cap for a waterproof seal and reinstall the plate in its frame snugly. The next steps include connecting cable clamps from switches and lights to ground wires and then mounting side vents as necessary before mounting electrical components such as fire vents.
Plug-in installations are commonly used with gas logs but can be used with other types of combustible materials with some special considerations. The basic requirements involve using an approved receptacle just above where you plan to install the appliance. Ensure that proper electricity flow is met, making sure to follow relevant safety guidelines when installing the necessary vent components. Then attach cables with restraints within 10 feet of each other leaving 3 inches between them, fasten them so they are secure without any interference; finally identify unused circuits with tape marked “not in use”.
Depending on what type of fire one is using both of these methods come with their own pros and cons – from cost savings to installation time – so it’s important for homeowners to research which option best suits their needs before making a decision.
Now that the electrical vent and flue have been installed, we move onto Setting the Hearth and Surround in the next section.
Essential Points
The takeaway from this text is that before installing the electrical vent and flue for a fireplace, one must review safety precautions like proper wiring and applicable local codes. There are two primary installation methods for the vent and flue: hard-wired installations or plug-in installations. Each method has its own pros and cons to consider in terms of cost, installation time, etc., so it is important for homeowners to do research and make an informed decision. After the electrical vent and flue have been installed, the next step is Setting the Hearth and Surround.
Setting the Hearth and Surround
Before installing the hearth and surround of a new fireplace, it is essential to accurately measure and cut the pieces to ensure that everything fits securely in place. To do this, you will need a measuring tape, saw, and other necessary tools.
Once the hearth and surround has been cut to size, you can begin setting them in place. It is important to locate wall studs while nailing into them in order to ensure a secure fit of the hearth and surround. When drilling holes for your nails or screws, it is important that they are deep enough to hold the pieces firmly in place.
When setting the hearth and surround, there may be some debate over whether putty and sealant should be used around the edges to prevent drafts. Some people believe it is not required if joints are flush-fitting due to air gaps being sealed by mortar when masonry work is completed around fireplace openings. It is recommended however, that silicone sealant be applied around inner edges of walls prior to installation for extra protection against smoke and heat penetration.
Now that the hearth and surround have been set in place, the next step in fitting a fireplace will involve cutting a hole in the wall. This requires careful planning beforehand as any hardware that requires power will require access for electrical wiring during or after installation. Additionally, any chimney liners must be inserted before brickwork formation so these considerations must be taken into account before making any cuts.
Cutting a Hole in the Wall
A key step to fitting your fireplace is cutting a hole in the wall. Before you do, make sure you have chosen the correct size and shape for your fireplace and your chimneypiece.
A good starting point is to measure out the measurements at least twice on the wall. Then mark them out using a level for precision. Once you’re happy, cut two rectangles in the wall – one for the top of the opening and one for the bottom. Due to the nature of this job it’s important to exercise caution during this step and be very accurate with your measurements and level.
Consider seeking professional help at this stage – cutting difficult shapes into walls can be tricky if not handled correctly. However, if you feel confident after measuring accurately, there are various tools available that can help you saw through both plasterboard walls and brick walls safely. Always wear protective gear such as goggles and gloves when tackling these jobs.
Once finished cutting, you may find that some dust has fallen onto furnishings or near-by areas in the house due to being kicked up while drilling or sawing; always use a vacuum cleaner to remove dust and debris before moving onto the next step of finishing your fireplace installation.
Finishing the Fireplace Installation is the next logical step in creating a stylish space from scratch. By following careful measurements and steps now, customers can enjoy their dream fireplace for many years to come.
Finishing the Fireplace Installation
Once the masonry or metal chimney is complete, it’s time to finish the fireplace installation. First, clean and inspect the interior surface of the firebox (the block wall) to ensure it’s free from dust, debris, and loose mortar. If necessary, apply a layer of insulation material and/or fiberboard panels to seal any cracks or gaps prior to installation.
It’s critical that the fireplace floor and firebox walls be sealed with approved fire cement or heat-resistant brick for extra safety and insulation. The use of refractory mortar – which contains high heat resistant properties – is imperative when placing fire bricks along the back wall and just above the opening of your fireplace.
Along with sealing the fire box area, you should also pay close attention to assembling your chosen set of components, such as installing a hearth extension, lintel assembly, surround panels, decorative casing materials and smoke shields. Heat-resistant tiles, finishing grout and caulk can also be used around your fireplace unit for a finished look.
Added insulation between the hearth extension and surrounding flooring will help reduce heat transference into other areas of your home through air infiltration or conduction.
The final step in finishing up your fireplace installation is to carefully fit in your choice of insert unit. Before doing so, you should confirm all recommended clearances have been properly followed; otherwise the safety certification may be invalidated. Next section we discuss “Securing the Insert Unit” – an important step in ensuring optimal performance while keeping you and your family safe from harm.
Securing the Insert Unit
Once the firebox is tuckpointed, it’s time to insert the unit. Before you get started, make sure the gas and electrical supply accesses have been properly installed. It’s important to ensure each connection point is sealed shut and tested for proper functionality. All recalled fireplaces should be inspected and serviced by a certified HVAC professional.
Begin by lifting the insert unit into place, which may require assistance from a professional. Depending on the style of fireplace you choose, there may be screw holes or a locking tab that secures the unit in place; both should be used for optimal security. If your fireplace uses nails, pay close attention to avoid any contact with gas lines or electrical wiring. The insert should fit snugly against the back wall of the firebox and sit level with the hearth.
Whether you choose to use screws or nails to secure the insert unit will largely depend on your personal preference. Screws provide a more permanent method of ventilation but require precise measurements for proper alignment; on the other hand, nails are an easier and less precise method of installation but can also loosen over time due to vibrations or other factors. Consider discussing your option with a professional before making a final decision.
Now that the insert unit is securely in place, it’s time to move onto finishing the masonry and surfaces before connecting it to your utility grades.
Finishing the Masonry and Surfaces
Once the fireplace is built, it’s time to finish the masonry and surfaces. This is an important step as it helps to create a solid seal and completes the aesthetic of your new or updated fireplace.
The best way to begin this process is by checking all your work thus far to ensure that everything is working properly and functioning as expected. Make any final adjustments necessary to the building blocks and mortar before continuing.
Next, you will need to cover any exposed mortar with a thin coat of stucco or cement that should be applied evenly and smoothed until it reaches the desired surface finish. Be sure to let the mortar dry completely before proceeding. Once it’s dry, you may choose to paint or stain the surface in whatever color fits your style best. Painting usually requires two coats with drying in between each layer for best results. After painting has dried, an appropriate sealer should be applied to prevent further weathering or wear overtime.
The final step is decorating can take many forms – intricate tilework, beautiful stone accent pieces, pictures framed within the mantelpiece, etc. You can choose any combination of decoration techniques to complete your one-of-a-kind fireplace design!
Conclusion: With proper planning and preparation, finishing the masonry and surfaces of your fireplace can be straightforward once you know what steps are necessary. In our next section, we explore ways to keep your fireburning safely and efficiently throughout the year regardless of weather conditions outside.

Conclusion
The process of fitting a fireplace may seem daunting, but with the right tools and knowledge it can be done. Ultimately, there are a number of advantages to having a fireplace in the home. Fireplaces create a comfortable atmosphere, potentially increase the value of the property and can be used to generate warmth in cold weather in an efficient manner. Additionally, fireplaces are great for decorative purposes, providing a visual focus point for the room.
On the other hand, DIY installation may not be appropriate for every homeowner. One should take into consideration the complexity of task involved, fire safety regulations and any necessary permits prior to carrying out any labor themself. For any individual who is unable or unwilling to fit their own fireplace, hiring a professional is strongly recommended. Ultimately, safety should always come first when dealing with installations that involve gas or electricity.
Common Questions and Answers
How much time will it take to fit a fireplace?
The amount of time it takes to fit a fireplace will vary depending on the complexity of the task, the experience level of the person fitting it, and the type of materials used. On average, installing a simple gas fireplace should take between one and two days, while installing a more complex wood-burning model can take up to five days. It is important to note that these times are approximate and could vary greatly depending on the details of the project. Furthermore, if you choose to install the fireplace yourself, additional time may be necessary for researching local building codes and safety regulations.
What safety precautions should I be aware of when fitting a fireplace?
Fitting a fireplace is an important and potentially hazardous task, so it’s important to take safety precautions. First and foremost, always wear appropriate safety equipment such as gloves and protective glasses while handling any sharp tools or materials. Additionally, ensure that the room you’re working in has adequate ventilation. Work in a well-lit area when possible to ensure visibility, and always read product instructions/directions carefully before attempting any task. Be sure to use the right tools for the job, as using improper tools can cause major issues down the line. Finally, position all furniture, boxes, or other objects in the room so they do not interfere with your work.
What tools do I need to fit a fireplace?
To fit a fireplace, you will need the following tools:
1. Tape measure – to ensure your new fireplace is the correct size for the space available.
2. Hammer and chisel – to create a cavity in the wall if there isn’t one already.
3. Bladed knife – to cut away plaster or mortar as needed so that your new fireplace fits snugly.
4. Putty knife – to help spread out any remaining debris after cutting your cavity.
5. Screwdriver – to secure your new fireplace into the wall or existing surround with screws.
6. Level – to check that your fireplace is straight in the opening before you complete the fitting process.
7. Vacuum cleaner – to help clear up any dust or dirt that may appear as a result of drilling, cutting or hammering.
How do I ensure my fireplace is correctly and securely fitted?
To ensure your fireplace is correctly and securely fitted, you should have the work done by a qualified professional. This is important because they have the knowledge, experience, and tools to make sure the fireplace is installed safely and properly. They will also be able to provide guidance and advice based on your particular set-up and safety regulations.
You should also be aware of any legal requirements in your area, such as building codes and permits. Additionally, you should take into consideration potential fire hazards that could arise if the fireplace is not installed properly, such as improper venting or failing to ground electricity.
Having a registered professional fit your fireplace offers peace of mind, since it eliminates the chance of any errors or mistakes being made while you’re attempting to install it yourself. Moreover, with their help, your installation process will be faster, easier and more efficient, thus leading to a better overall result.
What type of materials will be necessary when fitting a fireplace?
When fitting a fireplace, the materials needed will vary depending on the type of fireplace you’re installing. In general, you’ll need pre-assembled fireplace components, such as a mantel, hearth, and surround, as well as tools like a drill, level, hammer and saw. You’ll also need fittings such as screws, nails, and wall fixings for masonry surfaces. Finally, you may need fireproof sealant or mortar to ensure a secure fit that meets safety standards.
References
https://worstroom.com/fireplace-alternatives/
https://www.heatilator.com/shopping-tools/blog/what-is-the-best-type-of-fireplace-for-you


I once attempted to fit a fireplace in my living room without considering the structural implications, let’s just say it ended in a mess of soot and cracked plaster! Make sure you thoroughly research and plan before undertaking such a task, or you’ll end up with more work than when you started.
Renovation projects, like fitting a fireplace, can sometimes be like opening Pandora’s box, you might not know what you’re getting yourself into. From a structural point of view, as an architect, I strongly urge any DIY enthusiast to thoroughly understand the implications of your project before proceeding. Safety is a paramount concern and one should never compromise on it during these self-initiated projects.
I remember when I tackled my first fireplace installation, it seemed straightforward until I realized the chimney needed some serious repointing work. Always better to look at the bigger picture before diving into these types of projects.
Absolutely, Trillian. I agree that seeing the bigger picture is crucial while working with fireplace installations. Overlooking the profound aspects such as chimney safety, ventilation and material compatibility can turn your warm comfort zone into a hot mess in no time.
Last year, I installed a fireplace for my sister’s family and while it may seem intimidating at first, it actually turned out to be one of my most fulfilling projects.
I too have found installing fireplaces to be deeply rewarding, Zeek. Attention to detail and understanding the needs of each unique space can turn the installation from a mere job to a form of art. Not to mention the satisfaction one gets knowing that the warmth it provides both literally and metaphorically will be felt by families for years to come. Though, I sometimes find myself missing the process once it’s done, strange as that may sound!
Ah Lloyd, I see we share the same sentiments here – nothing matches the feeling of completion when you get that fireplace running. The warmth it brings can keep one quite sentimental, isn’t it?