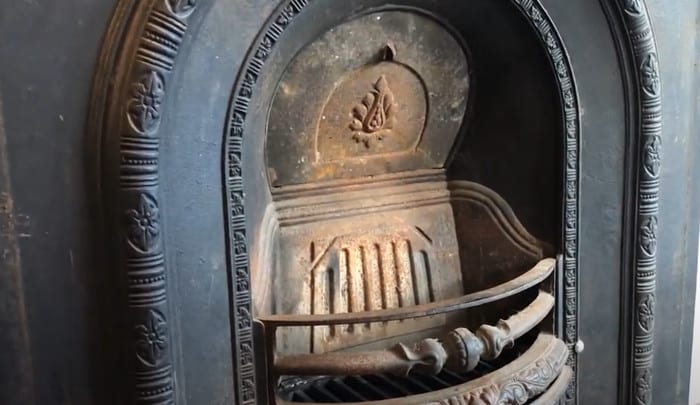
Are you considering investing in a cast iron fireplace? Whether you’re interested in a traditional look for your home or simply want the extra heat during winter, installing a Cast Iron Fireplace is a great choice. But, without the proper knowledge and information, it can be a daunting task to even know where to begin.
Don’t worry, that’s where we come in! This step-by-step guide will help make the installation process easier and provide you with the right information to ensure your cast iron fireplace is securely in place and ready to heat up your home. Let’s get started!
Installing a cast iron fireplace requires precise measurements and strong technical knowledge. It is recommended that you consult with a professional before attempting to install yourself.
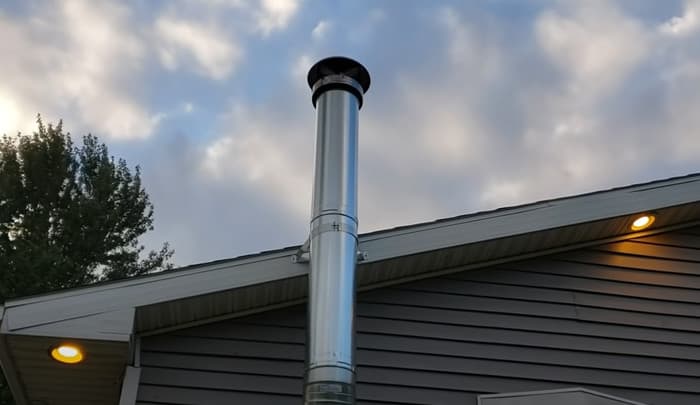
“The most common hiccup occurs when individuals underestimate the importance of ensuring that the flue is correctly lined. This step is not about aesthetics; it ensures efficient operation and reduces the risk of damaging heat loss throughout your property. My advice is to always triple check your flue lining, it’s a paramount part of the process that shouldn’t be rushed or overlooked.”
Oswin Sherwood, Certified Hearth Professional
Preparations for Installing a Cast Iron Fireplace
Preparations for Installing a Cast Iron Fireplace: Before installing a cast iron fireplace, there are several critical steps in the preparation process to ensure the safe and efficient completion of this project. First, be sure to accurately measure both the interior and exterior walls of your home where the fireplace will be placed
. This is important because the measurements you take during this initial process will determine whether or not a standard-sized cast iron fireplace will fit in the area or if custom-built modifications must be made.
Second, consider if you would like to have an open-hearth masonry fireplace or a zero-clearance steel fireplace installed. Open hearth masonry fireplaces are generally more expensive but require less insulation. On the other hand, zero-clearance steel fireplaces are more cost-effective but may require additional insulation to reduce heat loss through the chimney flue.
Third, familiarize yourself with local building codes and regulations. Fireplace installation procedures vary from region to region, so consulting with your local authorities before beginning is essential for a successful installation process.
Apart from preparing for necessary measurements, materials and tools for the installation itself, homeowners should also make any necessary arrangements prior to beginning construction such as clearing away furniture near the hearth area and making alternative living arrangements due to expected noise levels during the construction process.
With these preparations taken care of, you can now move on to gathering the right tools and materials needed to install your cast iron fireplace.
Gather the Right Tools and Materials
Gathering the right tools and materials is an essential step when installing a cast iron fireplace. There are several basic tools and materials you will need, including a tape measure, drill, fire cement, sealant, protective gloves and eyewear, screws and nails, a saw for cutting the flue pipe, chisel or tool for cutting away excess cement, hammer and fireplace thimble. Additionally, it is also important to purchase quality products from a reputable supplier and make sure they are suitable for the job.
It can be argued that having more specialized tools will make installation easier. Yet having too many tools could lead to excessive costs which might not be necessary if the job can be completed just as effectively with basic tools and materials.
When all of your tools and materials have been gathered, it’s time to move on to the next step: measuring and framing the opening. The correct measurements are important to ensure proper placement and installation of your cast iron fireplace. This is especially true in older homes where floor joists may be uneven or levels differ from one side of the room to another.
Measure and Frame the Opening
Installing a cast iron fireplace requires proper measuring and framing of the opening due to the weight and strapping requirements. If framed correctly, the opening should cover the entire fireplace frame so that it looks aesthetically pleasing.
There are a couple of ways to measure for an appropriate size for the opening but it’s key to consider both the length and width of the fireplace when designing the opening. Measure the firebox itself, then add an extra two inches on either side of the firebox (lengthwise and widthwise) for a total masonry frame of 4-inches larger than the firebox opening itself.
Debate:
However, some experts recommend adding an extra 3-inches on either side horizontally, with only 2-inches vertically because of technical complexities involved in installing a cast iron firebox such as strapping etc. These technicians believe that more space is needed horizontally than vertically to adequately secure any potential equipment.
On the other hand, many others recommend even distribution when adding length/width to an existing firebox, believing that consistency is important avoiding unnecessary errors.
No matter which opinion you stand by, one thing is certain – accurate measurements are paramount before performing any installation; if measurements are off it could lead to potential structural complications down the line. It’s vital to take one’s time when framing for a cast iron firebox, ensuring all dimensions have been accounted for and measured accordingly.
Once complete, your next step is to begin readying all necessary materials for installing your cast iron firebox into the framed opening – this will be discussed in greater detail in our next section about: “Installing the Cast Iron Firebox”.
- According to the US Department of Energy, fireplaces can reduce home heating bills by up to 15%.
- According to US Fire Administration, properly installed and maintained cast iron fireplaces can last up to 75 years or more.
- A study published in 2019 showed that 85% of people surveyed indicated that they have knowledge of the criteria required when purchasing, installing and maintaining their fireplace.
Installing the Cast Iron Firebox
Installing the cast iron firebox is a delicate job that should only be undertaken by a professional. If handled incorrectly, it could damage the materials and even lead to injury or death. It’s important to follow safety protocols when handling material, wearing protective gear, and having assistance present when large or heavy pieces need to be moved.
When installing the firebox, the first step is to reinforce the area where it will rest in order to ensure stability. This might include adding extra supports on the floor or walls, like blocking, using studs and brackets, or other structural solutions. Once the area is prepared, you can go ahead and install the firebox itself. Using a leveler and shims can help keep it in place and provide the necessary gaps for sealing.
It’s essential to size the opening of the firebox correctly so that there is enough clearance around its edges. Otherwise too much heat could escape and cause potential harm to anyone who’s near it. That also means making sure that combustible materials such as wood or plaster are not up against any of its surfaces as they could catch fire quickly. Lastly, take time to check that all screws, bolts, and other fasteners have been properly secured before proceeding with your project.
Once you have successfully installed the cast iron firebox and are satisfied with its positioning and stability, you can move on to the next phase of installation process: attaching the hearth and surround.
Crucial Highlights
Installing a cast iron firebox is a very delicate job that should only be done by a professional. When installing the firebox, it is important to reinforce the area where it will rest and make sure there is enough clearance around its edges for safety. Additionally, taking care to check all screws, bolts, and other fasteners have been properly secured before proceeding with the installation is essential. Once the firebox is installed, the next step is attaching the hearth and surround.
Attaching the Hearth and Surround
Once your hearth and surround are securely in place, it’s time to attach them together. This is an important step in the installation process, as a secure connection between these two components is necessary for a successful installation. After installation, remember to clean your marble fireplace regularly to maintain its beauty process, as a secure connection between these two components is necessary for a successful installation. Depending on the materials used for your fireplace, there are several methods that can be employed to secure the hearth and surround.
The most popular method is to use metal connectors or screws. Metal connectors come with numerous small holes that allow for easy attachment to the back of each piece of the hearth and surround. With a bit of patience and some patience, this method can provide a secure attachment like no other. The downside of this method is that it does require drilling into the material of the hearth and surround, which can damage the material or create unsightly holes.
Another attachment method involves using adhesives. Adhesives can provide an equally secure connection that avoids any drilling or unwanted damage to either component. However, some adhesives are not suitable for certain types of material and could lead to damage if incorrectly applied. Additionally, it takes time for adhesives to effectively bond two materials together while metal connectors provide instant security.
Once you have decided how you want to attach your hearth and surround, make sure you test their stability and strength before moving forward with your installation. A safe connection between these two components is essential when it comes to installing a cast iron fireplace.
Now that we have discussed attaching the hearth and surround, let’s move on to the next steps involved in installing a cast iron fireplace: making the smoke chamber.
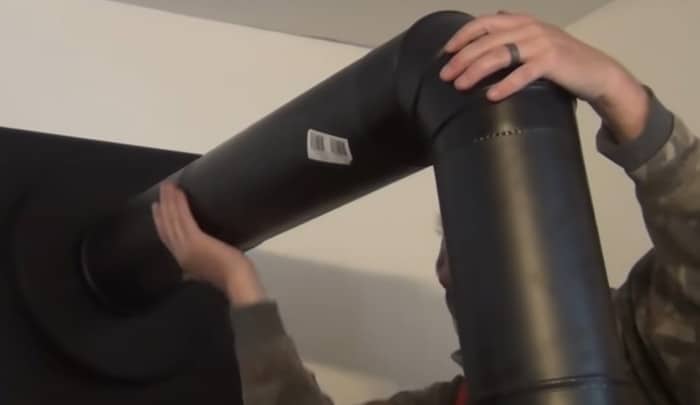
Making the Smoke Chamber
The smoke chamber is an essential part of any cast iron fireplace installation. It serves as the transition point between the fireplace and chimney by redirecting airflow away from combustibles while creating a large area for smoke to cool before it enters the flue and passes outside into the atmosphere. In order to effectively make this chamber, there are two main considerations to take into account: fireproofing materials and airtight seals.
When it comes to fireproofing material, there are two schools of thought; drywall or refractory cement boards. Drywall is a cheaper, faster alternative that can be installed with ease, however, it is important to remember that drywall is an extremely combustible material and must be protected with insulation to prevent any potential fires from occurring. Installing refractory cement boards can provide maximum protection against fires as they are designed to remain intact when exposed to high temperatures. The downside of using these boards is that they require specialized skills and installation techniques in order to ensure their effectiveness. Ultimately, the best option will depend on budget, level of expertise, and desired level of safety.
In addition to using fireproof material, it is important to properly seal the smoke chamber in order to create an airtight space. Sealing compounds such as silicone caulking should not be used as they will breakdown over time due to buildup of heat and smoke creating weak points in the sealant layer which may result in air escaping or creating openings for combustion gases. Instead, high temperature mastic adhesives should be used when installing fire barriers such as ceramic fiber blankets or refractory panels in order to create an airtight space that prevents gasses from entering the living space.
Creating a well sealed smoke chamber is critical for any cast iron fireplace installation as it allows smoke and hot gasses produced by combustion within the firebox to flow into the flue without leaking into other areas of the house. With proper installation of fireproof materials and airtight seals, homeowners can ensure that their cast iron fireplace remains safe and operates efficiently for years to come.
Now that the smoke chamber has been properly constructed, we can move on to the next step: fitting a damper and mantels.
Fit the Damper and Mantels
One of the most important steps in installing a cast iron fireplace is fitting the damper and mantels. While this might seem like a simple task, it requires great precision to ensure that the elements are properly fitted and securely sealed. The damper prevents smoke and other emissions from entering the home while the mantels enhance the look of the fireplace and can be customized to match any décor.
For installing the damper, many professionals suggest using specialized tools such as a wrench or screwdriver to make sure everything is correctly connected. Additionally, take care to check that all bolts are tightened securely. A strong seal with no air leaks is paramount when it comes to preventing emissions and ensuring operational safety.
Properly installing mantels also requires attention to detail. Care should be taken to measure carefully before beginning installation and all weight requirements should be consulted beforehand. Loosely hung mantels can cause potentially hazardous situations in case of an earthquake or severe weather event. Once the mantels are attached properly, it may also be wise to hang them away from direct heat sources so as not to damage them over time.
Finally, for a long-lasting secure fit, use high quality materials and screws where applicable. Investing in these materials now helps save costly repairs further down the line. With these professional tips, you should have your own cast iron fireplace installed with ease.
Now that the damper and mantels are securely fitted, we can move on to preparing for wall and floor levels when installing a cast iron fireplace – the final step before starting up your new hearth!
Finishing with Wall and Floor Levels
Before installing a cast iron fireplace, it is important to make sure that the wall and floor levels are finished properly. Poorly fitted wall and floor levels can lead to costly repairs or damage to property. It is recommended that professionals install the wall and floor levels to ensure they are done correctly.
The first step when finishing the wall and floor levels is to measure the height of the opening of the hearth. Make sure the dimensions match with the manufacturer’s specifications, as this will determine where you will begin measuring for the placement of the walls and floors. After determining the measurements, use a level to measure and mark out the area where you plan on placing the walls and flooring. Once you have measured out your area, lay down a few coats of primer to make sure it is leveled properly before laying down any paint or wallpaper.
When installing your finished walls and floors in your cast iron fireplace, it is important to take into consideration how much space each piece requires for installation. If there is not enough room for all the pieces, it may be necessary to cut some pieces down using a wet saw or power saw. This should only be done by a professional and should always be done carefully in order to avoid safety hazards or damaging any other pieces of furniture in the room.
After all pieces of wall and floor finishes have been installed, use a caulk gun to seal any seams between the pieces of wall or flooring. Doing this will help protect any gaps from dust or debris entering your home. Once everything has been sealed and caulked, you can enjoy your newly installed cast iron fireplace.
It is important to note that while professionals are recommended for installing a cast iron fireplace, there are some individuals who choose to do it themselves successfully. However, safety should always come first when undertaking such a large installation project, so err on Caution side if unsure about anything involved in this process.
Now customers are ready to add a Hearth Shield for protection against heat radiating from the firebox and other potential dangers in order for their fire receptacle to reach its full potential!
Add a Hearth Shield for Protection
Adding an additional layer of protection with a hearth shield provides extra safety, but is not always necessary. The hearth shield acts as a buffer or barrier against the heat radiating from the fireplace while providing an attractive and finished look to the fireplace’s installation. Hearth shields may be made of steel or ceramic material with insulation between the two layers. It’s important to note that both steel and ceramic shields require support for stability and safety. When in doubt, contact a local building inspector for specific recommendations for your area.
The pros of installing a hearth shield include providing an added layer of protection from hot surfaces, preventing small children from touching very hot surfaces, as well as adding visual appeal. On the other hand, it can be argued that depending on the size of the unit and its installation, they can be bulky; they also require additional labor cost in terms of mounting to existing walls or floors and possible construction to accommodate them.
When deciding whether to install a hearth shield, it is best to consider the benefits and drawbacks for each individual building situation. Whatever you decide, take appropriate safety measures for protecting your space from hazardous materials like open flames, hot surfaces, smoke and combustion byproducts from burning solid fuels.
Now that you are familiar with the pros and cons of installing a hearth shield, in the following section we will discuss how to insert the cast iron fireplace into place.
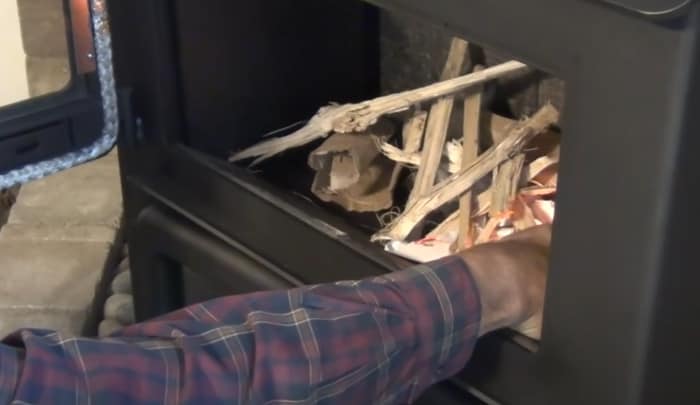
Insert the Cast Iron Fireplace
When installing a cast iron fireplace, it is important to insert the fireplace itself. Depending on the level of expertise and amount of time available, this process can be done either by a professional or by a homeowner with less experience but some understanding of construction.
A Professional: A professional installation requires more time and knowledge as many additional steps are involved. This includes making sure there are no obstructions in the chimney, measuring the area precisely, and using quality materials. Furthermore, the installation must be done in accordance with safety standards outlined by local building codes. This ensures proper ventilation and keeps heat away from combustible materials like wood studs and insulation so that fires do not occur. Additionally, the installer needs to install adequate thermal breaks between the firebox and framing members in order to prevent high temperatures from transferring to other parts of the house. In addition, when setting up the fireplace, professionals may advise homeowners regarding how much clearance should be provided around combustibles and about whether any venting requirements need to be met for their particular fireplace design.
Do-it-Yourself Installation: For those with limited or no experience in construction, a DIY installation may seem like a daunting task. However, if done with care and caution this process can be successful as well. The first step is to assemble the cast iron firebox on a non-combustible surface such as brick or concrete pavers. Next, it is important to measure the distance between the back of the firebox’s flange and framing members in order to ensure that there will be enough clearance and proper air circulation between them. Then, attach firebricks or mineral wool insulation to non-combustible wall material before securing it against backing studs with steel angle brackets. Finally, connect liner pipes (if applicable) through flange holes before placing the firebox in an appropriate location according to manufacturer specifications.
Overall, whether choosing a professional or doing-it-yourself installation of a cast iron fireplace, necessary safety precautions should always be taken into consideration during this process. Homeowners should research local building codes & regulations before beginning any kind of project so that all necessary steps can be taken toward creating a safe environment for enjoying their fireplace each season!
Frequently Asked Questions and Explanations
What steps do I need to take to ensure a safe fireplace installation?
In order to ensure a safe installation of your cast iron fireplace, there are several steps you need to take. Firstly, make sure you have read and understood all relevant instructions as well as consulted a qualified professional if needed. Secondly, check that the location of your planned fireplace has been properly examined and approved by a qualified building inspector or engineer. Thirdly, secure the correct mounting hardware, including an appropriate fireproof hearth and chase cover, in order to avoid any potential gas leaks or fires due to escaping flue gasses. Lastly, if necessary, install a carbon monoxide alarm in the proximity of the fireplace to detect any levels of deadly gasses while the appliance is in operation. Following these steps is essential to ensure a safe installation of your cast iron fireplace.
Are there any specific safety considerations for installing a cast iron fireplace?
Yes, there are several safety considerations to keep in mind when installing a cast iron fireplace. Firstly, ensure you are aware of any local codes and regulations that must be followed before installing a new fireplace. Secondly, make sure the right materials are used for the installation, and that the construction is done according to manufacturer specifications. Thirdly, use adequate safety gear including safety glasses, gloves and a dust mask when performing the installation. Fourthly, check for gas leaks if you are dealing with a gas cast iron fireplace. Finally, before using your new fireplace make sure that it is properly ventilated and that all combustible items are kept away from the flames.
References
https://www.directstoves.com/resources/cast-iron-or-steel-stove-which-is-best/
https://www.direct-fireplaces.com/resources/how-to-restore-a-cast-iron-fireplace/


Cast iron fireplaces are indeed a great addition to any home; don’t forget a key tip to use high temperature resistant paint to keep it rust-free and prolong its lifespan.
Although I agree with Sinclair about using high temperature resistant paint, it’s also vital to remember to keep your fireplace dry as moisture can accelerate rust formation; this tip saved my own Victorian fireplace from unnecessary damage.
Make sure you use proper heat proof screws when attaching the fireplace, standard ones might warp or break.
That’s a great point, Roscoe! Using standard screws might seem like an easy save, but it’s risking damage to both the fireplace and the safety of your home.
During my first cast iron fireplace installation endeavor, I overlooked the importance of using specific heat-resistant screws. The regular ones eventually wore out due to the high temperature – quite a pricey mistake!