
Imagine your grass as three layers. You have the soil where the grass roots are, then you’ve got that lovely green grass.
But where’s the other layer? Well that’s the stuff that’s in-between. A mixture of dead and living plant material, that looks a lot like hay. This is the thatch layer that needs to be removed, but the question is why?
“Indeed, thatch can be a serious issue for your lawn, diminishing its health and beauty. Dedicate yourself to regular dethatching, preferably in the spring or fall, and use a vertical mower or a dethatching rake for best results. Remember, consistent lawn care practices such as mowing, watering, fertilizing and aerating will result in lesser thatch build-up over time.”
Rutherford K. Fitzgerald, PhD Horticulture
There Is A Good Reason To Remove Thatch
It’s important to note, not all thatch is bad, in fact, some is beneficial to lawn promotion and health. At the right amount (about 1/2″ thick) it can help conserve moisture and keep the soil’s temperature constant while sill allowing water, nutrients and air to reach the soil.
Thatch that’s thicker than 1/2″, can prevent water, fertilizer and air from reaching the soil and therefore the roots of the grass… and this is why it must be removed.
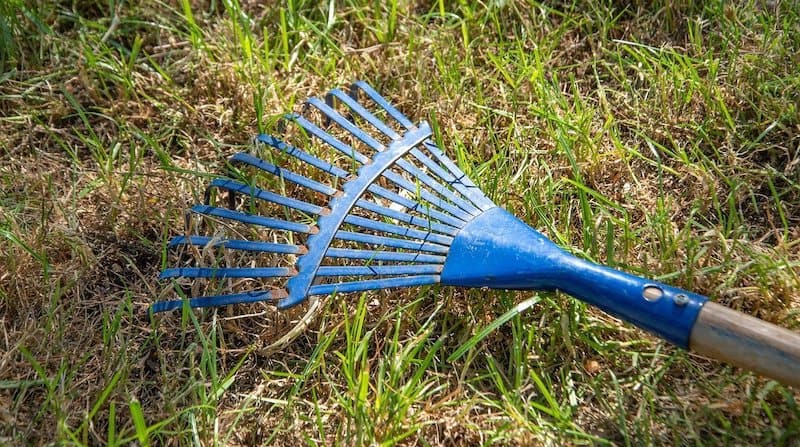
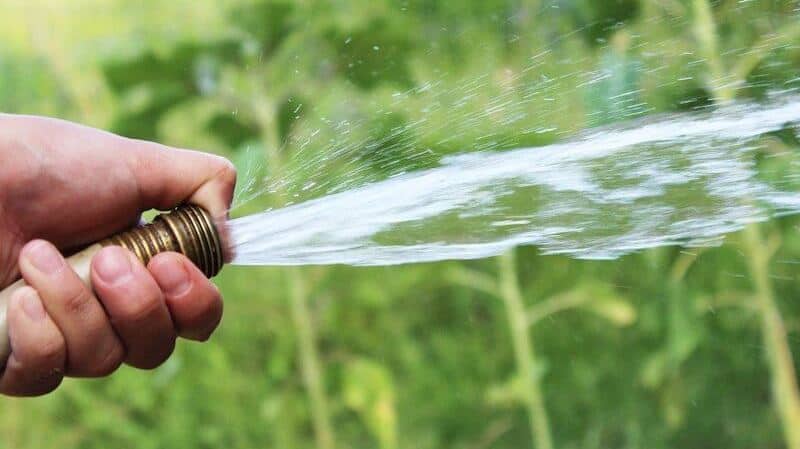
u003cpu003eTo remove thatch effectively, first you have to choose the right day and conditions to do it, the soil has to be moist but not completely wet. You can use a regular rake, but a specialized one will protect the grass and remove the thatch easily. Pull the rake working around small spaces until the thatch comes loose, then collect the debris and water the grass to end the job. u003c/pu003e
How To Know When Thatch Is Too Thick?
Often it’s clear to see, you’ll notice hay-like grass amongst your green grass. To be sure, gently rake away at the grass and if the thatch easily removes itself (without pulling out healthy grass), then your grass can do with a comb over. For those who find manual raking challenging, consider using a weed trimmer designed for seniors to make the task easier.
If it’s unclear to the naked eye, you may remove a plug from the lawn and measure the thickness of thatch. If this measures greater than 1/2″, it’s time to thatch that lawn to promote air circulation and water getting to the soil.
When’s The Best Time To Dethatch My Grass?
It’s important to know that dethatching is very stressful for the grass. Therefore you want to do it under ideal growing conditions to ensure an easy and swift recovery.
The best conditions for dethatching is in warm sunny weather, add some water after the job and you’ve then got the perfect elements the grass needs for recovery.
Warm weather will also prevent moss and weeds from growing after the dethatching has taken place. Ideally, you want the local weather to be above 22°C, with at least 15% moisture in the air. If weeds do appear, consider using a vinegar-based weed killer as an eco-friendly alternative to chemical herbicides.
Less thatch, less moss promotion, more water and fertilizer getting to the soil, means your grass will grow quicker and greener. For those looking for eco-friendly lawn care solutions, Sunday Lawn Care offers tailored, natural products that can complement your dethatching efforts.
Should I Dethatch When The Lawn Is Wet?
We’ve already stated the best conditions for dethatching your lawn is in warn and sunny climates. However, what about the soil, is it best for it to be sogging wet orbone dry?
When soil is extremely wet, it breaks down, sort of like mud. As a result, the grass can be pulled from their roots easier as the roots have less to hold on to.
Similarly, when the soil is too dry, the soil breaks down a little like dust and once again the roots have little grip and the grass will be pull away. If you want to get too technical, we recommend at least 20% of moisture in the soil.
What Are The Best Soil Conditions For Dethaching Lawns?
You’ve guess it! If soil being too wet or too dry weakens the integrity of grass roots, then somewhere in-between in the solution.
Remember, the best time to dethatch the grass is in warm, sunny weather and that usually means dry soil.
The easy solution to this is to water your lawn a day or two before starting the dethatching process, so the soil has enough integrity to allow the roots to hold on tightly.
The idea is to get the soil moist (not too wet and not too dry). This means not having to be overly caution as your rake your away around your lawn.
Using The Right Tools For Job
A traditional rake can do a decent job at dethatching your grass, however, there are tools that are specially designed to do a better job at removing thatch while also protecting your grass.
You can find a dethatching rake for just $40 that will do the job perfectly. But if you have a massive turf, you might want to go for a more expensive model.
Not all dethatching tools are the same, some are more expensive than the others, but (in general) work on the same principle.
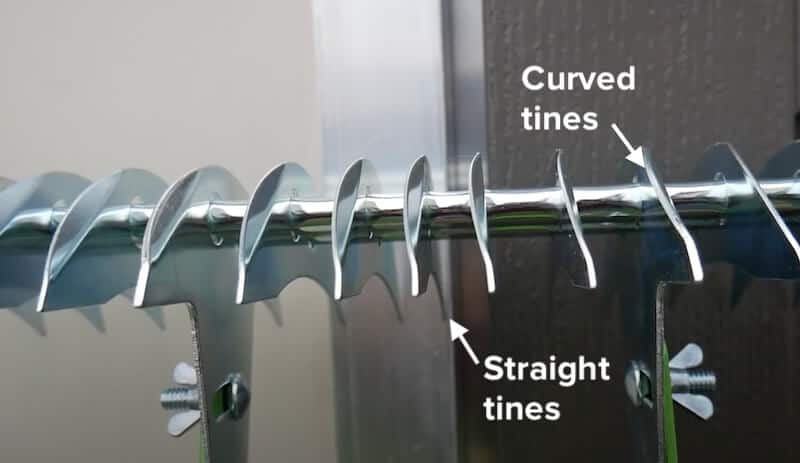
For simplicity, let’s look at a dethatching rake and how it works.
This rake is also called a convex rake because its tines are convex in shape. They have two sets of tines, with one side being straight to get into the soil and the other side curved to get under the healthy grass and rip through the thatch and bring it to the surface.
Pro Tip For Lawn Dethatching
A few years back I bought a pair of sun shades that happened to have polarized lenses. It was unusually hot where I live and decided to slip the sunglasses on while doing some gardening.
I noticed how awful the grass looked and could get my head around it, as only the day before, it looked decent. After removing the shades, I noticed the grass going back to decent looking.
It turns out, due to the way polarized glasses cut the light in one direction, it contrasts the dry areas more from the green. Polarized glasses are very cheap, you can purchase one pair online for just $8 dollars.
So if you’re looking to do a quick thatch job, slip on a pair of polarized glasses and go to the more prominent dry areas… let the shades guide you!
Final Thoughts
In all seriousness, thatching is quite labor intensive if you are to do it manually with a rake, but it’s probably the single best thing you can do to speed up the growth of your lawn.
This year I could not understand why my grass wasn’t coming out as lush and green as the year before. To enhance your lawn’s appearance and health, you might also consider composting to create nutrient-rich soil for your grass.
I gave the lawn even more water and fertilizer, but yet, it wasn’t looking as good.
One thing I forgot was to thatch it. It makes complete sense why this one process works miracles.
Removing thatch allows the grass to aerate, and all that watering and fertilizing, well, there’s no longer a thatch barrier stopping it from getting into the soil… the results are notable to say the least! As an added bonus, a healthy lawn can even help repel mosquitoes, making your outdoor space more enjoyable!


