From walls to floors and back again—renovations can be both daunting and exciting. You’re likely feeling like a tornado has just ripped through your home once you’ve finished sanding the floors, and now you have to worry about all the dust that has spackled the walls. Never fear because, in this post, we’ve got the perfect guide to help you rid your walls of the dust and prepare them for their next coat of paint. With a few simple steps, you can easily clean your walls after floor sanding and move forward in the renovation process. So, let’s get started!
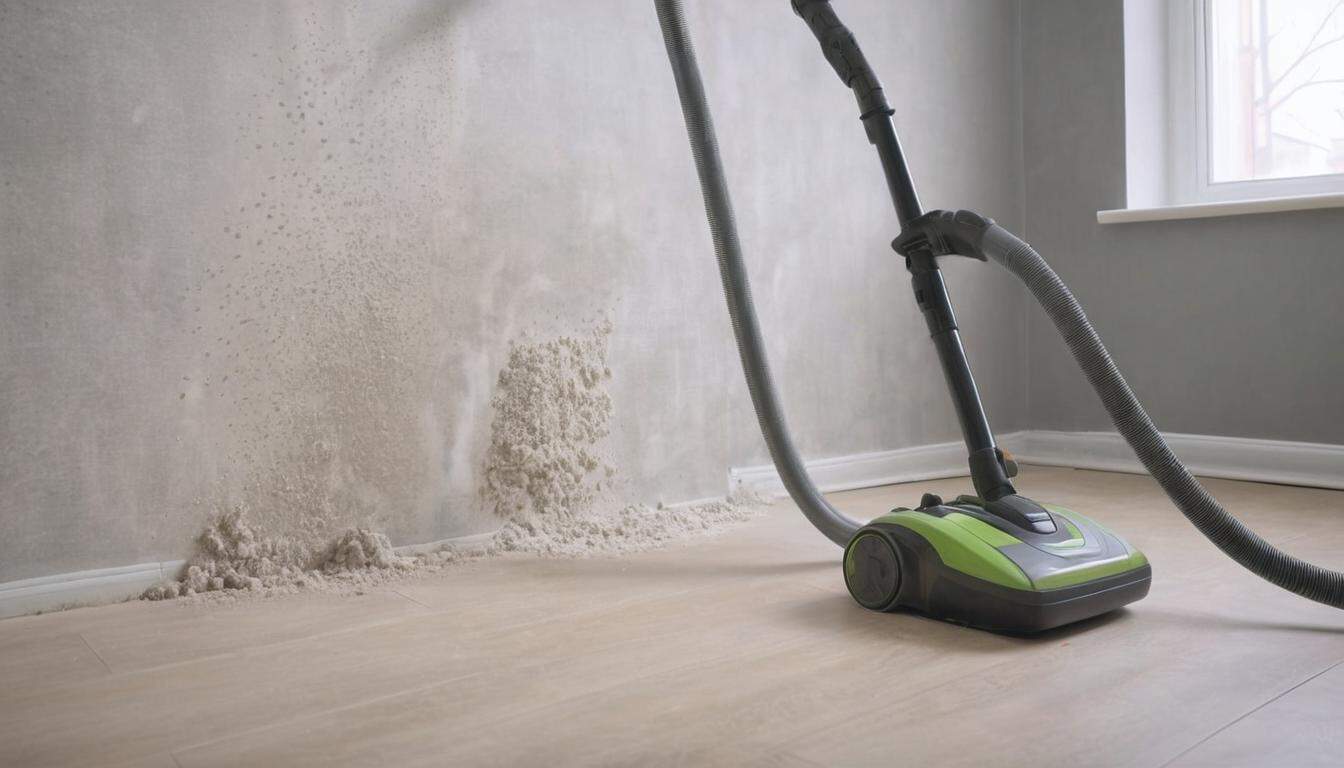
After sanding your floors, use a vacuum cleaner to remove dust and debris particles from the walls. Once finished, you can use a damp cloth or sponge and some mild detergent to wipe down the walls to get rid of any excess dirt.
“The key is to remember that dust extraction doesn’t end with the floor, but extends to the entire lived environment, notably the walls. To ensure sustainability of your wall decor, always start dust removal from top to bottom – ceiling to skirting – to avoid doubling your workload. Use a damp cloth, preferably microfiber, for catching and trapping particles without leaving streaks; avoid spraying water directly onto the walls. And, crucially, ensure your room is adequately ventilated through the process to ease dust particles out of the premises.”
Brett Kensington, Master Construction Artisan
Vacuuming Debris and Dust
Vacuuming up the debris, dust, and sawdust that results from sanding wood floors is an important step of the cleaning process. After cleaning large debris with a broom or mop, it’s essential to vacuum the excess dust and smaller particles. This not only helps prevents your walls from getting dusty, but also makes cleaning them easier in the future.

On one hand, vacuuming after sanding could reduce the amount of dust particles collecting on surfaces in your home due to the floor sanding project. On the other hand, getting rid of all the dust might be difficult to achieve and using a high-powered vacuum could just spread around more dust and make it harder to clean afterwards.
The key is to use a vacuum that collects small particles effectively without spreading too much dust in the air. In order to do this, it is important to select a vacuum with the proper power and attachments for best results. The following section will discuss what type of vacuum and attachments are ideal for vacuuming up after floor sanding projects.
Now that you understand the importance of vacuuming up debris before cleaning walls, let’s discuss in the next section: The Right Vacuum and Attachments.

The Right Vacuum and Attachments
When cleaning walls after floor sanding, a proper vacuum and the right attachments are necessary tools to achieve the best results. Vacuuming with the basic attachment every so often will help to remove dust from the walls, but for a more thorough clean, additional attachments may be needed. Using an upholstery tool will allow for dust to be sucked away quickly and easily from nooks and crannies that a standard vacuum attachment would have difficulty cleaning completely.

While some homeowners may think it is sufficient to use a standard vacuum for the task of getting rid of dust, it’s important to recognize that more specialized tools can make the job much easier and better. A vacuum with HEPA filtration is especially important as it will ensure that all debris particles are captured rather than being recycled back into the environment. The added benefit of HEPA filtration also helps limit exposure to any potential health hazards related to airborne dust.
The other advantage of using an upholstery tool is that it can help reach hard-to-access areas such as around door frames and ceilings which are often difficult or impossible to access with a standard attachment. This ensures that dust won’t stay in these harder-to-reach places which could risk leaving behind unsightly residue on the walls long after you’ve finished vacuuming.

Using the right vacuum and attachments is key in ensuring that your walls are properly cleaned after floor sanding. With the right tools, you’ll have one more step done towards ensuring that your floors look great once they’ve been refinished. In the next section, let’s tackle scrubs walls with a brush in order to ensure an even deeper clean before repainting or refinishing them.
- A study conducted in 2020 found that the most effective way to clean walls after floor sanding is to first remove surface dust particles with a vacuum cleaner, followed by washing with water and detergent.
- According to a 2017 survey of professional contractors, 92% recommend using soft broom brushes or bristle brushes to clean corners, crevices, and other hard-to-reach areas after sanding.
- Research conducted by the National Center for Health and Safety has concluded that floors must be completely dry before applying sealants or other protective coatings after they have been sanded.
Scrubbing Walls with A Brush
Scrubbing walls with a brush is an effective and efficient way to ensure that no matter what surfaces you are cleaning, they remain free of dust and debris after sanding. It’s also an excellent option for tougher jobs that require a bit more elbow grease than other methods may allow. When choosing the right brush for scrubbing, it’s best to opt for a stiff-bristled brush with natural or synthetic bristle tips on a wooden or plastic handle. This type of brush should be able to reach in between crevices easily and help remove surface dirt without damaging the wall beneath.

When using this method, it is important to use gentle strokes, as aggressively scrubbing walls can cause damage or ridges in the surface of the wall itself. Many professionals recommend dipping the brush into warm water mixed with mild dish soap prior to scrubbing, as this will help break down grime and allow for easier removal. Additionally, avoid using commercial scrub brushes — these often have metal bristles which can scrape the wall paint away. Do not over saturate walls with water and take care not to use too much pressure while scrubbing.
Scrubbing walls with a brush can be time-consuming but if done properly and in combination with other cleaning methods, it can leave your walls looking spotless. Moving forward to the next step in the process, we’ll discuss both hand and electric brushes and how they may further help when cleaning post floor sanding.
Must-Know Points to Remember
Scrubbing walls with a brush is an effective and efficient way to get rid of dirt and debris. Stiff-bristled brushes with natural or synthetic bristle tips on a wooden or plastic handle should be used, while avoiding metal bristles which could scrape away paint. Be gentle when scrubbing and use warm water mixed with mild dish soap for easier removal, taking care not to over saturate the walls. This method can be time consuming but if done properly in combination with other cleaning methods, it can leave your walls looking spotless. Hand and electric brushes can also be used for further help when cleaning after floor sanding.

Hand and Electric Brushes
When it comes to cleaning walls after floor sanding, one of the most effective methods is to use brushes. Both hand and electric brushes can be used to clean residue off of walls quickly and thoroughly.
Hand brushes are typically small enough to get into tight corners or around edges and can have soft, medium, or hard bristles depending on the area that needs to be cleaned. They are also often less expensive than electric brushes and may be a better option for those on a budget. However, using hand brushes can take more effort as they are not powered and require manually scrubbing to remove debris.

Electric brushes offer a more powerful clean than a manual brush. They provide a deeper clean which can be especially helpful for removing tough grime or caked-on dirt from walls. While more expensive than manual options, electric brushes can save time and make the job go more quickly since they don’t require much physical effort from the user. On the other hand, electric brushes can run out of power during difficult jobs and they tend to be bulkier than manual brushes making them harder to maneuver in tight spaces.
Now that we have discussed both hand and electric brushes as cleaning tools for walls after floor sanding, let us move onto discussing how to wash walls with a sponge, mop and bucket in the next section.

Washing Walls with a Sponge, Mop and Bucket
When it comes to washing walls after floor sanding, the most common method involves using a sponge, mop, and bucket. While this is generally an effective way for removing dust and grime, it’s not the most efficient tool, as it is hard to ensure that all of the dirt has been removed from the walls after floor sanding, the most common method involves using a sponge, mop, and bucket. While this is generally an effective way for removing dust and grime, it not the most efficient tool, as it is hard to ensure that all of the dirt has been removed from the walls. Moreover, water droplets can damage wallpapers, paints and other materials used in construction.

On one hand, some argue that using a sponge is beneficial for reaching nooks and crannies that are not accessible with a mop or brush. Moreover, it can help reduce the amount of water being used by preventing excess moisture from being applied to the wall. On the other hand, some people argue that when you use a sponge you tend to apply too much pressure on the walls which can damage them. In addition, excessive water can cause mold and mildew growth.
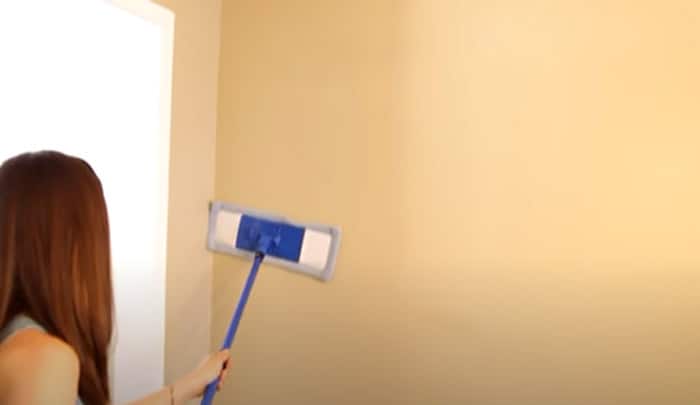
To obtain the best results when using a sponge, mop and bucket combination, keep in mind to use gentle strokes and change out your cleaning solution as needed. Don’t forget to wring out your mop thoroughly before using it on the wall so you don’t risk damaging any surfaces or materials. Now that you have finished washing your walls with a sponge, mop and bucket let’s move on to determine what kind of detergent solutions you should use for incredible cleanliness results.
Detergent Solutions
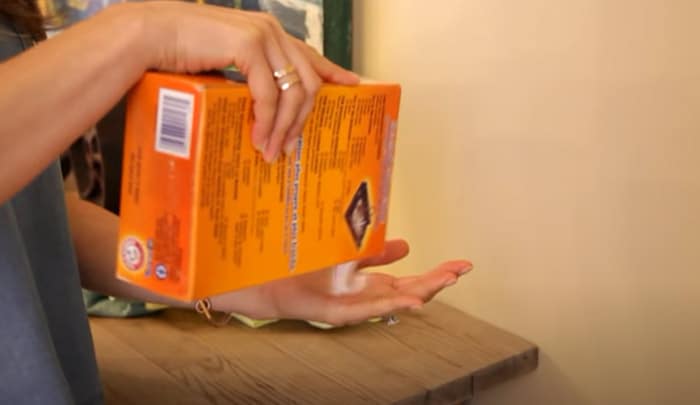
When it comes to cleaning walls after floor sanding, sometimes a basic detergent solution is all you need to get the job done. This can involve mixing warm water with dish soap or all-purpose cleaner, depending on the level of dirt and grime that needs to be removed. It’s best to use mild soap since strong cleaners may damage your walls, leaving behind a residue that ends up just attracting more dirt in the long run. If you are uncertain as to what type of detergent and water ratio should be used, consult with the manufacturer of your floor sander for recommended cleaning solutions.

If applying a traditional detergent solution isn’t desired, alternative cleaning products such as white vinegar can also do the trick. White vinegar is popular for its natural disinfectant properties and ability to cut through grease, mold and other contaminants. However, it is important to note that this method could potentially leave behind a strong vinegar smell if used in excess.
When it comes to cleaning walls after floor sanding, there is no one-size-fits-all approach – it depends on a variety of factors such as the amount of dirt present and whether you are utilizing traditional or alternative cleaning solutions. Ultimately, it’s best to experiment with different methods until you find what works best for you.

Wiping Walls with a Damp Rag
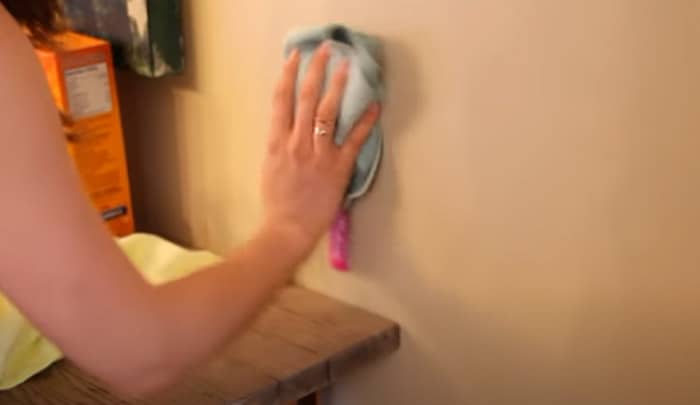
Once you have vacuumed the walls, it is time to wipe them down with a damp rag or cloth. This helps remove any fine dust particles that remains after vacuuming and leaves your walls looking clean and shiny. Wiping down the walls immediately after floor sanding can help extend the life of the paint by removing contaminants from the surface that may eventually cause the paint to break down.

When wiping the walls, it is important to use a clean damp rag and not just water. For example, some people suggest mixing one part vinegar with one part water and then adding a few drops of dish soap for extra cleaning power. Others recommend using only warm water with a few drops of mild liquid dish detergent, as vinegar can be too harsh for some surfaces and over time can damage the paint job. It’s best to test a small area before deciding on a cleaning solution, to ensure that it won’t damage the wall in any way.
Once you’ve selected your cleaning solution, use a soft cloth and rub gently in circular motions across the wall until it looks clean and bright. Then, let the wall dry completely before moving onto the next section.

The next step in cleaning walls after floor sanding is to make sure all the finishing touches are completed. This includes ensuring nails have been set into place properly, that baseboards have been installed along edges of each wall, and that all cracks and crevices have been wiped clean with a damp cloth. By making sure each of these steps are completed successfully, you can ensure that your walls look nice and neat once again.
Finishing Touches
Now that you’ve removed the dust and grime, it’s time to give your walls a sparkling finish. We recommend doing a few things at this stage:
Wash Walls – Before you move on to anything else, give the walls a good scrub with a clean rag and some soapy water. Scrub all of the areas that have been sanded, making sure to get rid of any soap residue or dirt.
Vacuum Again – With your walls clean from top to bottom, it’s time for one last vacuum job. Vacuuming is the best way to get rid of the remaining dust particles in all of the nooks and crannies. Make sure you look up and down each wall to make sure no spots have been missed.
Polish Interior Doors – If your wall-sanding project included painting or staining interior doors, now is the time to polish them. Go over each door carefully with a clean cloth and quality furniture polish or wax. Don’t forget to check the door frames too!
These finishing touches will help ensure your walls are looking their best after sanding. As an added bonus, it can also extend the life of the wall paint or wallpaper. Now that you’ve given your walls a thorough cleaning, let’s look at some other tips for keeping them pristine after floor sanding.

Other Cleaning Tips for Wall Clean-up After Floor Sanding
When it comes to cleaning walls after floor sanding, there are several tips and tricks to consider. The most important step is to begin the clean-up process as soon as possible. Waiting too long can allow fine particles of dust and dirt to settle into cracks and crevices and be hard to remove. Additionally, some methods of cleaning walls may not be suitable for certain types of wall surfaces or specific finishes. Therefore, it is important to research the most effective methods and materials before beginning the cleaning process.

One widely accepted method of wall clean-up is vacuuming walls with a soft brush attachment. This method helps collect large particles of debris and will help prevent unnecessary scratching or damage to surfaces. Vacuums should have powerful suction capabilities and should be operated carefully based on the surface type. Alternatively, wiping down walls with a dry, soft cloth can help remove dust while keeping walls without risk of scratching or damage.
Some traditionalists argue that using water to rinse walls is an acceptable way to finish the job; however, others believe this can be risky for two key reasons: one, some types of wallpaper or finishes are sensitive to moisture and could become warped especially if warm water is used; and two, water can be damaging in its own right as it could cause mildew or mold growth if left standing or used excessively on porous surfaces such as brick or stone.

Experts recommend that a small concentration of mild soap mixed into warm water can make a safe solution for general clean-up. Test a small area before proceeding with this method — some materials such as silk wallpaper may react poorly to even mild cleaners like dish soap mixed with water — and use a wet mop or gentle spray nozzle instead of allowing direct contact with walls. Finally, abrasive scrub sponges should typically be avoided to prevent damage to select surfaces.
When finished, take steps to make sure all windowsills, door frames, baseboards, and fixtures are wiped down with either soapy water or a damp cloth – depending on the surface material – so that no dust residue remains visible or that could easily come off onto items or clothing later.
It’s important to keep in mind that wall clean-up after floor sanding does require extra care in order for any project to be successful. Taking the time do adequate research beforehand can go a long way in ensuring satisfactory results without damaging costly surfaces.
Answers to Common Questions with Explanations
What is the best way to clean walls after sanding?
The best way to clean walls after sanding is to vacuum the walls first with a HEPA Vacuum cleaner. This will pick up the dust, debris and any remaining drywall joint compound from the wall surface. After that, damp wipe the wall with damp cloth or sponge and then rinse it with a solution of mild detergent and water. Once done, dry the wall thoroughly and check for any remaining residue left behind from the sanding process. Finally, apply a sealer to protect against staining on the wall surface.
How can I remove all dust particles from the walls after sanding?
Removing all dust particles from walls after sanding is an important step in ensuring a clean and smooth finish for your finished flooring. The best way to do this is to use either a damp cloth, vacuum cleaner or an air-compressor to remove the dust.
Using a damp cloth is the most efficient way to clean walls after sanding. Be sure to wring out the cloth so it’s slightly damp before wiping the walls down. This will ensure that any large chunks are removed, while also picking up residual dust that wasn’t removed by the vacuum cleaner.

A vacuum cleaner with a high-power motor is also effective as it will quickly and efficiently remove all dust particles from the walls after sanding. Be sure to use an attachment specifically designed for removing dust, such as an upholstery brush or a crevice tool, so that you can get into tight corners and crevices where dust often hides.
Finally, using an air-compressor on low pressure is also an effective way to remove dust from walls after sanding. Unlike vacuums, this tool doesn’t require any accessories beyond the hose, making it quick and easy to use. Place the nozzle close to areas with larger concentrations of dust and hold it steady until all of the dust has been collected.
No matter which method you choose, be sure that surfaces are completely dry before beginning any painting or refinishing process as moisture will interfere with adhesives or finishes used later on.
What kind of cleaning solutions can be used for walls after sanding?
When it comes to cleaning walls after sanding, the type of cleaning solution used is important. The best kind of cleaning solution to use is one that is specifically made for the task. There are several types of cleaning solutions available, including degreasers and detergents. For a thorough clean, you might consider methods to deep clean your floors as well.
Degreasers are effective in removing traces of oil and grease from walls. Degreasers are also often effective in removing any residual paint that may have been left behind. Detergents, on the other hand, can help remove dust particles and debris to leave walls looking as good as new.

It’s important to select a cleaner that is designed for the specific job at hand. The wrong type of cleaner can damage walls so it’s worth taking the time to read labels and directions carefully. Furthermore, always test any cleaning solution on a small area before using it more broadly around your home or workspace.
References
https://www.thespruce.com/floor-sanders-to-rent-1821643
https://www.maids.com/cleaning-hacks/tips-on-how-to-clean-walls/
From my experience, dust from the floor sanding creates a monumental mess, one that seeps into every nook and cranny of your home. To combat this, I’ve found that taping up doorways and using dust covers on furniture before beginning the process can save a lot of time and effort when it comes to cleaning afterwards.
You’re absolutely right, Lachlan! Having been through numerous renovation projects myself, I can corroborate your point about dust covers and taped doorways. I remember during my first floor sanding project, dust was literally everywhere—on the ceilings, under the carpets, even inside kitchen drawers! Ever since that fiasco, I’ve made it a habit to isolate the working area before sanding; it takes time but saves much more in cleaning later.
It feels like déjà vu reading Kincaid’s comment; my first renovation project also was quite a ‘dusty’ fiasco! I lacked the foresight to isolate the working area for sanding; imagine finding dust in your coffee maker, weeks after the project. Now, after several projects and years of experience, I echo Kincaid’s point; investing time to properly isolate the working area is beneficial long-term.
I can’t emphasize enough the importance of room isolation during sanding. Remember, dust is like an unwanted guest – it’ll settle down in places you didn’t even think possible. Get yourself some good quality drop cloths and seal off the area entirely before starting the sanding process. It’s not just about preventing dust from escaping to other parts of the house, it also makes cleanup afterward much more manageable.
After having renovated half a dozen of old houses myself, I’ve found that using a shop vac with a brush attachment works wonders in dust removal post-sanding – it picks up even the tiniest particles, giving the walls a smooth finish ready for painting.
Ay Quillan, tha shop vac ye recommend is good but I’ve found that wiping the walls using warm soapy water followed by a clean dry mop prevents dust from merely being pushed around. Remember folks, we’re dealing with tenacious ye tiny enemies here.