You’ve designed the perfect wooden piece for a project, but you don’t want to see any movement between the pieces—it has to stay together in one solid form. You don’t want to schlep from store to store to buy the necessary glue or screws, and you don’t want any metal pieces visible on your project either. The perfect, permanent solution? Laminate wood together.
Laminating wood is an effective and permanent solution that can be done without the need of an expert carpenter or access to expensive materials. In this blog post, we’ll explain the woodworking glue-up process, from choosing lumber and plywood to aligning boards, applying wood glue, setting clamping pressure, and allowing full curing time. If your project is actually a floor installation, our guide to installing laminate flooring covers that separate topic. Ready to learn how to make your wood pieces stick together without a fuss? Let’s dive into the amazing world of laminating wood together!
First, check that your lumber or plywood is dry and flat, then square the board edges, spread a thin, even layer of wood glue on the mating surfaces, align the grain, and clamp the assembly with steady pressure until the glue line has fully cured. Thanks to careful prep and curing time, the finished laminated panel will be stronger, smoother, and more durable.
“When it comes to laminating wood, the kind of glue used significantly impacts the final result. I’d recommend using a specialist wood laminate adhesive, such as polyvinyl acetate, or PVA glue. This adhesive is known for creating a long-lasting bond and is easy to work with. Additionally, it’s water-resistant and dries clear, offering a clean, professional finish. However, if you encounter issues with your laminate floor not locking properly, it’s important to address this promptly to ensure a secure installation.”
Jacqueline Greensmith, Woodworking Author & Professional
Tips for Prepping Wood for Lamination
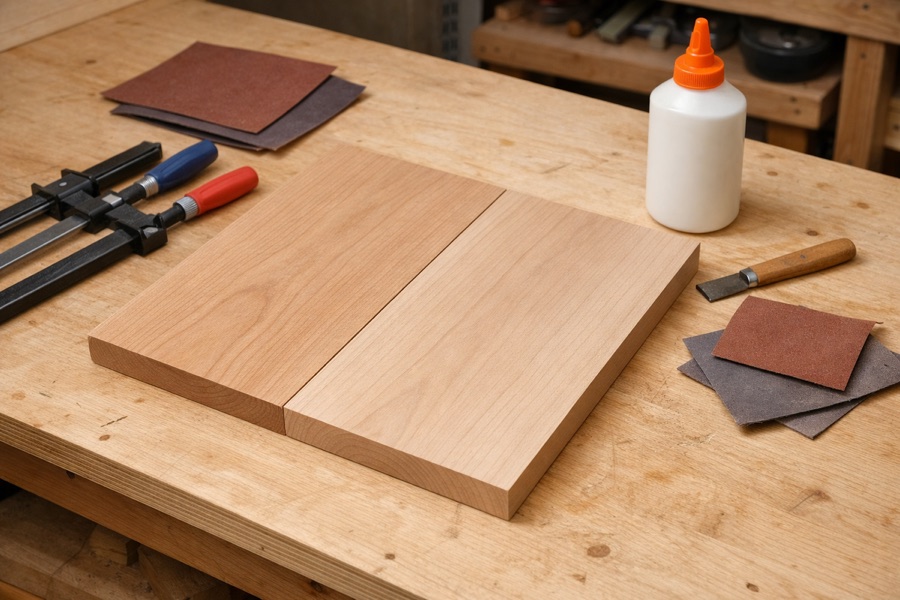
Lamination is an excellent way to join pieces of wood together, making it ideal for a range of projects. To join the wood successfully, the pieces must be accurately sized and then properly prepped. This section will discuss tips for prepping wood in preparation for lamination. Let lumber, hardwood, or plywood acclimate in the workshop first so the moisture content and humidity are stable before the board faces are glued.
The first step is to cut the wood pieces in order to create an accurate size and shape. Make sure to use a saw with sharp blades that are designed for cutting woods of different densities, like a miter saw or jigsaw. If you’re using power tools make sure to wear safety glasses and hearing protection as well as protective clothing. Additionally, this is also a good opportunity to check if there are any knots, twist, cup, or other imperfections that could weaken the joint or keep the top face from sitting flat.
Next, sand the pieces of wood on all sides. This will help ensure that the wood fits together correctly by removing irregularities in the surface and creating a smooth contact point between them when they are joined. Start with a lower grade sandpaper that has a 40-80 grit rating and work your way up to 120 or 220 grit paper. Also make sure that each piece is thoroughly sanded on all sides and edges before moving onto the next one.
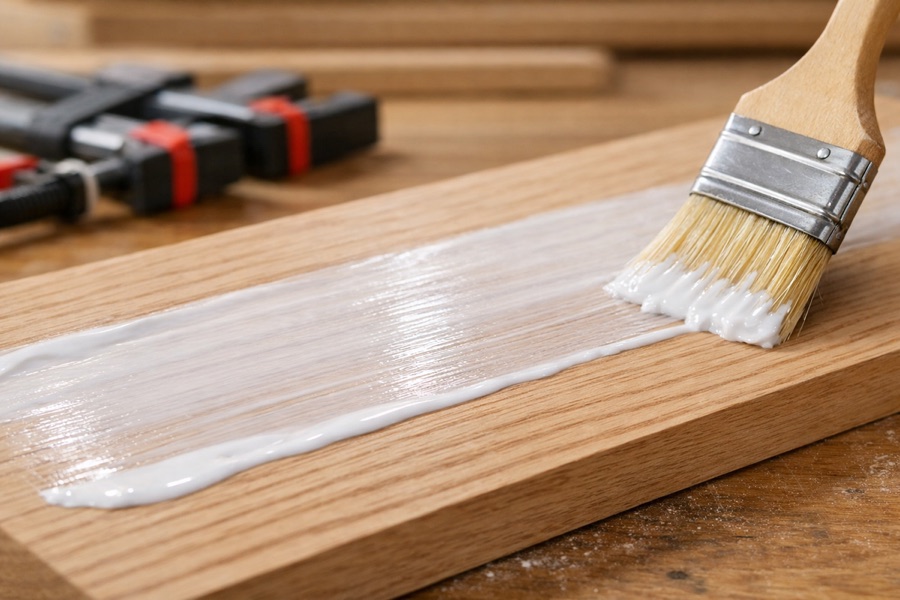
Finally, apply glue to both surfaces before assembly. This will provide the strongest bond possible once the two pieces of wood are clamped together. It’s important to spread a thin layer of glue evenly across both surfaces; otherwise you might end up with dry spots, a starved glue line, or weak spots in the joint that could cause it to fail over time. Assembling the parts without glue won’t provide enough strength; therefore any investment at this stage will pay dividends in terms of longevity.
Now that your pieces of wood have been cut and prepped correctly, you can move onto the next step: cutting them into shape so they fit perfectly when laminated together.
- According to the National Wood Flooring Association, laminating wood offers greater strength and stability than alternative methods of jointing timber.
- Glue laminated wood structures have been shown to have mechanical strength properties up to five times higher than those made from solid timber members.
- A study published in 2018 found that using dowels for lamination was more effective than using screws alone for joining hard woods together.
Cutting the Wood
Cutting the wood is an important step in the laminating process as this is forming the base of the final product. In most cases, it is more cost effective to cut pieces of wood that are slightly larger than required in order to allow for slight imperfections in cutting and measurements. In most home improvement stores, pre-cut pieces of wood can easily be found, but rough stock gives you more control over the final width, thickness, and grain match.
When considering what kind of saw is best for cutting wood, there are two main options: a hand saw or power saw. Hand saws provide greater control and accuracy when measuring the size and angle of cuts. However, if precision is important for the project, using a power saw like a miter saw or table saw will provide sharp, repeatable cuts perfect for fitting pieces together precisely. If the stock is bowed or rough, a jointer or planer can help create flat faces and square edges before glue is applied. Additionally, power saws can make straight cuts with ease and speed up production time significantly.
The last decision to make when cutting wood is what type of blades to use. For softer woods like pine, using a crosscut blade instead of a rip blade is essential as it helps reduce blow outs and splintering. Blades with carbide tips also help prevent chipping which can be beneficial if attaching hardwoods like oak.
Finally, while laminating two pieces of wood together requires symmetrical cuts in order to ensure a good fit; the two pieces need not be identical as they will be held together by adhesive or glue. With that said, paying attention to quality is important; even small errors can become exaggerated when joining multiple boards together one after another.
After cutting the pieces to size, the next step in successfully laminating wood together is selecting adhesives and glues best suited for the project. It’s also crucial to know how to stagger laminate flooring properly to achieve a professional look and enhance the floor’s stability.
Adhesives and Glues
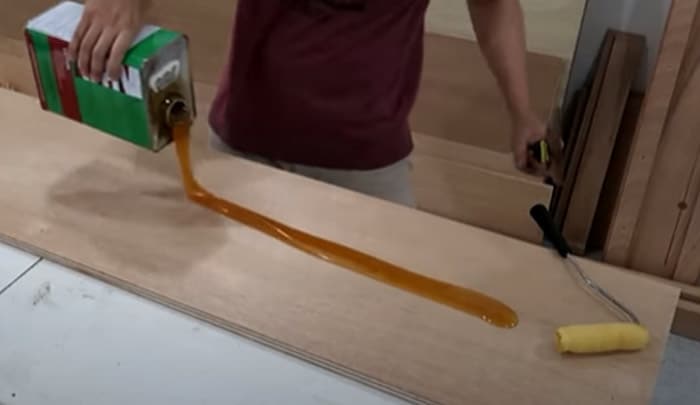
Adhesives and glues are essential elements of laminating wood together. For most carpentry and furniture glue-ups, yellow PVA wood glue is the default because it spreads easily, creates a durable bond, and cures with a thin glue line between two pieces of wood. Adhesives, such as plastic resin glue, are fast-drying, permanent, and provide a durable bond between two pieces of wood. On the other hand, liquid hide glues require some degree of maintenance, as the bonds must be re-activated in order to keep the wood secure. Glue sticks, on the other hand, may not last as long as plastic resin glue or liquid hide glue, but they are easy to use with minimal mess.
When laminating wood together, it is important to consider what type of adhesive or glue should be used for your project. Different types suit different types of projects, from requirements for a strong hold that will last for years or a more temporary situation where ease of use is more important than permanency. Match the product to the material, whether you are bonding hardwood, plywood, veneer, or a thicker laminated panel.
Selecting the best glue for your project is essential for creating the best results and ensuring the long-term strength and stability of your woodworking project. In the next section we will discuss how to select the right glue type for a successful lamination project.
Selecting the Best Glue for Your Project
When selecting a glue for your wood lamination project, it’s important to choose the right type for the job at hand.
Contact adhesive is one of the most popular adhesives used for wood lamination as it is easy to apply and provides a lasting hold. This type of adhesive typically comes as a thick paste or liquid and is easily applied with a brush or roller, depending on your project requirements. Be sure to check the manufacturer’s instructions regarding application to maximize durability and prevent any damage to the wood.
Liquid hide glues are also an option for wood lamination, however, this type of adhesive usually requires higher application temperatures. While offering a strong bond, you may require specialist equipment such as a heated spreader to apply this type of glue safely and efficiently.
Epoxy resins are also popularly used in wood lamination projects as they provide strength at lower temperatures than traditional contact adhesives or liquid glues, while still offering excellent water resistance. That said, epoxy resins must be properly stored and carefully mixed prior to use and can emit harsh fumes once cured if inhaled. Therefore, it is essential that the proper safety precautions are taken before handling this type of adhesive.
No matter which type of glue you choose for your project, always adhere to the manufacturer’s instructions to ensure precision when applying, open time, clamping time, and best results after curing—it might make all the difference!
Now that you have considered all of your options when it comes to selecting the best glue for your project, it’s time to fit the pieces together and get started on laminating your wood!
Fitting the Pieces Together
When working with wood, one of the most important steps is fitting pieces together. As any experienced woodworker knows, accuracy and precision are paramount when it comes to laminating wood together. Before beginning the lamination process, you need to accurately fit the boards together so that they have a tight bond and the faces align across the full length.
The best way to do this is to use dowel pins. Dowel pins provide stability and support for the two pieces of wood, making sure that the linear grain lines up flush. Carefully measure and mark where the two pieces will join and make sure the pins fit in each hole carefully. This dry-fit experience also helps you find any bottom or center gaps before glue makes the assembly harder to adjust. You can also use biscuits or tongue-and-groove joint techniques to create an even stronger bond between pieces.
Another common technique used to fit two pieces of wood together is pocket hole screws, which are used to prevent movement or shifting from occurring with multiple pieces of laminated wood before applying glue. Pocket hole screws are simple to use providing a strong connection for area’s not seen such as on the back side of cabinets, frames, etc.
No matter what technique you choose, it is essential to take your time and be precise when measuring and marking off joints prior to lamination. A clean dry fit should let the faces meet each other without forcing one side higher than the other. It is better be conservative when trimming off excess amounts of wood in order to ensure a snug fit between your pieces of wood which will not only look better aesthetically but make for a tighter seal once the lamination process begins.
Once you have securely fitted the two pieces together its time to move on to sanding and squaring off edges for a smooth transition between pieces.
Sanding and Squaring Off Edges
Sanding and squaring off edges is a crucial step if you want the lamination process to be successful. This process ensures that all of the surfaces are uniform and smooth, which allows for a better bond between the laminates. Before you begin sanding, make sure you have all appropriate safety gear on, including a dust mask, eye protection, and work gloves.
One of the most important pieces of advice when sanding is to start off with a coarse grit paper and gradually changing to a finer one as you go along. It is also important to pay close attention to any sharp edges as they may cause problems down the line. A good rule of thumb is to use sandpaper no less than 80 grit before switching to 220 grit.
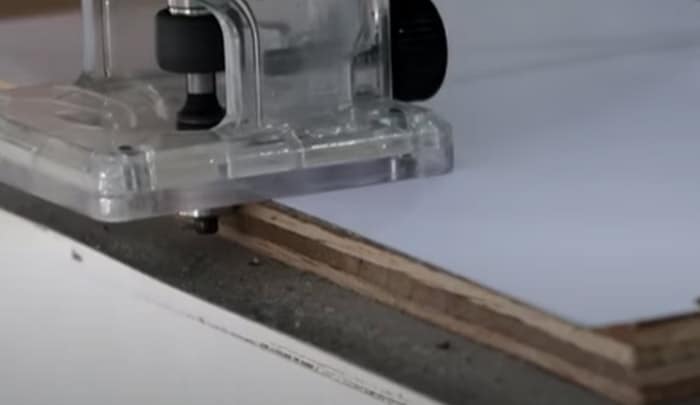
In addition to sanding, it’s important to square off the edges of your wood before gluing the two pieces together or gluing them into a frame. Using either a chisel or an electric router will give you clean lines and crisp edges every time; however, some woodworkers prefer using handheld wood files for more precise adjustments.
While both methods can produce good results, it’s important to remember that chiseling creates dust that needs to be properly cleaned off in order for the glue application process to be effective. On the other hand, electric routers can create precise angles faster and with less mess overall.
No matter what method you choose, squaring off all of the edges will not only help ensure a secure bond between your laminates but will also make your project look polished in the end.
Now that you have read through this section on sanding and squaring off edges, let’s move on to learn about laminating the wood in our next section!
Laminating the Wood
Laminating the wood is an important step in a woodworking project. The goal of lamination is to create a strong bond between different layers of wood, allowing for a stronger, more secure panel than the sum of its parts.
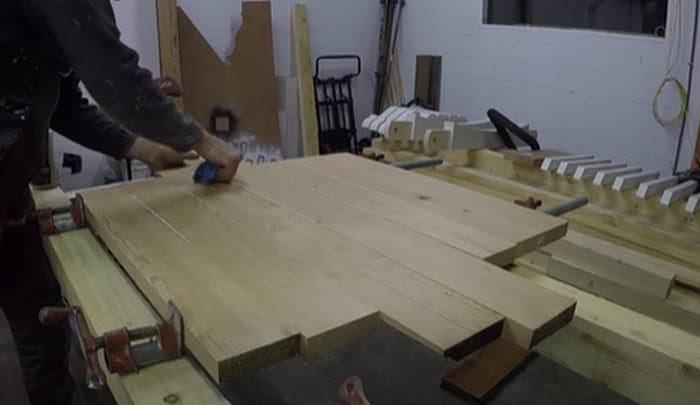
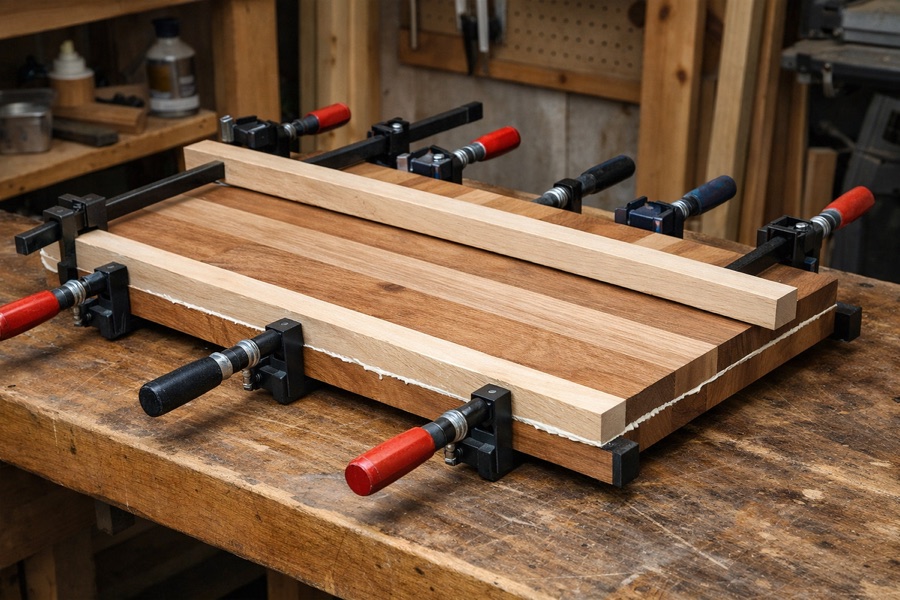
To laminate wooden pieces, begin by spreading wood glue across the prepared surfaces, bringing the faces together, and clamping them in place. Use enough clamps to apply steady clamping pressure across the width of the boards, and place cauls above and below the panel when you need the top and bottom faces to stay flat. A small, even bead of squeeze-out along the glue line is usually a better sign than dry gaps or puddles of adhesive.
Check alignment from the side and from the end before the glue starts to tack. If one board creeps out of place, loosen the clamp slightly, tap the piece back into line, and retighten evenly. Follow the glue manufacturer’s curing time before removing clamps, sanding, or putting stress on the assembly.
Finally, use a palm sander to sand down any rough edges and clean up any excess glue or debris from around the edges of your project. This helps create a nice seamless join between each piece of wood.
Finishing the project is necessary to ensure it looks great and functions properly. The next section will provide tips and advice on how to finish off your lamination project for best results.
Glue-Up Checklist for Boards, Grain, and Clamping Pressure
- Check every board face before assembly. Rough stock, bowed lumber, or mismatched plywood sheets should be jointed, planed, or sanded so the thickness, width, side, and end of each piece meet cleanly.
- Plan the grain direction before glue touches the surface. Keep the top face attractive, align board edges along the full length, and mark the bottom face so the pieces do not get reversed during the glue-up.
- Choose the right joinery for the material. A simple edge joint works for many panel laminations, while dowels, biscuits, or tongue-and-groove joinery can help with alignment on thicker boards, maple stock, or furniture parts.
- Watch the glue line and clamping pressure. Spread enough wood glue for continuous bonding, tighten clamps from the center toward the ends, and use cauls so pressure reaches both the top and bottom surfaces without bowing the panel.
- Control drying, curing, moisture, and humidity. Leave the assembly in a stable workshop until the adhesive has cured, then inspect for warping, open joints, or uneven laminations before sanding and finish work.
Finishing the Laminated Wood Project
Once the wood has been cut and glued together, it is time to finish off the project. Finishing an item made with wood lamination will vary depending on your desired outcome, as well as the type of timber being used.
When finishing a project created with wood lamination, it is important to keep in mind that the way each layer is finished can affect the end result significantly. A furniture panel, tabletop, or small cabinet part should be allowed to cure fully before final sanding so the surface stays smooth. The appearance of each individual layer will be visible once laminated unless a filler or veneer is used. If a filler is applied to the back, it may be necessary to smooth out any air bubbles that form and allow for uneven surfaces.
Most professionals recommend using either a spray-on lacquer or pre-catalyzed lacquer for even coating and a smoother finish. If you would prefer to stain your piece, make sure to apply several coats and let it dry in between coats until your desired color has been achieved. In addition, if you want to add extra protection against heat or moisture, you can apply polyurethane over the top of any other finishes used.
Depending on what type of finish you are aiming for, some sanding may be needed after the application of lacquer or polyurethane. It is important to remove dust particles that have accumulated during this process before adding a final coat of varnish or wax to give the project its finished look.
Finally, once completed, wipe down your wood lamination project with a clean cloth and inspect it carefully. Any bumps or discrepancies should be corrected immediately before proceeding further. This step may require more than one round of cleaning and minor adjustments in order to perfect the wooden construction.
With the finishing process complete, you have successfully put together a unique and beautiful piece crafted from wood lamination! Now that you have mastered this skill, it’s time to move onto the next section: Additional Tips for Crafting With Wood Lamination.
Additional Tips for Crafting with Wood Lamination
When laminating wood, it is important to pay special attention to the process in order to ensure a successful outcome. Here are some additional tips that can help you craft with wood lamination more effectively and efficiently.
1. Select the Right Glue: When laminated wood projects are created, a strong adhesive must be used to ensure pieces stay bonded. Wood glue is usually the best choice for ordinary lumber, plywood, and hardwood panels. For best results, use a seam adhesive designed specifically for woodworking. These glues are stronger and more flexible than regular carpenters’ glue and will bond better, ensuring a high performing and long-lasting piece of work.
2. Practice On Scrap Material: Before undertaking a larger project, experimenting on scrap material can reveal what type of adhesive works best for the specific type of wood being used. It also gives the crafter a chance to practice techniques before moving on to the main project.
3. Use Clamps: To guarantee that each joint is completely secure, clamps should be used in conjunction with the glue. Add straight cauls when the board faces need help staying level. The amount and size of clamps will depend upon the size of the project but it is important that each joint is clamped evenly and snugly so that nothing can be shifted during or after lamination has been completed. Too much clamping pressure can squeeze out too much glue, while too little pressure can leave a weak glue line.
4. Consider Vacuum Forming: Vacuum forming is another effective way to ensure an even lamination by creating pressure evenly across both surfaces being glued together. Using this method may require special equipment, but if available can help produce perfect lamination every time and prevent air bubbles or incorrect adhesion between two pieces of wood.
5. Keep Layers Thin: If working with multiple layers of wood, each layer should remain thin in order to reduce any warping or cupping which may occur over time as the piece ages or is exposed to heat, humidity, or moisture changes in its environment.
6. Finish With Sealant: After lamination has been completed, sealants such as varnish or lacquer should be applied before polishing for an even finish across all surfaces. This helps protect the material from damage too, making it last longer without deterioration or fading of color or texture over time.
Wood Lamination References
https://www.familyhandyman.com/list/tools-for-laminate-flooring-installation/


