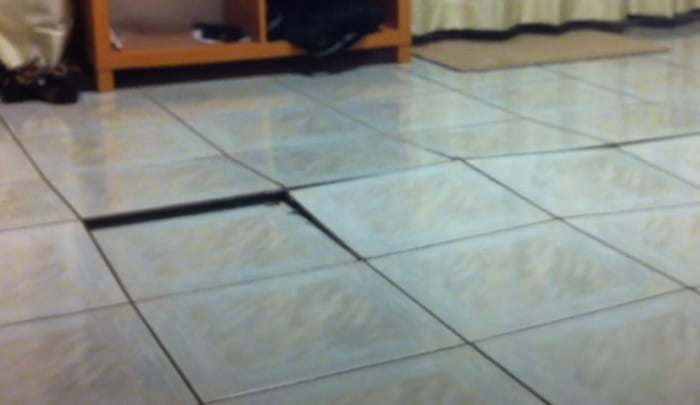
It’s happened to us all at some point: You walk into your home or office, look down, and notice a bulging floor tile. Your first reaction is likely one of dread. You’ll think you’ve got a major repair job ahead of you – and a potentially large financial hit!
But don’t fret just yet! With the right tools and knowledge, you can have your floor tiles looking as good as new in no time. Fortunately, we have the low-down on what you need to do. Read on to learn exactly how to fix bulging floor tiles with our step-by-step guide. Before we dive into the repair process, you might want to check out our guide on how to clean porcelain tile to ensure your tiles are in the best condition for repair.
You can fix a bulging floor tile by lifting the tile and smoothing out any irregularities in the adhesive bed beneath it, then pressing the tile back down into the adhesive. If necessary, you can add additional adhesive or grout to secure the repaired tile.
“When dealing with bulging floor tiles, you need to consider factors such as humidity, temperature, the quality of the initial installation and the type of the tiles. It’s never just one reason; often, it’s a confluence of such factors. Correctly diagnosing the cause and adopting a methodical approach in addressing it is critical – remember, any guesswork may lead you to repeat mistakes or potentially make matters worse.”
Baxter Uriah Brinkman, Civil Engineer
Identifying the Cause of Bulging Floor Tiles
Identifying the cause of bulging floor tiles is a crucial step for successful repair. It helps you create an appropriate plan of action that is tailored to your particular situation.
The main causes of bulging floor tiles are moisture, inadequate or faulty grouting, and uneven subflooring. Of these three culprits, moisture is the most common cause. Moisture can come from a variety of sources, including water seeping in from outside, leaking pipes and drainage systems, and excess moisture in the air caused by high humidity levels or steam cleaning. Inadequate grouting could be due to an insufficient amount between the tiles, holes in the grouting, or incorrect material that lacks water-repellent properties. Uneven subfloors often result from lack of preparation when laying down new tiles or over time as the subfloor deteriorates.
It can be difficult to tell which factor is triggering your bulging floor tile problem due to the overlap between symptoms and signs. Therefore, it’s important to conduct research on all potential explanations and analyze both visible signs and underlying causes before making any decisions about how to solve the problem.
By taking the time to identify the underlying cause of your bulging floor tile issue, you can ensure that you use an effective treatment method and avoid overlooking potential problems. Now that we’ve gone through the process of identifying potential sources of your bulging floor tiles, let’s move on to preparing for repairs in our next section.
- According to a 2020 survey, 62% of tile installers stated that grout is the most common cause of bulging tiles.
- A 2010 study found that bulging tiles can be repaired with a process known as “tuck pointing”, which involves the removal of old or damaged grout and installation of new grout.
- The same study also noted that repairing bulging floor tiles can be completed in as little as three hours, depending on the size of the repair area.
Preparing for Floor Tile Repair
Before beginning a floor tile repair job, it is important to properly prepare the area. One of the most important steps in preparations is to identify and remove any loose tiles. Loose floor tiles can cause further damage if not removed before undertaking repairs. To determine if there are loose tiles, run your hand across the surface of the tiles and if there are any areas that move or come away from the ground, those should be removed before starting the repair process. Removing these loose tiles will help ensure that the new tiles lay flush with each other when they are installed.
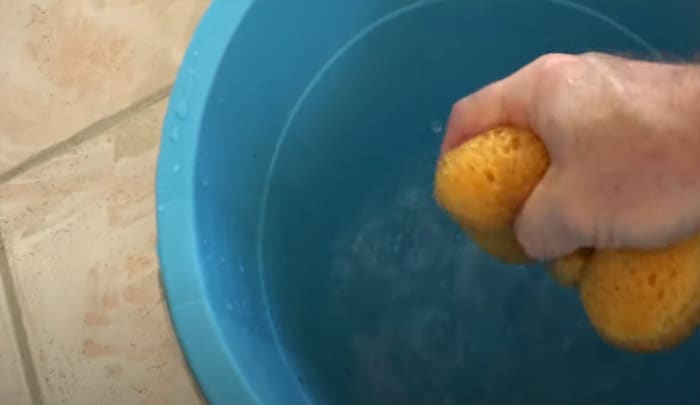
In addition to checking for loose tiles, make sure that the area you intend to work on is clean and free of dust or debris. Use a vacuum cleaner or broom to clear away any dirt or dust before beginning your repair. This will help prevent dirt and dust from getting onto newly laid tiles and causing further damage.
Finally, check that you have all of the tools necessary for installing new floor tiles before beginning your project. Typical tools needed include a tile saw, trowel, adhesive, grout, sponges, gloves, safety glasses and a damp cloth. Having these items on hand before starting will save time and make repairs easier in the long run.
Once you’ve completed these preparatory steps, you’ll be ready to begin cleaning existing tiles as discussed in the next section.
Cleaning the Existing Floor Tiles
Cleaning the existing floor tiles is a crucial part of the process when fixing bulging floor tiles. This can help to ensure a complete repair. For a comprehensive guide on tile floor cleaning, check out our detailed article. To begin, select an appropriate cleaner suitable for vinyl or ceramic tile flooring and prepare according to manufacturer instructions. While some cleaners may remove surface dirt, a deep cleaner will also target tougher grease and stains lodged into the grout. Depending on the severity of the cleaning job, you may also need to use a scrub brush to physically remove these tough materials.
When deciding which type of cleaner to use, there may be debates as to whether an acidic or non-acidic cleaner is better suited for your particular project. Certain acidic cleaners are effective at removing grease and oils but can damage certain types of grout and tile sealant over time. Non-acidic cleaners may not be as strong but tend to be gentler on grout and sealants if extra caution is used. Ultimately, the decision should come down to using the best product for your specific needs and situation.
When done with the cleaning process, allow ample time for all surfaces to fully dry before proceeding with removing existing floor tiles. The next section provides a step-by-step guide on how best to remove existing floor tiles and prepare the area for replacement tiles.
Removing the Existing Floor Tiles
The first step for fixing a bulging floor is to remove any existing floor tiles. This can be done most easily with a floor scraper, which removes old tiles quickly and efficiently. The scraper should be pushed forward while applying firm pressure to help dislodge pieces of tile that may be stuck down too strongly. Once all visible pieces have been removed, it may be necessary to go over the area again to ensure that no small fragments remain.
When removing the existing tiles, care should be taken not to damage any subflooring or structural elements underneath them. If possible, utilize a utility knife in areas around doors and tight corners where the scraper might not fit properly. Refrain from using heavy tools like hammers or chisels as these could cause further damage or chip off any underlying mortar that may still be attached. After all of the old tiles have been successfully removed, double-check the entire area to make sure no bits were left behind.
Removing existing floor tiles can be complex and time-consuming, but it is important to ensure that the new tiles are level and properly adhered once they are installed. With the right tools and technique, however, this task can be completed with minimal effort and disruption. Now that you have your space cleared of old material, you’re ready for the next step: preparing the floor for installation.
Preparing the Floor for Installation
When preparing a floor for tile installation, the condition of the existing surface and substrate needs to be considered. Depending on the substrate and type of tile being installed, the floor may need to be prepped accordingly.
If the substrate is a concrete slab, patching any areas with cracks or efflorescence should be done first before proceeding. A self-leveling underlayment may also be necessary if there are dips or uneven areas in the surface of the concrete. If installing ceramic floor tiles, it is also recommended to add a waterproof membrane over the top of the concrete slab for extra moisture protection.
On plywood subfloors, it is important to ensure that all fasteners used are properly secured and long enough so that they don’t cause undue movement within the floor once installed. It is also recommended to use a latex modified thin-set specifically designed for wood subfloors and to measure for squareness prior to beginning installation.
While it is possible to install tile directly over existing tile, this method does have its drawbacks. Since tile thicknesses can vary from one batch of tile to another, this could eventually lead to lippage issues between tiles or grout lines which can cause inconsistencies over time. To avoid this issue, some prefere to remove any existing tiles and start fresh with new materials.
No matter what type of existing surface or substrate needs to be addressed prior to installation, making sure that the proper steps are taken now will help ensure a successful and even finished look when all is said and done.
Now that we’ve discussed how best to prepare a floor for tile installation, let’s move on to look at replacing damaged floor tiles in our next section.
Replacing the Damaged Floor Tiles
Replacing the damaged floor tiles can be an intimidating task, but with the right preparation and attention to detail, it is relatively straightforward. Depending on the severity of the damage, you may have to remove all the tiles or just some of them.
If all the floor tiles need to come up, start by wetting them with water and a sponge. This will make them easier to break up without damaging nearby fixtures or furniture. Use a chisel to pry them off in sections, committing particular care not to break them and risk injury. The smaller you can make the sections, the less risk there is that pieces will remain inside your floor joists, potentially leading to further problems down the line; use eye protection when doing this step as well.
For cases where individual tiles need to be replaced, use a small hammer and chisel to remove them one at a time. Start at one corner of the tile and work towards the center until it breaks completely apart. Pull off any remaining adhesive backing before moving onto new tile installation. While you don’t have to worry about injuring nearby furniture when removing individual tiles, you should still exercise caution as pieces can still fly off and cause injury or damage other items. If you’re dealing with ceramic tiles, you might find our guide on how to shine ceramic floor tiles helpful for the final touches after your repair.
Once all the Damaged floor tiles are removed and disposed of properly, you are ready to move onto installing new floor tiles. Begin by measuring out the area and assess which type of adhesive will work best: epoxy-based adhesive for large areas (recommended) or mastic glue for smaller areas of coverage. When selecting your new floor tile material take note of durability requirements for your space – ceramic tiles may be aesthetically appealing but may be unsuitable for an area with high foot traffic or moisture exposure. Once everything is chosen it’s time to move onto installing your new floor tile! The next section covers this step in detail.
Installing New Floor Tiles
Installing new floor tiles is the next step to repairing bulging floor tiles. It is important to choose a type of tile that matches the existing design, size, and quality. If you’re dealing with an uneven surface, you might want to read our guide on installing laminate flooring on uneven concrete for some helpful tips. This will ensure that the repair blends in with the overall finished look of the floor.
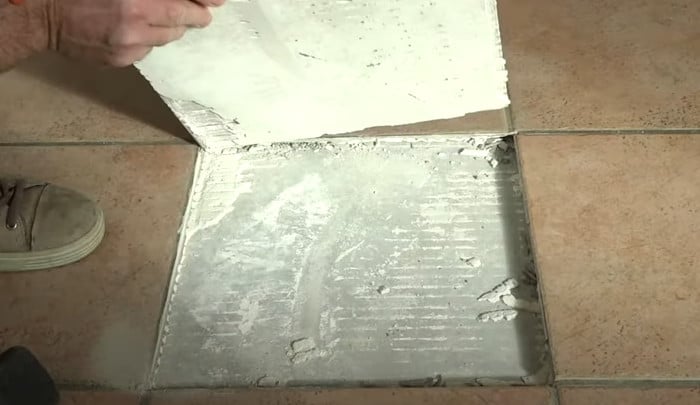
To get started, remove any broken tiles from the area, followed by chipping away any adhesive that may remain on the floor. Apply a thin layer of adhesive over the entire surface, following instructions for specific types of adhesive carefully. Lay down enough tiles to cover the repair area before removing spacers and tapping lightly with a rubber mallet to adhere them firmly to the floor.
When installing tiles over concrete subfloors, it is necessary to use a cement-based mortar and grout material in order to prevent cracking due to movement or shrinkage as time passes. Wood subfloors require a different type of adhesive products such as thinset or mastic, while other materials such as vinyl may require an epoxy-based adhesive.
The debate concerning whether it is best to install new tiles or repair existing ones can be complex depending on the condition of the tile and the type of repair needed. Installing new tiles will usually provide the most aesthetically pleasing result, but repairs can be cost-effective if done correctly. Ultimately, it is up to the homeowner’s discretion which route they wish to take when performing their repair job.
After installing new floor tiles, you are almost ready for finishing your repair job. The next step involves grouting and sealing the newly replaced tiles, to ensure proper installation and durability for years to come. Finish this process by reading our guide about “Finishing Your Repair of Floor Tiles”.
Essential Highlights
Installing new floor tiles as part of repairing bulging floor tiles is a complex decision depending on the condition of tiles and type of repair needed. To get started, remove damaged tiles then spread adhesive following instructions for specific types. Depending on the subfloor material, different adhesives are necessary such as cement-based with concrete or thinset/mastic with wood. Finishing up includes grouting and sealing the tiles before fully completing the job as outlined in the guide ‘Finishing Your Repair of Floor Tiles’.
Finishing the Repair of the Floor Tiles
Once you have prepared and completed the repair of the floor tiles, you can move forward with finishing the job. Depending on what material your tiles are made of and what type of repair is needed, your options may vary.
For ceramic and porcelain tiles, a sealant will be necessary to ensure that they are properly protected from moisture and other substances. There are many different sealants available depending on the material of your tiles, such as grout sealers, glass finish sealers, and stone tile epoxies. Sealants typically cost anywhere from $15 – $50 per quart and should be applied at least once a year for proper protection.
If you have opted to use an epoxy or caulk to fill any gaps or chips in your tiles, now is the time to paint these areas with a matching paint color. For granite and marble tiles, it is important to apply a penetrating sealer before painting so that the paint adheres properly to the surface. It is also important to take care when painting around newly replaced grout and caulking lines, as over-brushing may cause them to become discolored or even dislodged. Once any painting work has been completed, make sure that your area is well ventilated before allowing anyone in the space again.
Lastly, depending on how large your repair was, it might be wise to replace any furniture or appliances that were removed during this process so that everything looks complete once more.
Once all of these steps have been taken and you have verified that everything looks great, congratulations! You have successfully fixed an issue with bulging floor tiles in your home or office space!
The next step in maintaining healthy flooring is learning how to keep them looking that way longterm. This section will discuss Maintaining Healthy Floor Tiles – so stay tuned for tips on how to prevent future issues with bulging floor tiles!
Maintaining Healthy Floor Tiles
It is important to properly maintain floor tiles in order to keep them looking and functioning like new. Many people neglect proper maintenance, leading to a range of common issues such as crumbling, cracking, or bulging. Proper maintenance will help prevent these issues from occurring and extend the life of the tile floor. Here are some tips for maintaining healthy floor tiles:
1. Regular Cleaning: Dirt and debris build up over time on tile floors, which can make it more vulnerable to damage. To prevent this, vacuum or sweep your tile floors at least once a week with a soft-bristled brush attachment. Mop the floor regularly using warm water and mild detergent. Once a month, deep clean the tile floor using an appropriate cleaning solution and a pH neutral cleaner. For stubborn grout stains, check out our guide on how to clean floor grout without scrubbing.
2. Protect Against Abrasives: Abrasive materials can cause scratches or chips in your floor tiles, so it is important to protect them against abrasives. Place mats in front of entryways and areas that get a lot of foot traffic, as well as rugs in any areas where chairs or furniture might be moved around frequently. This will help protect your floors against abrasion that can occur from moving furniture or everyday foot traffic.
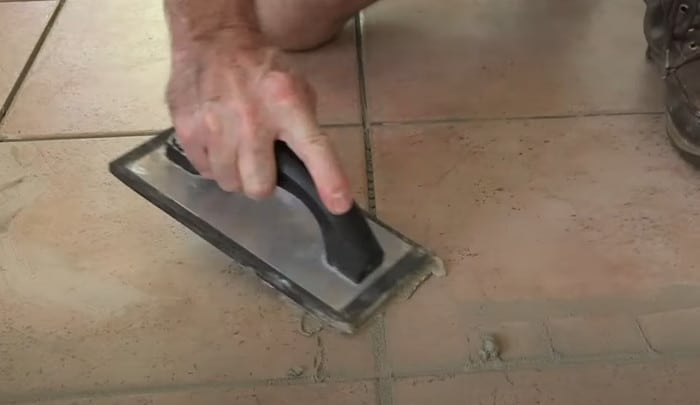
3. Seal the Grout: Applying sealant to the grout between your tiles will help protect it from dirt, debris, and moisture buildup that could lead to staining or cracking in the future. Use an appropriate sealer for your particular type of tile and grout material, and reapply every six months for optimal protection.
4. Wax Tile: Applying wax on glazed tile helps repel water, making it easier to clean up spills before they become trapped in the grout lines or cause other damage to the tile itself. Use an appropriate wax paste for your tile type and apply thinly one to four times a year according to manufacturer’s instructions.
With proper maintenance, you can preserve the look and longevity of your tile floors while preventing serious issues such as bulging and cracking from developing. Take time each week to properly clean, wax, seal, and protect your surfaces against abrasive materials for healthy and beautiful tile floors that last for years to come!
Answers to Common Questions with Detailed Explanations
What should be done to ensure that bulging floor tiles do not recur?
In order to ensure that bulging floor tiles do not recur, it is important to identify the underlying cause of the issue. Common causes for bulging floor tiles include ineffective adhesive bonding, subfloor movement or moisture getting trapped beneath the tile due to a poor installation job.
Inspecting the installation and looking for signs of weakness or water damage can help identify the potential problem. Once identified, make sure to fix any problems before reinstalling new tiles. It’s important to use high-quality adhesive materials and follow manufacturer instructions for application so that your installation lasts. Also, make sure to check for moisture in the subfloor prior to laying down new tile and be sure to properly seal floor grout once the installation is complete. Following these steps will help protect your investment in new tiles and ensure that they last without any recurrence of bulging floor tiles.
Are there any potential risks associated with fixing bulging floor tiles?
Yes, there are potential risks associated with fixing bulging floor tiles. If the tiles are loose or have been laid incorrectly, they can be come further detached from the subfloor which could create a further unsightly and potentially dangerous problem. In addition, if moisture has caused significant damage to the tile underlayment or subflooring, it can lead to extensive water damage or mold growth in the underlying materials. Furthermore, if any of the tile adhesive or grout becomes exposed during the repair process, it could release toxic particles into the air and be hazardous to your health.
It’s important to take safety precautions when working with bulging floor tiles to ensure that you minimize any potential risks and ensure that your repair job is carried out properly. Wear gloves, protective eyewear and a face mask as appropriate for your situation and always follow manufacturer instructions carefully. Be sure to check for existing damage before beginning any work and don’t hesitate to seek professional help if in doubt.
What are the best methods for repairing bulging floor tiles?
The best methods for repairing bulging floor tiles involve a combination of scraping, cleaning, cementing, and resealing.
Scraping involves removing the excess or loose grout or adhesive from the edges of the tile. This will help expose any cracks or gaps that may have developed underneath the tile and make it easier to repair them.
Cleaning is also very important when repairing bulging floor tiles. Using an appropriate cleaner to remove dirt and dust will ensure that the new materials applied adhere correctly.
Cementing is essential for creating a secure bond between the floor and the tile surface. Choose a suitable adhesive according to manufacturer’s recommendations and apply it in thin layers over the entire area where a tile needs to be replaced. Make sure that you build up a waterproof barrier between the two surfaces.
Finally, sealing is required to secure the surface once all repairs are completed. Use a suitable sealant which is designed specifically for your type of flooring material and use it liberally along all edges of the repaired tiles. This helps protect against further damage due to moisture or other elements.
References
https://www.carpetone.com/flooring-guide/product-tile/tile-types
https://www.thespruce.com/best-flooring-for-every-room-1821694


In my years of tinkering with home repairs, I’ve found that a common cause of bulging floor tiles is poor ventilation and humidity. I tackled a similar problem in my own home by introducing better air circulation, and it significantly reduced the issue.
Wendell, I completely agree with your points about air circulation and humidity. I recall an instance where a friend’s bathroom tiles bulged terribly due to the lack of proper ventilation. After installing an exhaust fan and redoing the bulging tiles, the problem never reappeared. It’s amazing the impact that such a relatively simple solution can have.
I can echo what you’re saying Thaddeus, inadequate ventilation does often lead to this problem. In my own case, I discovered water seeping up through small cracks contributed to tile bulging in my foyer. Sealing those cracks before installation was crucial to preventing future issues.
Just like you Magnusson, I too have struggled with bulging tiles due to water seepage in my kitchen area. I discovered that a poor moisture barrier had been installed initially which caused all troubles.
Kazimir, I echo your experience with bulging tiles that was caused due to an improper moisture barrier; had a similar issue in my bathroom some years ago.
When it comes to fixing bulging tiles, moisture is indeed often your enemy. Interestingly enough, fluctuating temperatures can make it even worse as they cause the tiles to constantly expand and contract. That’s why using the right adhesives and ensuring an effective vapor barrier are not just options but necessities.
I noticed this exact issue in my seasonal cottage after last winter, a combination of moisture and dipping temperatures had caused several floor tiles to bulge. I only wish I had known about the necessity of effective vapor barriers earlier!