Are you looking to add a modern, updated feel to your living room, but feel intimidated by the thought of encountering an uneven concrete surface underneath your desired laminate flooring? You’re not alone in this struggle! Installing laminate flooring over concrete is a very common practice, but when the concrete surface is uneven, it can present some challenges concrete surface underneath your desired laminate flooring? You’re not alone in this struggle! Installing laminate flooring over concrete is a very common practice, but when the concrete surface is uneven
- Preparing the Uneven Concrete Subfloor
- Types of Laminate Flooring and Their Impact on Installation
- Preparation Techniques for an Uneven Concrete Subfloor
- Best Practices for Installing Laminate Flooring on Uneven Concrete
- Potential Gaps or Soft Spots to Account For
- Responses to Frequently Asked Questions with Detailed Explanations
- References
Preparing your concrete surface for laminate flooring requires levelling the surface with a self-levelling compound. After that has dried, use an additional underlayment or padding before installing your laminate planks.
“Successful laminate flooring installation on uneven concrete surfaces requires precision and a well-thought-out strategy. Assessment of the uneven surface should be your preliminary action, use self-leveling compounds or grinding methods to tame such surfaces. Remember, thorough preparation and patience are your allies in achieving a seamless look and extended durability. If you encounter issues with laminate floor not locking properly, it’s often due to an uneven subfloor, so addressing this issue from the start is crucial.”
Fergus Upton, Certified Flooring Contractor
Preparing the Uneven Concrete Subfloor
In order to successfully install laminate flooring on an uneven concrete surface, it is important to prepare the subfloor. When it comes to preparing the subfloor, there are two schools of thought: one that advocates using self-leveling compounds or mortar and one that suggests simply sanding down the bumps and filling in low spots as needed.
Using Self-Leveling Compounds or Mortar
Self-leveling compounds are designed specifically for smoothing out minor imperfections. They typically dry quickly and provide a uniform layer over the entire surface. The advantage of using self-leveling compounds is that they usually require minimal effort and result in a smooth surface. However, this method may not be ideal for larger bumps and dips due to its tendency to drain away from elevated areas too quickly. Additionally, it can be quite expensive if large quantities are needed.
Sanding Down Bumps and Filling Low Spots
This traditional method can be done with a belt sander or disc sander. Bumps should be sanded until they are level with the rest of the subfloor, and then any low spots should be filled with patching compound. This approach does require more time and effort than using self-leveling compounds, but could potentially be more cost effective when dealing with large imperfections. Furthermore, one should make sure to wear appropriate safety equipment such as dust masks and goggles due to the fine dust created by sanding concrete surfaces.
Once you’ve chosen your preferred method for preparing your uneven concrete subfloor, the next step is to apply a leveling compound in order to create a smooth foundation for your laminate flooring installation.
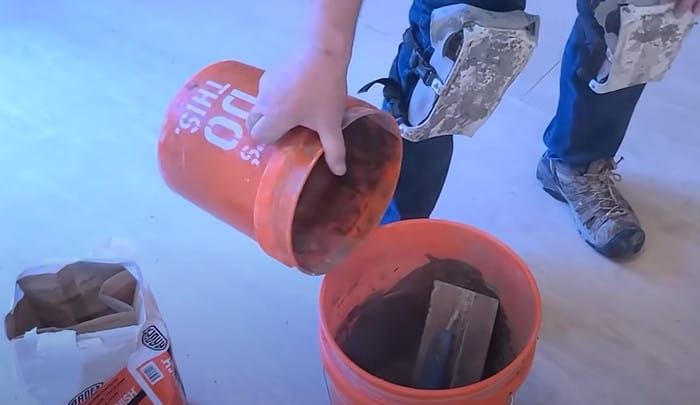
Leveling Compound
Leveling compound is an important step when installing laminate flooring on uneven concrete surfaces. The compound helps to fill in low areas, allowing the floorboards to be laid as evenly as possible. This makes the finished product look beautiful and professional. It’s also essential for preventing issues like bulging tiles or planks, which can occur when the subfloor isn’t properly leveled.
There are two types of leveling compounds: cement-based and latex-modified. Cement-based compounds are more difficult to use, but they dry faster, resulting in a stronger bond between the concrete and the floorboards. Latex-modified compounds are much easier to work with but can take several hours to dry before placing the floorboards on top.
Whichever type of leveling compound is used, it’s important to ensure that the compound is thoroughly mixed and applied evenly with a trowel before it dries for best results. Applying too much of the compound or not spreading it out evenly can result in an uneven finish and weak spots in the flooring where it may become loose or start buckling over time.
The use of a leveling compound can make all the difference when installing laminate flooring on uneven concrete surfaces. It helps to ensure that there are no ridges or low spots, creating a smooth and even surface for maximum durability and longevity of your new floor.
Now that you’re familiar with using a leveling compound when installing laminate flooring, it’s time to learn about checking for moisture/humidity levels before getting started, which will be discussed in the next section.
Checking for Moisture/Humidity
Before beginning the installation of a laminate floor over an uneven concrete surface, it is important to check for moisture and humidity levels. Moisture and humidity can lead to warping or curling of your new laminate flooring when laid down on concrete that has too much moisture in it. Too little humidity can also cause damage as laminate requires an environment with between 30 and 60 percent relative humidity to remain stable.
The debate over how to accurately measure the moisture/humidity levels depends on the cost of the equipment you are intending to purchase. While hand-held devices are the most affordable option, digital testers provide more accurate results for a higher price tag. Some experts even recommend hiring a third party contractor to conduct a moisture test, which provides definitive proof but carries a significant cost. Whatever approach you decide is best for your project, it is important to factor in the labor and material costs associated with any moisture test before committing to installation.
Having the correct information about moisture/humidity levels before laying down laminate flooring on an uneven concrete surface will ensure it stays in its original condition long after installation. The next section will focus on different types of laminate flooring and their impact on installation.
Types of Laminate Flooring and Their Impact on Installation
When considering how to install laminate flooring on an uneven concrete surface, it is essential to consider the type of laminate flooring being used. Different types of laminates can have varied impact in terms of the difficulty of installation and maintenance. It’s important to choose the best flooring for uneven floors to ensure a successful installation and long-lasting results. Glue-down laminate flooring is one option that provides consistent adhesion and security against displacement, but has the drawback of being challenging to remove later on. Click-lock laminate flooring, which clicks together with a tongue-and-groove interlocking system, is easier to install but may be more susceptible to shifting or coming apart over time.
For areas with thicker variations in term of unevenness, tile laminate flooring may prove most beneficial since its interlocking tiles will easily fill in any cracks or gaps in the uneven concrete surface, while providing additional stability and sturdiness than glue-down or click-lock laminates. On the other hand, many argue that by installing tile laminate flooring on an uneven substrate there is greater potential for tile shifting in addition to the need for greater accuracy when cutting around objects such as fireplaces and doorways due to limited sizing options among its tiles.
Despite the differences between these types of laminate flooring, careful preparation techniques such as filling any large holes before application are important regardless of installation choice. With this in mind, the next section will discuss specific preparation techniques for an uneven concrete subfloor so that your selected type of laminate installation can be successful.
Key Summary Points
Installing laminate flooring on an uneven concrete surface requires careful consideration of the type of laminate used. Glue-down laminate offers secure adhesion and stability, but is difficult to remove, while click-lock laminate is easier to install but may come apart over time. It’s important to weigh these options against other flooring options to determine the best choice for your specific situation. Tile laminate may be most beneficial for thicker variations in unevenness, but has potential for tile shifting and requires more accurate cutting around objects. Preparation techniques such as filling large holes before application are important regardless of installation choice.
Preparation Techniques for an Uneven Concrete Subfloor
Preparing an uneven concrete subfloor for laying laminate flooring requires time and care, as even the slightest imperfection can have an effect on the lifespan of both the hardwood and the subfloor. The first step in preparation is to clean the area of any dust, dirt, and debris. You should use a vacuum cleaner to get into corners and along crevasses. This will help ensure that no particles are left behind as you begin to work on the concrete subfloor.
The next step is to inspect the concrete surface for any major level changes, cracks, or other damages that need repair before laying laminate flooring. Depending on what needs to be done, some homeowners prefer to obtain the services of a professional contractor while others attempt to fix the issue themselves with tools like epoxy fillers or caulk.
Moreover, it is important to determine whether there is proper installation moisture protection in place since this can sometimes cause swelling and buckling of wood laminate flooring over time. Depending on your particular situation, it might be necessary to apply a damp-proof membrane or self-leveling cement compound.
To further reduce any risk of movement due to unevenness in the future, it is also recommended that many professionals install a foam underlayment beneath their concrete subfloor prior to installing laminate flooring. This extra layer serves as an additional shock absorber between the concrete slab and wooden boards, enhancing stability for long-term performance.
Now that your preparation is complete and your subfloor is ready for installation, it’s time to proceed with laying down the subfloor – something we will cover in detail in our next section.
Laying the Subfloor
Before laying laminate flooring, a level subfloor surface is essential. As concrete itself is an uneven surface, there are several strategies options available to even out the surface before installing the laminate. On one hand, a self-leveling compound can be used to create a perfectly even surface as it spreads and settles over time, but this solution can come at great expense and may require special equipment. On the other hand, other methods such as using plywood or a thin foam underlayment layer can provide simple and cost-effective solutions for creating a flat floor.
When using plywood it is important that any uneven parts of the concrete are filled in with a cement-based patch or filler; otherwise any irregularities created by the concrete can cause bumps or significant issues later down the line. Plywood itself should also be prepared accordingly with lath screens and small pieces of wood as spacers. This allows air to pass through so water vapor generated from the subfloor can move freely between the subfloor and the plywood and escape freely. This helps prevent moisture buildup which can lead to mold growth.
Once these measures are taken, plywood should be securely fastened to the concrete with strong screws rather than nails since they are less prone to accidents caused by popping loose when walking over them differently than nails.
With careful attention paid to all of these details, laying the subfloor will be a straightforward process. Afterward, it is time to move on to installing the laminate flooring for beautiful results that last for years to come.
Installing the Laminate Flooring
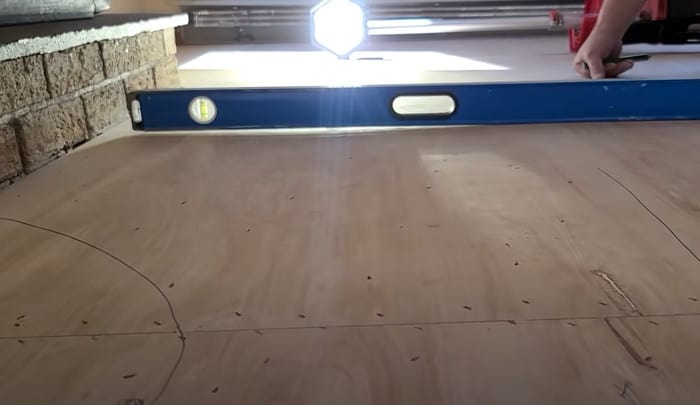
When installing laminate flooring on an uneven concrete surface, it is wise to start planning before beginning the installation process. Consider which direction you prefer the boards to lay, in relation to the room, and whether or not they should be cut flush against walls and other obstructions that may exist. Before you begin laying flooring, it is important to inspect the subfloor for large depressions or lumps, this will help determine if further preparation is necessary before you begin.
Using a good quality level and straight edge, check for any slopes or dips in the finished surface and make a mental note of any changes needed to prepare for the next steps. If there are low spots, you may need to fill with self-leveling compound or an engineered underlayment specifically designed for use on uneven floors. However, if high points exist, it’s better to sand them down first before beginning installation.
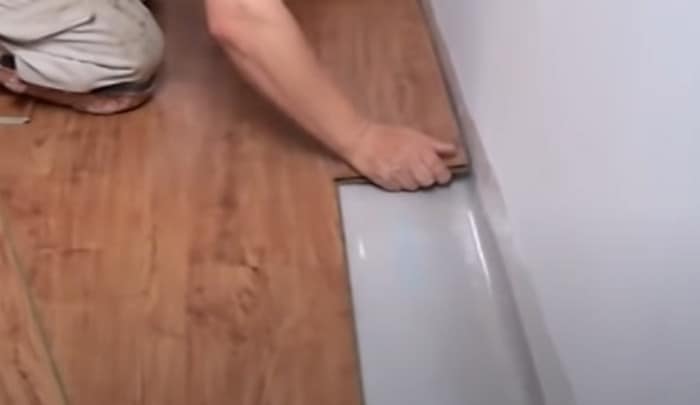
When ready to install the flooring be sure to leave enough space between the wall and board (1/4-3/8”) until all planks have been laid down in order to prevent any structural damage or buckling of your new laminate flooring due to expansion and contraction of temperature and humidity changes. Utilizing a tapping block helps reduce movement of boards when being tapped into place when using a handheld mallet or hammer. It is also critical to verify which way each plank has faced as you are installing them as only one side can be visible after installation has been completed; they must all face the same direction or else visibility of an unflattering pattern may occur on the finished surface.
Once your laminate flooring has been successfully installed on your uneven concrete surface, it is time to move onto best practices for completing the job correctly and safely.
This paragraph leads into the next section about: “Best Practices for Installing Laminate Flooring on Uneven Concrete”.
Best Practices for Installing Laminate Flooring on Uneven Concrete
“Best Practices for Installing Laminate Flooring on Uneven Concrete”
Installing laminate flooring on an uneven concrete surface can often cause some problems. While there are some arguments that the job can be done, and done properly with a little effort, there are others who would suggest against it. As such, those looking to install laminate flooring on an uneven concrete surface should keep in mind best practices for doing so before beginning the project.
The main idea when installing laminate flooring over an uneven concrete floor is to make sure the surface is as even and level as possible. Before beginning the installation process, double-check that the area has been completely leveled and has no visible gaps or divots. If necessary, use self-leveling compound or patching material to fill in any low spots. The subfloor should also be inspected for any moistness issues that can damage the laminate flooring later on in its lifespan. If needed, spread a vapor barrier over the entire area to prevent condensation build up and water damage.
Once these preparations have been completed, begin laying the planks of laminate flooring in rows starting at one corner of the space. Make sure that each plank and row fit perfectly flush together by pressing them down as you go. Use a tapping block with a mallet to tightly seal the joints between boards where needed. It may be necessary to sand down any high points slightly to level out a few bumps in order to keep everything flush with each other while laying them.
It’s important to know that installing laminate flooring over an uneven concrete surface can result in some unforeseen issues down the road, due to its inconsistent nature. Even though it is possible with careful measurements and preparation beforehand, there is a higher chance of gaps developing between boards and air pockets forming under them. As such, it is important to determine if this type of installation is really worth tackling before taking on the job itself.
Overall, while installing laminate flooring over uneven surfaces isn’t ideal, it is still possible to do with proper preparation beforehand. Keeping all possible risks associated with this kind of installation in mind will help ensure that the job is done correctly from start to finish. Now that best practices for tackling this task have been discussed, let’s take a look at potential gaps or soft spots that must be accounted for when installing laminate flooring on an uneven concrete surface.

Potential Gaps or Soft Spots to Account For
When installing a laminate floor on an uneven concrete surface, it is important to consider any potential gaps or soft spots that may require special measures. While a flat, even surface is ideal for easier installation and a better-looking final product, gaps and soft spots in certain parts of the subfloor can be covered up if taken into account during installation.
Soft spots in the surface should always take priority over any potential gaps because they can cause the laminate boards to warp and buckle due to shifts in moisture levels over time. These areas can be filled with a thin layer of self-leveling concrete, or another subfloor filler of your choice, before laying down the laminate.
Gaps between boards can also emerge if the subfloor has an uneven texture or area of low spots compared to the high spots in the rest of the floor. If not accounted for properly at installation, these gaps can lead to creaking or squeaking noises when walking on the floor. Some experts suggest adding shims or additional pieces of underlayment foam in order to fill any large discrepancies between boards and close off any potential gaps that could later cause damage or noise.
However, other professionals argue that laminate floors are designed with built-in expansion channels between each plank that provide necessary space for water vapor and temperature’ changes within the room. This allows for long-term stability against warping. Forcing extra cushioning into those channels could cause future issues with expanding and contracting planks when warranted over time.
It is always recommended for professional installers to consider any potential gaps or soft spots ahead of time to account for different circumstances and make sure that any measures taken do not negatively affect the overall performance of the floor. Ultimately, once these parameters have been established, you will be able to more effectively determine how best to approach cuts and installations around problem areas while ensuring you achieve an attractive end result backed by quality craftsmanship.
Responses to Frequently Asked Questions with Detailed Explanations
Are there any special tools or products needed for installing laminate flooring on uneven concrete?
Yes, there are certain special tools and products required for installing laminate flooring on uneven concrete. You will need a plywood subfloor to provide a more level surface for the laminate. Also, you should use an adhesive specifically designed for use on concrete surfaces, such as a cement-based adhesive or construction adhesive. Additionally, you will need appropriate tools, such as jigsaw with tungsten carbide blades to cut the boards and spacers to ensure even gaps between the boards. Finally, you may want to use sealant or grout between the boards to help prevent moisture from seeping in.
What methods can be used to level the concrete prior to installing laminate flooring?
The most common methods that can be used to level a concrete surface prior to installing laminate flooring are self-leveling compound, briquette paver systems, and concrete patches.
Self-leveling compound is a method of smoothing out uneven floors by applying a chemical mixture to the surface which then sets, spreads out and dries with a flat finish. The principle behind this technique is that the flow of the material on the surface causes it to fill in all the undulations created by the different layers of concrete. In order for this to work correctly, however, one must pay close attention to both the product itself and its application.
Briquette pavers provide another way of leveling a concrete surface by providing a more uniform substrate. This system works similar to a puzzle as it consists of interlocking plastic pieces in small units called briquettes that can be fitted together in large pieces providing near perfect lateral leveling.
Finally, concrete patches can also be used in order to level a concrete surface. This technique involves repairing or filling any gaps or scratches within the concrete before installing any new floor material. Concrete patch can also be used for very minor imperfections, tension cracks, or joints in existing surfaces which may cause problems during installation down the line.
What types of underlayment are best for levelling laminate flooring on an uneven concrete surface?
The best type of underlayment for levelling laminate flooring on an uneven concrete surface is foam underlayment. Foam underlayment is lightweight, flexible, and provides a cushioning layer between the uneven surface and the laminate flooring. It also helps absorb any noise or vibrations associated with walking on the laminate flooring. Additionally, foam underlayment helps reduce sound transmission through the subfloor. Other types of underlayment can be used, such as cork, but foam provides better shock absorption and noise dampening for an uneven concrete surface.
References
https://www.floorbay.co.uk/blog/alternative-to-laminate-flooring/
https://www.familyhandyman.com/list/how-to-choose-laminate-flooring-a-buyers-guide/


Speaking from experience, using a self-leveling compound is crucial when preparing an uneven concrete floor for laminate flooring. One project I engaged in was my basement where, initially, the floor was far from level. By using a self-leveling compound, I managed to get a smooth, even surface, ready for the laminate flooring to be laid on top. The result was perfect; everything sat flat, and there were no uneven patches.
Just to add on to what Eliotson said, a self-leveling compound isn’t just crucial, it’s the difference between a flooring job you can be proud of and one that leaves you frustrated and dissatisfied. I’ve seen it first-hand in my business dozens of times.
I can make an affirmation on Mr. Wickens’ claim. Using a self-leveling compound might seem like an extra step, especially if you’re new to the game, but it makes an enormous difference in the final result. However, applying it is not always straightforward, you have to ensure a clean, dust-free surface else it might not adhere properly, and your hard work will be wasted.
I second what Vernon stated about the importance of a clean surface before using a self-leveling compound. One time, I attempted to apply the compound over an area that still had some residual dust and debris, thinking it wouldn’t affect the result. This mistake cost me both time and materials as the compound did not adhere well to the concrete floor, requiring me to start all over again.
Always maintain a healthy respect for the process — concrete leveling is not just a preparation step; it’s crucial for the longevity of your laminate flooring.
Although the leveling of concrete might appear daunting, it’s only a matter of having the right tools and perspective. I’ve dealt with dozens of uneven surfaces throughout my years as a contractor, and while it does demand significant attention, it’s far from impossible. Incorporating self-leveling compounds can make the process considerably smoother than you’d anticipate.
Just last month I used self-leveling compound for the first time myself when freshening up my old study room. It was definitely an experience, but the final results were worth the patience and effort required!
As someone who’s been installing floors professionally for two decades, I’d like to highlight the significant role of a good-quality moisture barrier — even when using a self-leveling compound — to prevent warping or swelling of your laminate flooring over time.