If your garage feels uncomfortably cold in winter and uncomfortably hot and sticky in summer, you may wish to consider insulating the ceiling. That’s because the ceiling presents a large target area, so insulating it can make a big difference in the temperature control for your garage. If you’re like most homeowners, though, you may be a bit intimidated by the idea of insulating a finished ceiling. Fear not — we’ve got you covered! In this step-by-step guide, we’ll walk you through the process of how to insulate a finished garage ceiling and help you get the best possible insulation results.
You can add insulation to your finished garage ceiling with spray foam or batt insulation. Care must be taken not to damage the existing finish when installing the insulation. This process requires attention to detail and proper techniques to ensure the best results.
“Selecting your insulating material based on your garage’s unique conditions is pivotal. For most finished garage ceilings, fiberglass insulation is my go-to suggestion. This choice combines an attractive cost-effectiveness with substantial thermal performance which can significantly reduce energy loss. However, it’s important to ensure it is fitting properly between the ceiling joists, as gaps or improper installation can drastically reduce its effectiveness.”
Cornelius Thorne, Architectural Thermal Insulation Specialist
Assess the Existing Conditions
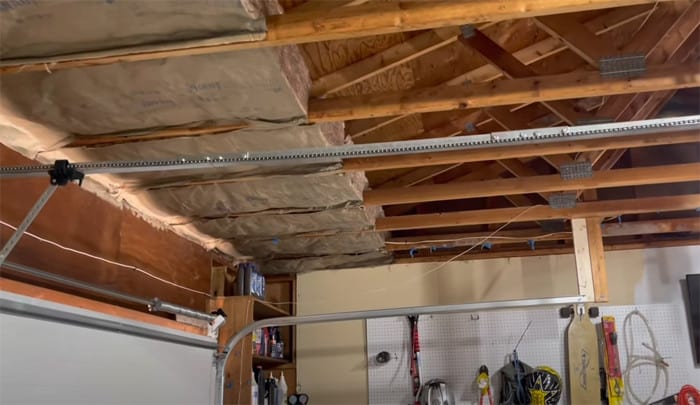
When insulating a finished garage ceiling, the first step is assessing the existing conditions. The builder must consider what type of insulation is already present and determine how best to improve it if needed.
In some cases, the existing insulation may be adequate to keep the garage comfortable throughout the winter months. However, if there are significant air leaks in areas such as attics or around doors and windows, this insulation may not be effective enough. Additionally, existing insulation that is damaged by water or other elements should also be replaced. It’s also important to consider how to properly ventilate your garage to prevent moisture buildup and maintain air quality.
The builder should also evaluate any existing electrical wiring and ventilation systems when assessing the existing conditions. If these components are already in place, they should be taken into consideration when selecting insulation materials. Electrical wiring can potentially cause fire risks if improperly insulated; thus, it’s important to use specific safety regulations to ensure that all electrical wiring is properly insulated. In regards to ventilation systems, the builder needs to identify any available return air pathways or other exhaust outlets for new venting needs due to additional insulation installation.
Finally, builders should also factor in relevant local building codes when assessing the existing conditions of a finished garage ceiling prior to insulating. For example, energy efficiency regulations may be more strictly enforced in certain jurisdictions than others; thus, selecting an appropriate insulation material can help builders stay compliant with local regulations.
By carefully considering all of the existing conditions noted above before beginning a project to insulate a finished garage ceiling, builders will have an informed starting point before making any major decisions. Now that you’ve assessed the existing conditions and identified potential issues that need addressing, it’s time to select material to insulate your garage ceiling – the topic of our next section.
Selecting Material to Insulate the Garage Ceiling
When it comes to selecting an insulation material for the garage ceiling, there are a variety of options available to choose from. The right choice can help you effectively cool your garage and maintain a comfortable temperature year-round. It is important to take into account factors such as cost, insulation rating, and ease of installation when making this selection.
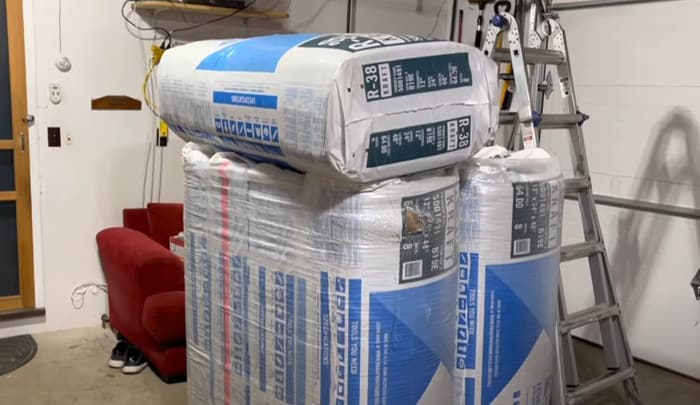
Fiberglass insulation is one of the most affordable and easy-to-install materials available. It is typically found as loose-fill or batts that you roll out and cut with a utility knife. Fiberglass is considered effective in terms of insulation rating (R-value) but may not be suitable for all garages due to its potential for emissions of small glass fibers.
Cellulose insulation has a higher R-value than fiberglass, making it more resistive against heat transfer. This type of insulation also contains fire retardant agents which makes it a great choice for areas near heat sources such as furnaces or hot water tanks. However, cellulose is more expensive due to the more intensive installation process and larger amounts needed for installation.
Spray foam insulation has become increasingly popular due to its ability to fill even the smallest gaps, creating a complete air seal. This type of insulation is particularly effective for garage door insulation, helping to maintain consistent temperatures throughout the space. Its R-value is much higher than fiberglass or cellulose but spray foam requires professional installation and comes at significant cost.
When considering the desired characteristics and budget constraints, each homeowner must weigh the pros and cons of these three options before selecting their preferred material to insulate their garage ceiling. The next section will focus on the different types of insulation available on the market today.
Types of Insulation
When considering how to insulate a finished garage ceiling, it is important to understand the different types of insulation that are available. The most popular options usually include spray foam or fiberglass batting, but there are other forms of insulation to choose from depending on the desired results and budget. Each type of insulation has its own pros and cons and homeowners should be familiar with all of their options so that they can make an informed decision for their project.
Spray Foam Insulation: Spray foam insulation is one of the most popular forms of insulation, due to its ability to quickly fill cracks and crevices in any space – making it perfect for covering areas that may be difficult to access. Although spray foam costs more upfront than conventional types of insulation, it often pays for itself over time as it is extremely effective at preventing heat loss. Since spray foam fills cavities completely, there is no need for extra materials such as wood framing or repairing studs. On the negative side, it can be messy and smelly during installation and requires professional expertise to properly adhere it to the ceiling.
Fiberglass Batting Insulation: Fiberglass batting insulation is a good option for those looking for an economical solution to insulating a finished garage ceiling. This form of insulation is relatively easy to install and comes in different thicknesses to accommodate varying sizes of spaces. One downside is that this type of insulation tends to settle over time which can leave gaps that allow air infiltration, making it less effective at keeping your garage warm in the winter months. Additionally, since this type of insulation comes in large mats, cutting them down for smaller openings can be difficult without proper equipment.
Cellulose Insulation: Cellulose insulation is made from recycled paper products and is becoming an increasingly popular form of insulation due to its energy-saving properties and affordability. It offers superior noise reduction compared with other types of insulation material and is also highly resistant to fire and insects which makes it safer than other forms of traditional fiberglass insulation. The main drawback with cellulose is that installing it takes longer than spray foam or fiberglass batting and can be more labor intensive due to its particular set up process.
There are numerous types of insulation available for insulating a finished garage ceiling, each offering its own benefits and drawbacks depending on your individual needs and wants. It’s important to weigh all your options before making a decision so that you get the best solution possible for your project. With these tips in mind, let’s look at how we can estimate the R-value needed for our finished garage ceiling in the next section.
Estimating R-Value
It is important to know the R-value of your garage ceiling insulation in order to choose the right material for maximum thermal performance. The R-value measures the resistance to heat transfer, with higher values resulting in more effective insulation. Depending on factors such as local climate, personal preference, and budget, a homeowner may decide on an appropriate value for their insulation goals. The R-value should also change when changing from wall insulation to ceiling insulation given the orientation of the surface.
Depending on where you live and local building codes, it may be recommended that a minimum R-value be used for your insulation. However, a homeowner may have distinctive needs not covered by these standards which could result in selecting a higher R-value than necessary.
For those who are unsure how much insulation they need or what applicable building codes to follow, consulting with a professional can provide in-depth expertise that would be beneficial to planning out your project accordingly. Additionally, there are online resources available to estimate the optimal level of insulation needed given local climate conditions and other factors.
Once you have determined which R-value meets your needs and complied with all relevant local regulations, you can move onto preparing your garage ceiling for insulation.
The next section will discuss Preparing the Garage Ceiling for Insulation, including inspecting the current condition of the ceiling, utilizing proper safety equipment and techniques, and cleaning the area to prepare for installation.
Essential Points
It is important to know the R-value of your garage ceiling insulation in order to choose the right material for maximum thermal performance. The R-value measures heat resistance, with higher values resulting in better insulation. Depending on local climate, personal preference, and budget, a homeowner can select an appropriate value for their insulation goals. Homeowners should ensure they meet all applicable building codes; consulting with a professional or researching online resources can provide guidance. Preparation of the garage ceiling for insulation requires inspecting the current condition, using safety equipment, and cleaning the area.
Preparing the Garage Ceiling for Insulation
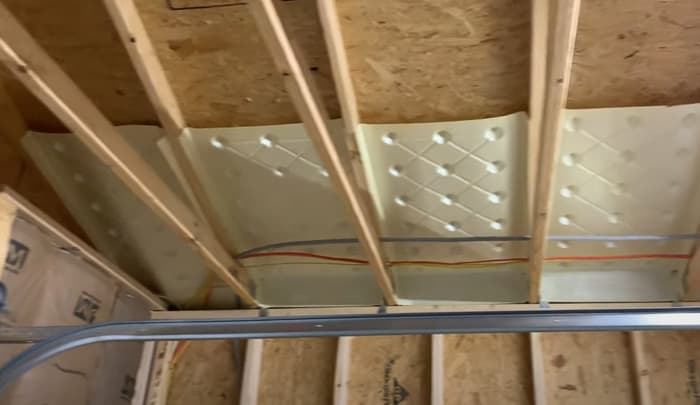
Before beginning the insulation process, it is important to ensure the ceiling is ready to receive the material. Start by assessing the existing situation in the garage and create a plan that takes into account any existing hazards or obstructions, such as wiring, plumbing, or ducts. Next, clear away any debris and cobwebs that may pose a fire hazard.
If possible, remove any items suspended from the ceiling like lights or speakers. Additionally, it is best practice to replace any old insulation with new insulation made of safe materials and free from moisture. While some may argue against installing new insulation because of cost, be aware that manually adding additional material can lead to a more time-consuming installation and future headaches down the line if not done correctly.
When removing certain components from the ceiling it is recommended to turn off power before beginning work for safety reasons. If unsure about whether it’s a safe space to work in then have an electrician come in to assess before proceeding with the project.
Once all preparation has been completed and the ceiling is ready for insulation, you’re ready to proceed to the next step: soundproofing the room.
Soundproof the Room
Soundproofing a finished garage ceiling is an important step to ensuring optimal acoustic comfort. An effective soundproofing insulation solution should reduce incoming and outgoing noise, increase thermal insulation values, and be environmentally friendly. Applying a lightweight barrier directly to the underside of the garage ceiling can help mitigate excessive levels of sound coming both from within and outside.
There are numerous soundproofing solutions available on the market today including standard fiberglass insulation, special foam insulation, or combination products that combine foam and mass-loaded vinyl (MLV). Fiberglass absorbent material works by trapping sound waves and deflecting them away. However, as it is not dense enough to block airborne vibrations, it may not be sufficient for extreme noise reduction in a finished garage space. Foam, on the other hand, works well when it comes to blocking airborne sounds but does not have the capacity to reduce impact noise, such as footsteps or car doors opening and slamming shut. MLV has properties that offer a combination of both absorption and reflection of sound waves; however its effectiveness can be hindered if there are significant gaps in installation coverage.
In deciding which soundproofing method is best for your needs consider the amount of noise coming from outside sources (street traffic, neighbour activity etc.), along with any internally generated noise such as TVs, radios and vehicles. If noise levels are low then opting for a standard fiberglass insulation might suffice for basic sound attenuation; but for more extreme soundproofing requirements you’ll need to look into using either foam or an MLV with fiberglass product.
Finally when tackling the task of soundproofing a finished garage ceiling always remember to take proper safety precautions when working with insulation materials such as masks, gloves and eye protection gear. With this section on soundproofing complete, our next step in this guide will be installing the appropriate insulation solution.
Installing the Insulation
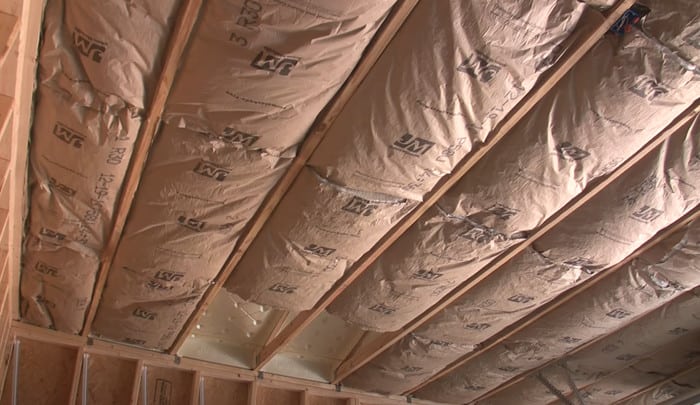
Installing the insulation is an important step when insulating finished garage ceilings. There are several different types of insulation available for use in this application, including fiberglass batts, spray foam, blown-in cellulose or mineral wool. Each type has its own advantages and disadvantages that should be weighed based on your specific needs.
Fiberglass batts are the most common option and typically the most affordable. The advantage is that they’re easy to install without specialized equipment and don’t require additional protection from moisture. However, they can lose some of their insulation value over time due to settling and can be difficult to access if repairs are needed down the line.
Spray foam insulation is a more expensive option but offers superior air sealing properties and doesn’t settle like fiberglass batts. The downside is that you need to purchase or rent specialized equipment for installation and extra care needs to be taken during application to avoid creating any air pockets which could reduce efficiency.
Blown-in cellulose or mineral wool insulation is a great option for higher R-value applications, as both materials provide excellent soundproofing and thermal performance. The disadvantage is that they can be difficult to install correctly without specialized equipment and they are more vulnerable to moisture damage than fiberglass batt insulation.
No matter which type of insulation is chosen, it’s important to make sure all steps have been taken to ensure proper protection from fire, moisture and pests before beginning the installation process.
Now that you’ve decided on the right insulation for your project, it’s time to move on to finishing the garage ceiling with drywall or other building materials.
Finishing the Garage Ceiling
Once you have chosen the insulation material and placed it within the ceiling, you need to finish off the job. The final steps typically involve covering the insulation material with drywall or other appropriate material and then completing finishes, such as painting or texturing.
It is important to be sure that any material used overtop of the insulation is rated to handle the weight of both itself and any additional items that may be stored in the garage, such as heavy tools. Drywall is generally a safe bet for this purpose, although you should ensure to use appropriate screws for mounting it into place.
When it comes to paint or another type of finishing material, there are two distinct schools of thought. Some feel that any type of paint will protect against dust and dirt buildup, while others suggest that specialised paints, such as those formulated for industrial spaces, are best for garages. The latter approach may require more effort and expense upfront but could provide better protection against dust and dirt build-up long-term. Ultimately, this is a personal decision based on budget and desired outcome.
No matter which finishing product you choose, be sure to take all necessary safety precautions while working away from the ground: wear safety goggles and gloves where possible, utilise ladders or scaffolding to reach even high ceilings, consider using joint compounds with lower levels of VOCs (Volatile Organic Compounds), and keep your workspace well ventilated.
With these steps completed, your garage’s ceiling is now insulated properly according to code and looks great too! Now it’s time to consider a few final considerations when it comes to insulating a garage ceiling before calling a job done – an important topic we’ll address in the next section.
Final Considerations for Insulating a Garage Ceiling
Once you have followed all the steps to insulating your finished garage ceiling, it is important to consider the following factors before you complete the job. These considerations must be discussed and taken into account to guarantee a successful installation that will improve your home’s overall energy efficiency and provide several other benefits.
1. Safety: First and foremost, safety must be taken into account when installing insulation in any part of your home. Immediately after installing insulation around electrical wiring, make sure that no frayed ends are exposed; further ensure that drywall covering is properly secured over wiring junction boxes. If you are using fiberglass insulation, wearing gloves, a long-sleeved shirt, and a face mask is highly recommended due to its potential irritants. Ensure that nothing combustible comes in contact with the insulation material.
2. Air Leakage: If not properly installed, air can leak through the ceiling of your garage or attic, leading to greater heating and cooling costs during hotter or colder months. Using spray foam insulation can combat this issue by providing an airtight seal between walls and ceilings. Make sure to use the type of foam appropriate for the application; spraying too much into an area may cause cracking in weak spots or seams.
3. Fire Code Compliance: It is important to adhere to local fire safety codes for both pre-existing garages as well as new additions when insulating them. Fire resistant materials must be employed in areas where sparks or flames may occur; for example for garages attached to homes, fire boards should be used on the wall common to the house interior. Further checking with local fire codes would help determine specific requirements in this regard.
4. Condensation Prevention: Condensation can damage existing structures and weaken existing frames if allowed to build up over time without being noticed or taken care of properly. Installations need to be planned in such a way that air flow is improved; floor vents should also be installed near the doorways if condensation still persists after completing installation of insulation material on external walls and ceilings.
In conclusion, proper consideration of these issues can help ensure successful installation of insulation materials as well as improve energy efficiency by reducing energy costs in either winter or summer seasons while keeping homes safe from hazardous materials or gases emanating from insulated areas such as garages or attics.
Commonly Asked Questions
What insulation material is best for insulating a garage ceiling?
The best insulation material for insulating a garage ceiling is fiberglass batt insulation. It is cost-effective, easy to install, and highly efficient at trapping heat. Fiberglass batts come in various lengths, widths, and R-values to suit any need. Additionally, they are non-flammable and provide air sealing properties which help reduce energy bills by keeping warm air in during the winter, and cool air in during the summer. Furthermore, fiberglass batts have no harmful off-gassing like some other materials do, making them safe to use in indoor areas such as garages. With all these benefits, it is no wonder why fiberglass batt insulation is the go-to choice for insulating garage ceilings!
What types of insulation can be used to insulate a finished garage ceiling?
When it comes to insulating a finished garage ceiling, there are several types of insulation that you can use. Depending on the size and shape of your garage ceiling, and the climate conditions in which you live, you may opt for fiberglass rolls, fiberglass batts, spray foam insulation, or rigid foam boards.
Fiberglass rolls, or blankets, are an effective and affordable form of insulation and come in easy-to-install rolls that can be cut and fitted into difficult spaces. These rolls are composed of hundreds of strands of glass fibers held together in place with a binder. This type of insulation is most commonly used for garage ceilings because it provides excellent thermal resistance.
Fiberglass batts, also known as faced or unfaced batts, are pre-cut lengths of insulation that come in widths suitable for standard joist spacing. They’re easy to install and provide good acoustic properties as well as thermal insulation.
Spray foam is another popular choice for insulating a finished garage ceiling. It’s an ideal solution if you need to get into tight spaces to apply the insulation. In addition to providing thermal protection from extreme temperatures outside, spray foam also seals out drafts, helping to keep your heating costs down in winter months.
Rigid foam boards are made from polyiso and provide excellent thermal protection when used in combination with other forms of insulation such as fiberglass rolls or batts. These boards come in both perforated and non-perforated versions and can easily be cut down to fit the shape of the ceiling space in your garage.
No matter which type of insulation you choose to use for your finished garage ceiling, make sure it’s installed correctly so that it forms an effective barrier against cold drafts during winter months and helps keep your energy costs low!
What are the steps for properly installing insulation in a finished garage ceiling?
1. Make sure the garage interior is clean and free from debris. You’ll need to move shelving or items stored in the garage temporarily, or use plastic drop cloths to keep dirt away from the insulation.
2. Inspect any existing insulation. To prevent moisture damage and limit the heat loss that occurs through an uninsulated ceiling, make sure the existing insulation is effective and complete with no gaps.
3. Choose appropriate materials for insulating your finished garage ceiling. If you have exposed framing, unfaced batts of fiberglass are typically the most cost-effective option; if you have drywall, use faced batts of fiberglass or foam board.
4. Measure the height of the ceiling and then cut your insulation accordingly. Once it’s measured and cut, check to make sure it fits properly in between ceiling joists before installing it.
5. Install your insulation either by stapling it directly to timber frames, or gluing foam boards directly to ceilings with caulking adhesive. Make sure to fill any holes where pipes may be entering through the ceiling with expanding foam or pugging cement when sealing around these components.
6. Check for air leakage around light fixtures or fan boxes: now that your insulation is installed, you want to ensure that all gaps are sealed up properly in order for your insulation to effectively protect against temperature changes in the garage. Use weatherstripping or caulk to seal off any potential drafts before re-installing anything like light fixtures, fan boxes, switch plates etc..
7. Finally, enjoy a more comfortable living space in your garage thanks to your new insulation!
References
https://www.forbes.com/wheels/accessories/best-garage-door-insulation/


I’ve insulated my own garage ceiling a couple of years back and it’s really not as intimidating as it seems. Be sure to choose the right insulation material that suits your climate and safety needs. It includes a bit of a learning curve but I found it a fun challenge and well worth the steady temperature it provides.
Years ago, I insulated my office ceiling, which is similar to a garage ceiling. I second Quinlan’s notion about choosing the right insulation material. In my case, I found that fiberglass batts provided the right balance between cost, efficiency, and ease of installation.
I spent a cold winter battling condensation in my garage, mainly due to poor insulation. Once I added an insulated ceiling, the temperature variance reduced significantly, completely eliminating the condensation issue.
Ronan, I couldn’t agree more! Do note that adding proper ventilation can also help regulate temperature while reducing condensation buildup.
Absolutely, Galen! Aside from temperature regulation, proper ventilation also helps with reducing the risk of mold growth due to condensation – I’ve learnt that one the hard way from a property I renovated a decade ago.
Completely agree with you there, Nolan – besides, ventilation plays a vital role in maintaining the insulation material’s durability as well; a poorly-ventilated garage can lead to degradation or damage of the insulating materials over time.
Your point about ventilation is spot on Kilmer – I’ve seen too many DIYers skip the crucial step of proper ventilation, ending up with their precious insulation getting ruined in just a couple of years.
It’s nice to see someone emphasizing on ventilation, Jabari. I’ve seen people being too quick to insulate their garages without considering this aspect, which eventually leads to dampness and compromises the integrity of the structure over time.