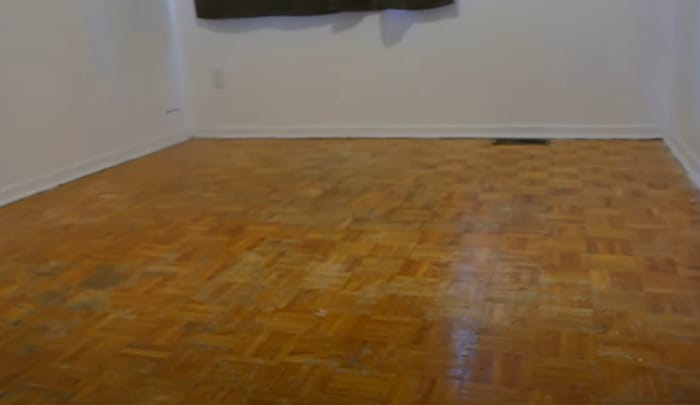
Installing a new floor can be a daunting task and things become even more complicated when, like many homes from the 70s, your place is still sporting a parquet floor. If you’ve been struggling with the idea of going full sledgehammer, take heart—you can remove aged parquet flooring and once again have a base to lay down a new style without undue mess or effort. In this post, we’ll be taking an in-depth and step-by-step look at the tricky problem of removing parquet flooring, so you can finally find freedom from the outdated and often unsightly ancient tiles.
Removing parquet flooring is a labor-intensive process that requires you to use a number of tools and techniques. To ensure the job is done properly, it may be best to hire a professional for the job.
“Removal of parquet flooring can be a complex task without proper knowledge. It is integral to understand that every speck of adhesive and substrate must be eliminated to ensure a smooth base for the next installment. As a Certified Flooring Professional with over 20 years of experience in the industry, I have developed safe and efficient methods for such tasks which can save both, your time and effort.”
Grady Kimball, Certified Flooring Professional
Preparing the Room for Parquet Floor Removal
Before starting the parquet floor removal process, it is important to properly prepare the room. This involves assessing the state of the home and making any necessary preparations to ensure the safety of those who will be working in the room. Proper preparation also reduces potential health hazards due to dust and debris created during a complex project like parquet floor removal.
The first step in preparing for parquet floor removal is to assess what is beneath the flooring. It is important to make sure there will not be any electrical wiring or plumbing lines that need to be disconnected prior to beginning the project. If these are found under the parquet, it’s best to take care of them before attempting to remove the flooring itself.
The next step involves protecting the other items in the room. All furniture, drapes and area rugs must be removed or covered with protective material such as plastic sheeting. Moveable pieces of art should also be relocated away from where work will occur. Last but not least, windows should be opened and protective plastic should be placed over them to prevent any additional dust or debris from entering the home.
Once all of these preparations have been taken care of, you can begin removing parquet flooring itself. The next section will discuss removing furniture and clearing away the area ahead of starting this job – so make sure that is completed before you begin this labor-intensive task!
Remove Furniture and Clear the Area
Removing furniture and clearing the work area is one of the most important steps in preparing to remove parquet flooring. This process is similar to removing nailed hardwood floors, which requires careful preparation to avoid damaging the subfloor. Careful and accurate preparation can prevent unnecessary damage to existing tiles, walls, and other materials, so it is a crucial part of the process.
There are two ways to approach this stage: either leave the furniture in place and cover it with protective material, or move it to another room altogether. Each method has its advantages and disadvantages that should be taken into account before making a decision.
If the furniture is left in its current position, it should be thoroughly covered with thick plastic sheeting or painter’s tarp. This will protect it from chips, dust, and debris that may come up as tiles are removed. Additionally, applying masking tape on all sides between the furniture and surrounding walls should help contain any debris that comes up while cascading over furniture edges.
On the other hand, removing furniture altogether will take some additional effort; but could ultimately be beneficial as access to the entire floor may then be easier. Portable furniture items such as chairs can usually be taken out of the room without much trouble. However, larger items like dressers or couches may require assistance from an assistant or professional moving crew.
In either case, once all furniture has been removed from or covered up in the work area, the space should be cleared of any obstructions or decor items such as area rugs or plants; as these could impede progress on removal day.
When this step is complete and there is a clear workspace for parquet floor removal, proceed to the next step of techniques for parquet floor removal.
Techniques for Parquet Floor Removal
Removing parquet flooring is a process that can be done in several different ways. Each technique has its own advantages and disadvantages and should be examined to decide which would work best for the type of space being worked on. This process is similar to refinishing Brazilian cherry floors, which also requires careful consideration of different techniques. The most common techniques used in removing parquet flooring are scraping, beveling, and chemical injection.
Scraping is a relatively simple approach that uses manual tools like hammers, chisels, or scrapers to remove the existing parquet tiles. While this method is effective when removing thicker tiles, it can cause damage to any underlying layers, such as subflooring or plywood. Beveling is a more complex technique that uses sharp cutting edges to cut through deeply-embedded flooring materials like yours. It requires special equipment and experience but may be necessary if other methods cannot reach the underlying material.
Chemical injection involves injecting an appropriate solvent beneath the parquet surface to slowly break down the glue holding the tiles in place. This may require special installation tools and is often used for difficult removal jobs due to its safety benefits; however, it can leave residue behind if not properly managed.
The technique chosen for parquet floor removal depends on the individual situation at hand—the size of each tile, the level of damage desired, and the amount of time available all contribute to which method will be used. However, there are certainly pros and cons with each option, so getting professional advice before beginning is recommended.
Fortunately, there is another solution—one that doesn’t involve damaging walls or creating dust during the removal process: Dustless Technique for Removing Parquet Floor. In the next section we’ll discuss how this innovative new procedure works and why it could be just what you need for a successful yet dust-free job.
Dustless Technique for Removing Parquet Floor
Using the dustless technique for removing parquet flooring can be an effective way to keep your home clean and reduce the amount of debris created during the process of demolition. This method involves using a vacuum with HEPA filter attachment in order to remove dirt, dust, and other particles without creating a mess. It also reduces airborne particulate matter which can cause breathing problems or allergies if left unchecked. This approach is beneficial in not only speeding up the process but also keeping floors clean and free of debris.
There are both pros and cons associated with using this dustless approach when removing parquet floors. On one hand, it tremendously decreases the amount of debris that accumulates in the home and simplifies cleanup afterwards. Additionally, it keeps potentially harmful particles from becoming airborne into family members’ noses and throats. On the other hand, there are some concerns with regards to noise that must be taken into account; vacuums can be quite loud and may cause disruption to nearby neighbors if used during certain times. Furthermore, if not properly maintained they can lack suction power and dirt will remain on the parquet floor when doing this technique.
Despite its potential drawbacks, using a dustless approach is still a viable option for removing parquet flooring safely and efficiently. To guide readers through this technique for their own project, the following section explores the steps for successfully executing it.
Steps for Using the Dustless Technique
Removing parquet flooring with the dustless technique is a popular, yet controversial method due to potential damage to the existing floor and subfloor. However, this technique offers quicker removal when done properly. Here are the main steps for removing parquet flooring with the dustless technique:
1. Start by sweeping or vacuuming the surface of the existing parquet flooring. Carefully remove any dirt and debris that could potentially act as a shield during the sanding process.
2. Next, stabilize the floor with special concrete dampener. This will ensure a smooth surface for sanding and reduce noise.
3. Apply special adhesive paper sheets over the floor’s surface that will help keep dust under control.
4. Now attach a specialized dust collection vacuum that is designed to contain dust particles.
5. Place your orbital sander on top of the adhesive sheet and begin sanding off the parquet floors in a slow, steady motion with an 80-grit abrasive pad. Continue until all of the surface is gone, making sure to keep on top of emptying out your dust collection vacuum as needed.
6. Once you have fully sanded down your parquet floors it is time to remove them completely by using a spatula or chisel to break them into pieces and scoop up any remaining debris from your vacuum cleaner into a heavy-duty bag or bucket ready for disposal.
Arguments exist both for and against using the dustless technique for removing parquet flooring – some argue that it can cause irreversible damage to existing floors and subfloors due to incorrect sanding techniques; however, others claim that it offers quicker removal and is better for those who are allergy-sensitive than traditional methods due to its ability to capture more fine particles compared to other techniques like dry scraping or damp scraping. Ultimately, it is important to carefully consider what type of technique best suits your project needs before beginning your project so that you get your desired results without causing permanent damage in the process.
The next step in preparing your floor is to remove and replace your old parquet flooring with new materials – which we cover in our upcoming section about “Removing and Replacing Parquet Floor”.
Crucial Summary Points
Removing parquet flooring using the dustless technique can be a good option, as it offers quicker removal and better anti-allergen protection. However, it is important to consider the potential risk of causing irreversible damage to existing floors and subfloors due to incorrect sanding techniques. The last step in removing your old parquet flooring is to replace it with new materials – which will be covered in our upcoming section.
Removing and Replacing Parquet Floor
When it comes to removing parquet flooring, some may wonder whether it is better to remove the entire floor and replace it or attempt to salvage the existing flooring by simply replacing a few sections. This decision is similar to choosing between different hardwood floors, where various factors need to be considered. It is important to consider several factors before deciding how to approach the task.
If your floor has become severely damaged, removing and replacing it will likely be the more economical option. Opting for a full-floor replacement can also provide an opportunity for you to choose a new, more modern design. Depending on the new material you choose, this could even improve energy efficiency and noise reduction of your space. Moreover, if there are sections that cannot be salvaged, a full replacement will eliminate any unevenness in the finished product.
On the other hand, if there are only small sections requiring repair or replacements, fixing the existing parquet boards may be the better choice. Refinishing these sections is possible with certain types of flooring and while they may not perfectly match the surrounding sections this may not be an issue depending on the type of installation your parquet floor has. This option can also be less costly than full-floor removal/replacement in many circumstances as well as being much less invasive.
Ultimately, when it comes to removing and replacing parquet flooring, weighing both options is key in order to make an informed decision that best suits your specific situation.
With either option chosen, now we must move onto the task of actually removing the parquet blocks in order for any repair or replacement work to begin. In the next section we will outline exactly how to do just that.
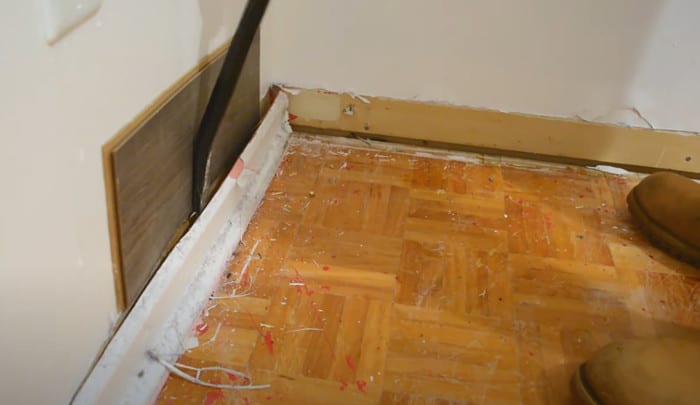
Removing the Parquet Blocks
Removing the parquet blocks is a challenging but ultimately rewarding task as it will reveal the underlying subfloor, enabling you to assess any corrective work that needs to be done before installing the new floor. Before beginning, it is important to clean the surface and lightly sand down any uneven surfaces. This can be done by starting with coarse-grit sandpaper and then moving up through progressively finer grits until a smooth finish is achieved.
When taking up the parquet blocks, the decision on whether or not to use a hammer and chisel should be carefully considered. On one hand, removing thin layers of adhesive with a chisel can minimize risk of injury to yourself and potential breakage of the blocks. On the other hand, if taken in large chunks, there is a greater chance of damaging surrounding areas due to flying wood chips. The ultimate decision should be based on personal preference, budget, and availability of tools.
Once all of the parquet blocks have been safely removed, you will need to properly dispose of them. As they are made of hardwood, some people opt to recycle or even sell them for reuse in projects or furniture pieces. However, if they cannot be reused they should be disposed of responsibly at an appropriate facility.
Finally, it is time to move on to the next phase: choosing replacement wood! When selecting your new flooring material it is important take into account factors such as desired appearance, durability needs, cost efficiency, environmental impact and suitability with existing décor. Consider exploring various flooring options to find the best fit for your space and needs. Understanding these factors will ensure that you choose a new floor that meets all your requirements now and in the future.
Choosing Replacement Wood
Choosing Replacement Wood for the Parquet Floor
When it comes to choosing replacement wood for a parquet floor, there are several key elements that should be taken into consideration. This includes the type of wood, the grade level, and how it will be installed.
Type of Wood: It is important to choose a wood that is compatible with the current type of wood used for the parquet flooring. If not done correctly, the new floor may mismatch with the existing one. Additionally, it is important to research which woods are best at withstanding water and other liquids as well as checking that they can be easily matched with stains and other finishes like varnish or polishes.
Grade Level: As with any flooring project, it is important to ensure that you purchase high-quality grade A materials. Choosing premium grade materials when replacing parquet floors ensures that each square foot lasts longer and is more resistant to wear and tear over time.
Installation: The installation process plays a significant role in determining the overall quality of your floor. Before beginning the project, check if there are any subfloors that need repair or replacement, such as an old plywood base. The wrong installation can lead to moisture trapping between surfaces, pest infestations, warping due to lack of air circulation, or uneven surfaces from poor levelling techniques.
Once you have chosen the right type of wood and grade level for the new parquet flooring, you need to make sure that it is properly installed by hiring a professional contractor. Doing so will guarantee a durable and long-lasting new parquet flooring system. Now that we have discussed selecting replacement wood for parquet flooring, let us move onto the next section which covers parquet floor disposal and clean up.
- On average, it takes 2-3 hours to remove parquet flooring.
- According to a survey conducted in 2019, 60% of people said that removing parquet flooring was their least favorite part of a DIY flooring project.
- A study published in 2020 found that an experienced professional can remove up to 25 square feet of parquet flooring in an hour.
Parquet Floor Disposal and Clean Up
When dealing with a parquet flooring demolition, proper disposal and clean up of the remnants is crucial to ensuring the safety of all workers and those in the vicinity. For small projects, it is often possible to simply bag up the old flooring and take it to a local landfill or transfer station to be disposed of responsibly. This can also be an easy way to deal with any additional debris that may have been generated during the removal process such as dust, nails, and adhesives.
For bigger projects where several layers of subfloor must be removed in addition to the parquet floor tiles, hauling out the debris may not be feasible. In this case, using a rented dumpster or roll-off bin might provide an effective solution. However, to ensure that all asbestos and other potentially hazardous materials are properly disposed of, please contact your local waste management authority for details about accepted disposal policies.
It is also important to make sure that all tools (including hand tools and power tools) used for parquet flooring removal are properly cleaned afterwards. Any remaining dust should be vacuumed out or wiped away with a damp cloth before safely storing them. Also be sure to wear protective gear (goggles, respirator mask, gloves, etc.) during clean-up operations in order to avoid inhaling any fine particles left behind.
Once all debris has been cleared away and tools have been properly cleaned, final clean up should include using a broom or leaf blower on any remaining dust particles on the subfloor surface and vacuuming any crevices between boards. This will prevent additional dirt from entering future renovations while also protecting air quality within the home.
Now that proper disposal protocols have been followed and clean up is close to completion, it’s time move onto the next step: dealing with nails and adhesives which will require more precise techniques if a safe disassembly is desired.
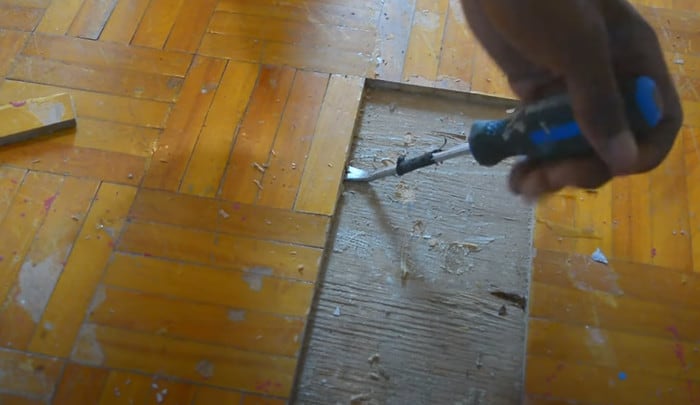
Dealing with Nails and Adhesives
Removing parquet flooring may require altering adhesives and nails that could be securing it to the subfloor. Adhesive removal can be difficult, thus requiring strong solvents or chemical removers to remove the adhesive from the subfloor. These should be used sparingly as they can damage the substrate material under the parquet flooring.
When dealing with nails, you must decide whether it is better to pry up the boards around each nail or to use a hammer and nail punch to ensure that no hammer marks are left in the wood of the subfloor. Prying up each board is time-consuming and may cause damage to both the subfloor and the parquet boards. Using a nail punch also carries risks of gouging or damage if it is not done properly. It is always best to test an inconspicuous area before attempting either of these methods in an area that will be visible once the flooring is removed.
Regardless of which method you select, all fasteners need to be removed in order for the next step in parquet removal – careful pull-up of large panels – to go smoothly. After all nails and adhesives have been removed, you are now ready for DIY parquet floor removal tips. Before continuing, take care to protect yourself by wearing protective glasses and gloves while handling chemicals or working with sharp tools.
Now that nails and adhesive have been dealt with, it’s important to learn some DIY parquet floor removal tips in order to finish removing your parquet flooring safely and effectively.
DIY Parquet Floor Removal Tips
Removing parquet flooring can be a daunting task, and many homeowners wonder if they should tackle the job themselves or hire a professional. There are pros and cons to doing it yourself. On the plus side, it can save you time and money in the long run. However, there are certain risks that DIYers face when tackling parquet floor removal on their own including potential damage to wall structures, door frames, and baseboards. Below, we’ll discuss some tips for successful DIY parquet floor removal so you can make an informed decision about whether trying the project yourself is worth the cost savings.
First of all, it’s worth noting that many parquet floors are glued to their subfloor systems. As such, removing them without damaging the surface underneath can require some finesse. On top of that, parquet flooring often has intricate designs that must be taken into careful consideration before starting a project. The best method usually involves using pry bars and chisels since they provide more control than tools like hammers and screwdrivers. Additionally, you may consider renting an oscillating saw with a suitable blade if your floor has been installed over concrete or another hard surface material.
Secondly, because of the potentially hazardous materials in older parquet floors (like asbestos), it’s important to take safety precautions when handling them during removal. If you suspect your floor contains asbestos or other hazardous material, contact a certified contractor as soon as possible for assistance in proper disposal and prevention of inhalation exposure danger.
In conclusion, while DIY parquet floor removal is possible, if done incorrectly it can cause significant damage to surrounding walls or even cause injury from shards of wood or exposure to hazardous materials. Careful consideration should be given before attempting this task yourself and homeowners should weigh their options with any potential risks before moving forward with tackling the project alone.
Frequently Asked Questions Explained
Are there any special tools needed to remove parquet flooring?
Yes, there are certain tools needed to remove parquet flooring. You will need a hammer or mallet, pry bar, a utility knife, putty knife, chisel and a flat-bladed screwdriver. You may also need safety goggles, a dust mask and heavy-duty gloves for protection. Additionally, having a handsaw and jigsaw can come in handy when cutting and sectioning the parquet pieces as they are removed.
What is the best way to remove parquet flooring?
The best way to remove parquet flooring is by using a combination of manual and mechanical methods. Manual methods include careful prying with a hammer and chisel, while mechanical methods involve the use of specialized tools such as a floor scraper. When removing parquet flooring, you should take extra care to avoid splintering the wood or damaging any underlying layers. If possible, it is advisable to also wear protective gear and work in an area that is well-ventilated. Additionally, when removing parquet flooring you should always ensure that your work area is free from any excess dust, debris or moisture so as to facilitate an efficient job with minimal disruption.
What should be done with the parquet flooring after it is removed?
Once the parquet flooring has been removed, it is important to determine what to do with it. Depending on the condition of the flooring, there are a few options.
If the parquet flooring is in good condition, it can be reused. Some people may choose to donate the flooring or put it up for sale online. Reusing parquet flooring can help reduce waste and make sure that this type of material does not end up in a landfill.
If the parquet flooring is too damaged to be reused, it should be recycled if possible. Many recycling centers accept wood materials, so check your closest center to see if they accept parquet flooring before disposing of it yourself.
Finally, if all else fails, the damaged parquet flooring must be disposed of properly. Make sure that it is taken to a hazardous waste facility and treated properly according to environmental laws and regulations.
References
https://www.bobvila.com/slideshow/the-7-best-low-cost-alternatives-to-hardwood-flooring-49263


Parquet removal does seem intimidating initially, but from my experience, it’s a straight forward task once you understand the mechanism behind it. I’ve worked with several ’70s homes, and while many consider removing parquet flooring a nightmare, I’ve found you can fairly easily accomplish it with the right tools and systematic approach. The belief that it’s a complicated process often stems from a lack of understanding rather than the task’s complexity itself.
It’s interesting to read your thoughts on this, Kingsley. Not everyone might perceive floor removal, especially parquet, as a straightforward task, particularly if their expertise lies elsewhere. I have seen several beautiful old parquet floors get destroyed simply due to impatience or lack of understanding. I believe the preservation of these unique floors, if possible, should be a consideration too.
Florian, I share your view that the historical significance of original flooring, such as parquet, should not be subsumed by trends. Moreover, I argue that, given the proper care and restoration, a well-preserved parquet can add undeniable charm and character to a home.
Even though I generally love the concept of preserving originality, some things are best updated to modern standards. In one of my recent flips, a mid-century house featuring parquet floors. I found the floor so badly damaged that preservation wasn’t a feasible option, so went ahead with removing it. The end result was very satisfying and complemented the overall ambiance of the restored house.
As someone who’s been tearing out flooring since I was a teenager, I can certainly appreciate the satisfaction that comes from making a full restoration. However, it’s also important to understand the potential value inherent in older styles, such as parquet, there’s a demand for them among certain buyers and sometimes, repairing rather than replacing can lead to unique aesthetics and higher returns.
I second Harland’s sentiment about the potential aesthetic value of older styles, such as parquet. It can indeed bring a unique flavor to an abode that some clients favor. However, often the stripping process is more economical not only in terms of finances but also time-efficiency, especially when dealing with extensively damaged flooring. Careful cost-benefit analysis should be conducted before any floor removal or restoration activity – it’s more about what you gain than just what you get rid of.
In my own home restoration endeavors, I’ve repurposed old parquet into other home design elements such as wall accents or re-staining them for a more contemporary touch. While yes, laying new flooring can often be the easier route, reflecting the history alive within each of those quadrilaterals can lead to highly gratifying results.
It’s refreshing to see someone else, Gideon, value restoring parquet flooring over outright removal. The erstwhile glamour should not be neglected but preserved, given that the right sanding and re-staining can bring an edginess to otherwise drab-looking areas. I’ve experimented with using clear coats with higher gloss levels which add depth to the grain patterns and create satisfying results while maintaining its retro appeal. Artistry resides in preserving history, which makes each of our projects an idiosyncratic masterpiece.