If you’re thinking about redoing your hardwood flooring and you’re looking for ways to save money, then you’re in luck! Believe it or not, you don’t have to entirely replace your hardwood flooring – all you need to do is remove it and you can reuse the same boards with your new design. That’s right, no new flooring is necessary. Sounds too good to be true? Think again. Removing hardwood flooring to reuse it is not only achievable, but it can also be quite easy if you know exactly what to do.
In this blog post, we’ll provide a step-by-step guide on how to remove hardwood flooring for reuse so you can save money and make your home look great at the same time. Read on for all the details about DIYing your hardwood floor project!
u003cpu003eStart by prying up the boards with a crowbar or chisel. After all the boards have been removed, use an orbital sander and a vacuum to sand away any dirt and debris from the floorboards so they are ready for reuse.u003c/pu003e
“In my decades of experience, I’ve learned that patience conjoined with the right technique is key to preserving the integrity of the wood during the removal process. Always use a vibrating floor stripper and make sure your work is slow and methodical—rushing could lead to damages that would defeat the purpose of reusing the beautiful hardwood pieces.”
Felix Stroud, Published Flooring Specialist
Removing Hardwood Floors for Reuse
Deciding if it’s possible to remove your hardwood flooring depends on a variety of factors, such as the type of subfloor it’s attached to, the age and condition of the flooring itself, its method of installation, and whether or not you plan to reuse the boards. Solid hardwood floors can be removed for reuse if they are in good condition and have been glued directly to a plywood subfloor using a moisture-resistant adhesive. Keep in mind that reusing old hardwood flooring may require extensive repairs before it can be reused, including sanding and refinishing.
The traditional technique used to remove hardwood flooring has long been a process known as “prying”. This involves prying up each board one at a time with an appropriate tool, such as a pry bar or crowbar. However, this method is slow and laborious and can lead to damage to both the subfloor and the boards. There is also debate among professionals over the risks associated with using this method since it involves working with nails that could potentially be damaged or bent during removal.
Alternatively, some professionals recommend sawing between boards with an oscillating multi-tool fitted with a wood cutting blade instead of prying them up. This method enhances safety by reducing potential hazards from splintered wood. It also reduces wear-and-tear on your tools since there is less chance for them to slip off of nails or gouge out chunks of wood.
Regardless of which technique you choose, always take measures to protect yourself from sharp edges and wear eye protection when removing hardwood flooring for reuse. Once all of the old boards have been removed, you should be ready to prepare the area for your new flooring.
Now that we have discussed how to safely remove hardwood flooring for reuse, let’s move on to preparing the area for new flooring in our next section…
Preparing for Removal
Removing hardwood flooring is no small job, so it’s important to prepare for removal properly. Preparing for removal involves assessing the condition of the floor beforehand and planning ahead to make sure that the proper steps are taken during the removal process.
First, assess the condition of the hardwood flooring. Is it damaged in any way? Is there wear and tear on certain areas of the floor? It’s important to be aware of the condition of the floor before starting a project like this. This can help minimize any damage that might occur during the removal process. Furthermore, if there is any damage present, it’s best to have a professional bring in their own equipment to better manage it.
Second, plan ahead for what type of materials may need to be purchased or rented for the job. If a professional will be hired to remove the flooring, they may already have all of their own tools. However, if attempting this project by oneself, necessary tools such as pry bars, saws, drills, chisels and hammers (and more) should all be bought or rented ahead of time to ensure nothing gets forgotten in the moment.
Third, think about how you will dispose of the old hardwood floors after they are removed. Depending on where one lives and local regulations, hardwood floor removal may require special consideration when disposing of used materials. Knowing what options one has available and preparing accordingly can save time and money down the line while helping keep our environment healthy as well.
Now that you’ve properly prepared for hardwood floor removal, it’s time to gather the appropriate tools for getting started with this project.
- According to a 2018 report from the National Wood Flooring Association, 20% of all wood flooring that is removed and replaced is viable for reuse.
- According to a study published in 2017, it takes an average of 4 hours per 100 square feet to remove hardwood flooring.
- A study conducted in 2016 found that it costs an average of $2.25 per square foot to professionally remove solid or engineered hardwood floor installation without damaging or destroying the existing or underlying subfloor.
Gathering the Appropriate Tools
Removing hardwood floors requires certain tools, depending on the type of flooring and installation method. Flooring that is nailed down or glued to the subfloor will need a pry bar, hammer, circular saw and lever bar. If the floor is snapped together, a chisel and mallet would be required as well as safety glasses and hearing protection. There are also power tools designed specifically for removing flooring such as a demolition hammer or oscillating multi-tool.
Arguments can be made both for and against using DIY methods for hardwood floor removal. Even with advance planning, it’s still possible to damage walls and features when using pry bars and hammers to remove floor boards. Working with these tools also carries a risk—DIYers should use caution in sharpening blades and carrying heavy equipment on potentially slippery surfaces. On the other hand, professional flooring removers have specialized tools to create minimal dust particles from demolished wood planks and strips that can quickly add up in an indoor space.
Regardless of whether you choose to DIY or hire professional assistance, it is important to gather the necessary tools beforehand so you are prepared when it comes time to actually remove the flooring. Once you have gathered your tools, it is time to carefully inspect your hardwood floors for any damage before starting removal.
Inspecting the Floor for Damage
Inspecting the floor for damage is an important step when considering removing hardwood flooring for reuse. Signs of wear and tear, water damage, or fading can be easily identified and should be taken into account before committing to removal.
The condition of the hardwood floor should be closely assessed prior to removal in order to make the best decision about whether it can be saved and reused. Common signals of wear on the hardwood include scratches, dents, and discoloration. In addition, if the floor was installed directly on concrete or cement floors, moisture may have seeped in causing buckling due to swelling. Spot checking different sections can help identify water damage and/or wood rot. If insects are present, they must be removed prior to attempting to take up the hardwood flooring.
On the other hand, even if there are signs of wear and tear or water damage, depending upon how severe it is, it may still be possible to salvage the hardwood flooring and give it a new life. By knowing what type of finish is on the wood, repairing the damages may just require sanding down in some areas or adjusting the planks with a pry bar prior to cutting for reuse in a new space.
Regardless of whether you decide to reuse the existing flooring after inspection or start from scratch with new material, inspecting the hardwood is a necessary step before taking up any existing flooring for any installation project. Now that we have explored inspecting for potential damage, let’s move onto learning how to safely remove hardwood flooring in our next section.
How to Remove Hardwood Flooring Safely
Removing hardwood flooring safely is essential to ensuring that the flooring can be salvaged and reused. It’s important to take safety precautions before beginning the project, such as wearing protective eye goggles, gloves, and closed-toed shoes. Other safety measures include prepping the area to prevent dust particles from spreading and removing any nails or staples that may be present.
When it comes to deciding whether to hire a professional or attempt the job yourself, there are pros and cons on either side of the debate. Do-it-yourself removal is typically much less expensive than hiring a professional, but it does require knowledge of safe removal techniques and tool use. On the other hand, hiring a professional can take away a lot of the stress of doing the job yourself, but it can be costly. Ultimately, it’s up to you to decide which option is best for your particular situation.
By following these safety steps and ensuring you have the necessary tools for removal, you’ll be well on your way to taking up hardwood flooring in an efficient and safe manner. Now let’s move onto the next step – removing tackless boards and glue.
Removing Tackless Boards and Glue
Removing tackless boards and glue typically requires patience, but can be achieved with the right tools and technique. The most effective approach for removing tackless boards is to first use a crowbar or pry bar to lift the board off the floor, taking care not to damage the wood. If there is glue underneath, use a heat gun or flame torch to soften it and help make the adhesive easier to remove. Additionally, you may want to consider using a scoring tool such as a scraper or tile saw with a carbide blade in order to score and peel off the old glue.
However, due to the difficulty of this task and potential for damaging your hardwood floor during removal, some choose to leave the tackless boards in place and cover them up instead. This approach may require extra material costs, but it could save you time and money in the long run because it reduces the risk of damaging your hardwood flooring.
Once you have safely removed all of your tackless boards, it’s time to move onto removing any nails or tacks that may still remain from connecting the boards to the subfloor. In our next section, we’ll discuss how to properly pull those nails/tacks from your hardwood flooring so that they don’t cause any additional damage during removal and subsequent reuse.
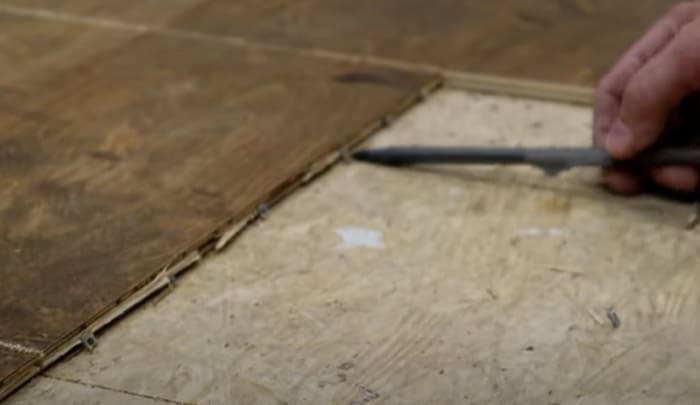
Pulling the Nails/Tacks From the Floor
The nail and tack removal process is one of the most labor-intensive, time-consuming, and potentially dangerous tasks that you must complete when removing hardwood flooring for reuse. For this task, you will need a hammer, Pry Bar, or nail puller to remove any nails or tacks from the subfloor. When using a hammer or Pry Bar, use extreme caution in order to protect yourself from injury and avoid damaging the underlying subfloor. It is also important to remember that when you hit the nails with a hammer, the floor around it may become weakened due to age. Depending on your experience and comfort level, you may want to consider using a professional for this part of the flooring tear-out.
On the other hand, using a dedicated puller can be effective if used properly. As with manual methods mentioned before, take precaution not to damage the underlying subfloor with too much force while working on stubborn nails. With patience and skillful application of force, an experienced DIY-er can successfully remove nails and tacks without much difficulty. Moving forward, it is important to store these fasteners in a box or container separately so they don’t get mixed up with other debris.
Now that all nails and tacks have been removed from the floor, we are ready for the next step of carefully prying the hardwood sections from their places.
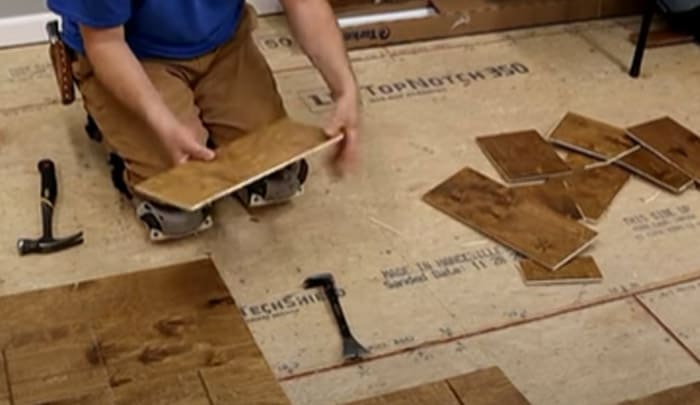
Carefully Prying the Hardwood Floor Sections
Carefully prying the hardwood floor sections is an important part of the process. Before starting this step, it is essential to provide yourself with adequate protection. Eye protection and gloves should be worn at all times in order to prevent any potential injuries.
When beginning to pry up the flooring, it is important to be mindful of how much force you are using. If you apply too much force, it could potentially cause damage or break the wood. Start by using a small, flat head screwdriver for leverage when lifting the wood planks out of place. To avoid damaging the floor underneath, use caution when inserting the blade behind the plank. For wider gaps that require a pry bar, wedge pieces of cloth between tool and floor in order to reduce damage.
The debate concerning the use of power tools arises due to the high-speed nature in which they operate. On one hand, they are capable of removing material more quickly than manually operated tools; however on the other hand, there is greater risk of causing damage in comparison to a slower manual approach. Before deciding whether or not to proceed with powered tools, it is best to weigh both sides of the argument and make an informed decision depending on your individual situation.
Once you have successfully pried up each plank, move on to the next section about using a pry bar and hammer to complete the removal process safely and effectively.
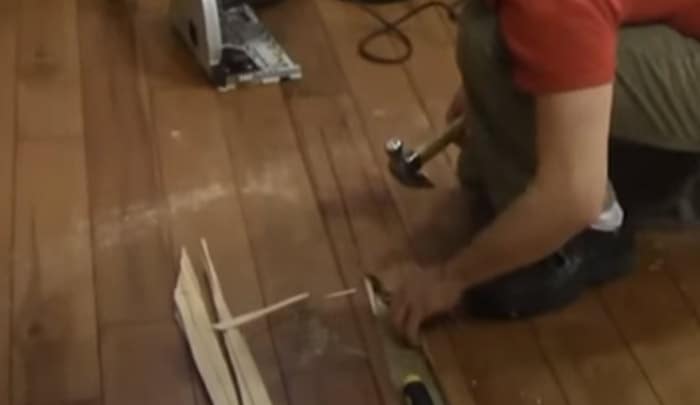
Using a Pry Bar and Hammer
Removing hardwood flooring using a pry bar and hammer is often considered one of the quickest and simplest approaches. With a few carefully placed hammer blows, you can lift up edge boards or planks to begin peeling back the flooring in long strips.
This method is particularly useful for larger rooms with fewer interruptions, such as built-in bookcases or cabinets, as it does not require specialized tools. It’s also a less destructive way to remove boards by avoiding power tools, which can cause immense damage to the surrounding space with extensive sawdust, dirt and splinters. Additionally, this method permits you to inspect each board individually before taking it out.
On the other hand, some people argue that using a pry bar and hammer puts too much strain on the old boards. If done improperly, this technique can easily destroy edges and end up damaging most of the pieces reused for re-installation. Furthermore, due to their intrusive design, pry bars can create a great deal of dust and debris – especially when working with denser traditional hardwood floors – thus making the job more laborious than necessary.
Overall, although using a pry bar may be preferable if you are looking to speed up the process, caution must be taken to ensure that no board is broken during this procedure. To minimize chances of damages and preserve your existing hardwood flooring for reuse later on, proceed slowly and carefully when handling your equipment. When done properly, this approach can save time and provide satisfactory results.
Now that you’ve gotten to grips with taking out old boards using a pry bar and hammer, the next step consists of preparing the floor for re-installation.
Preparing the Floor for Re-Installation
Before you can begin to install your hardwood flooring, it is important that you prepare the existing floor for reinstallation. This will ensure an even, secure surface that gives your new floor a foundation for lasting wear and beauty. There are two main approaches for preparing your existing floor for re-installation: sanding or grinding.
Sanding
This method is the most popular and cost-effective way of preparing a hardwood floor for re-installation. If there are any residual dirt, grime, or old paint that needs to be removed, sanding is the way to go. The process involves using specialized sandpaper and a machine to remove the surface layers and soften hard surfaces. Sanding can also help smooth out minor imperfections in the existing hardwood floorboard so that the new planks fit better into place. Additionally, sanding will flatten out where the boards have been worn down either naturally or through age. However, if there are major damages such as deep gouges or chips… then you should opt for grinding instead.
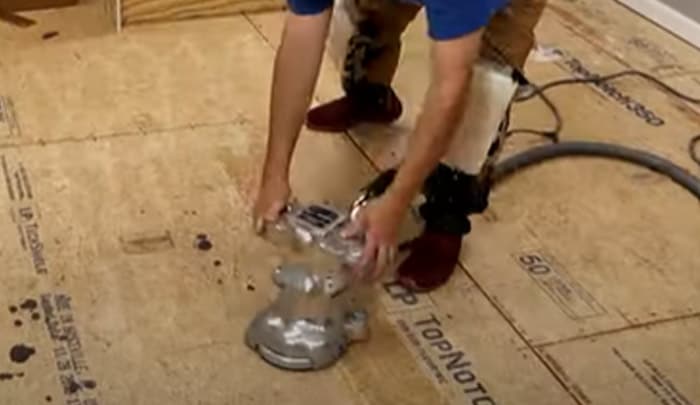
Grinding
The second method of preparing your hardwood floor for re-installation is grinding. Unlike sanding which is used to lightly scratch and smooth the surface of your existing floorboards, grinding does much more heavy duty work. This technique is better for large areas of damage such as deep gouges or chippings, as it digs deeper into these places and removes the faulty pieces entirely. Grinding can also help level out any dips or humps in the existing floors so they are even before laying down new planks over them. While this approach may be more expensive than sanding alone, it offers a quicker and more thorough solution to providing a clean, solid base for your floor installation.
After either sanding or grinding has been completed, it’s important to sweep away any scrapings or dust created during the process. Then take a damp cloth – NOT wet – and wipe away any last traces of debris before you start laying your new hardwood floorplanks. Taking steps like these will ensure an even installation and reduce any disruption during future maintenance tasks on the floors!
Frequently Asked Questions and Their Answers
What precautions should be taken when removing hardwood flooring?
When removing hardwood flooring, it is important to take the necessary precautions to ensure safety and prevent damage. First of all, you should always wear protective gear such as gloves, eye protection, and an appropriate face mask when handling and disposing of materials that contain dust or other small particles. Additionally, make sure your working area is well-ventilated during the removal process to reduce the amount of irritants that may be inhaled. Lastly, you should be aware of any live wires or power outlets that may be present in the room where the hardwood flooring is being removed, and take any measures necessary to protect yourself or anyone else present in the room from them.
What tools and materials are needed to safely remove hardwood flooring?
Removing hardwood flooring safely and reusing it requires some specific tools and materials. First, you will need a flat pry bar to get underneath the boards and remove them without damaging both the hardwood and the underlying flooring material. Second, you need a hammer for tapping the planks together in order to remove them without bending them or breaking them. Third, a power drill with a bit for pre-drilling holes (if needed) may be required in order to break up stubborn planks of hardwood. Finally, when it’s time to actually remove the boards from the subfloor, you should use a circular saw or jigsaw. This will help ensure you don’t damage the subfloor while removing the boards. Additionally, protective gear is essential when removing hardwood flooring; safety glasses, work gloves, and dust protection are all necessary items when tackling this kind of DIY project.
What are the steps necessary to remove hardwood flooring safely?
1. First off, you need to remove any furniture and other items from the floor area. This will help protect your furniture and floors during the removal process.
2. Next, use a utility knife to cut through any sealant, adhesive, or fasteners that may be holding the hardwood down. This will make it much easier to remove the flooring.
3. Now, start prying up each planks using a crowbar and a pry bar. Work your way from one side of the room to the other – removing each plank as you go.
4. Once all planks are removed, vacuum up any debris that remains on the subfloor. Then sweep or vacuum again to make sure no dust or residue is left behind.
5. To complete the job safely and properly, use a hammer and chisel to separate any nails from the boards before you store them for reuse or disposal. This will ensure that no nails are left behind in the old flooring when you go to install it in a new space.
References
https://www.wikihow.com/Replace-Hardwood-Floor
https://www.aspenwoodfloors.com/can-i-reuse-and-relay-laminate-flooring/


